How to Grow Potatoes in Bags and Containers
A practical UK guide to chitting, planting, earthing up and harvesting a genuinely useful crop from bags on a patio, balcony or tiny plot.
Why Your Patio Could Feed You: The Case for Bag-Grown Potatoes
It is October, which means many of us are looking at a few tired tomato plants, a scattering of fallen leaves and the rather optimistic empty pots that were supposed to become a herb garden in June. Potatoes may not be the first crop on your mind right now. Fair enough. Their main planting season is still ahead of us. But this is actually a very good moment to plan them.
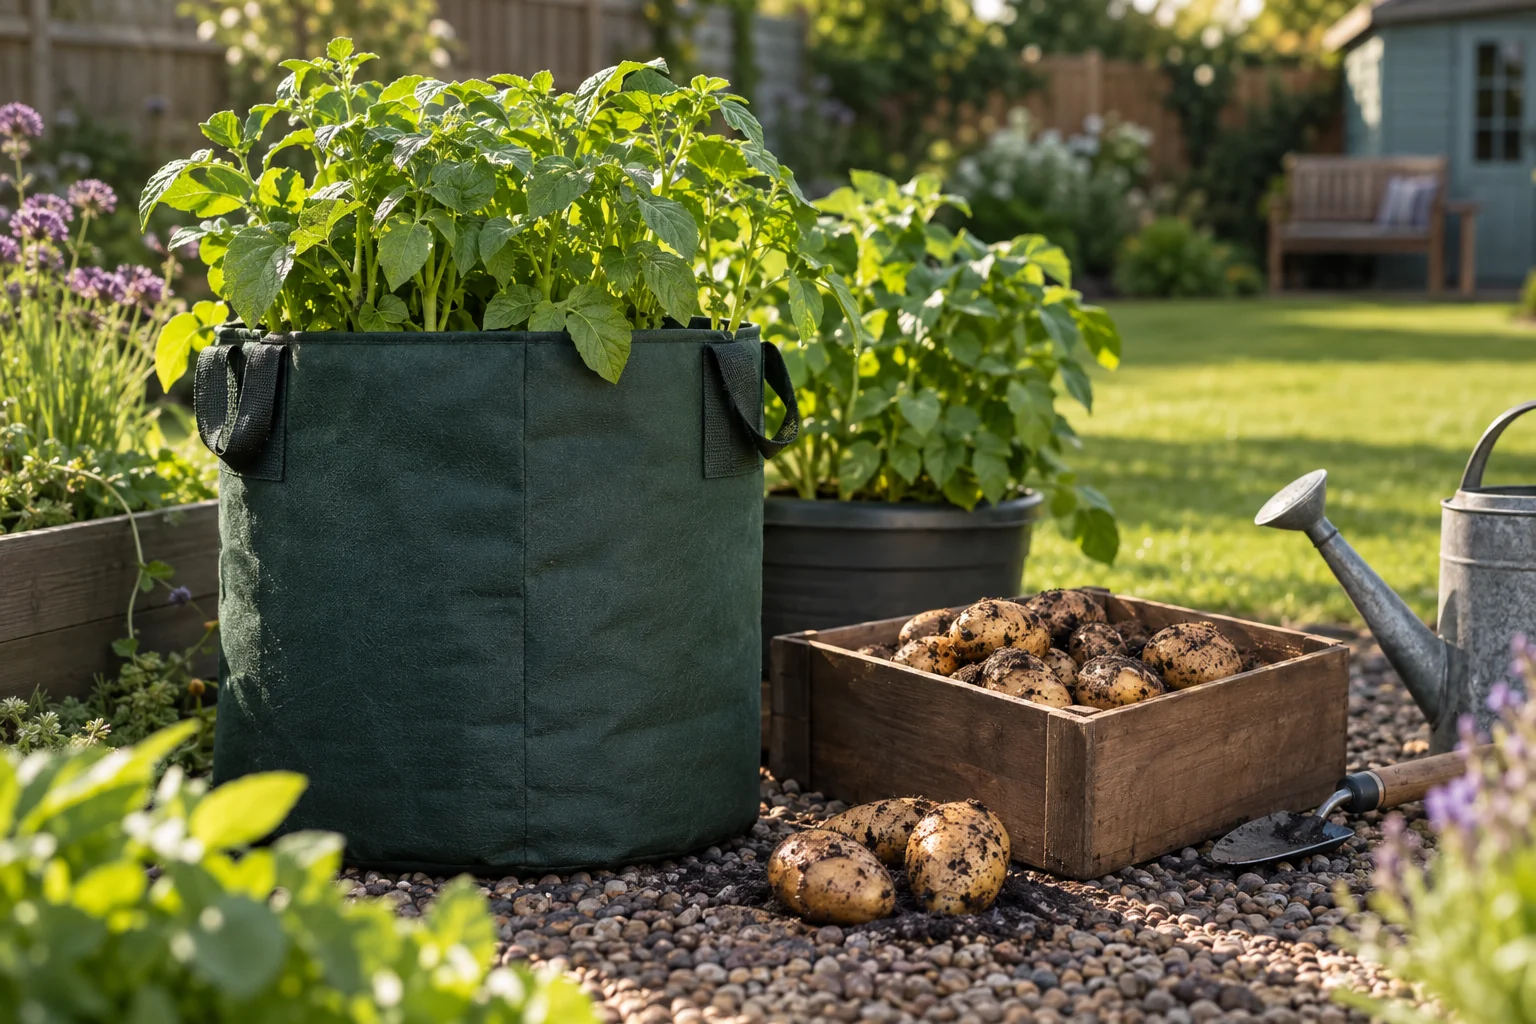
A potato bag is one of the least fussy ways to turn a hard surface into a food-growing space. You do not need an allotment, a deep vegetable bed or a garden that resembles a smallholding. You need a sunny-ish place, a bag or container with drainage, compost, seed potatoes and the willingness to add compost twice when the stems grow. That last part sounds suspiciously like work, but it is really just topping up a bag. The potatoes do the dramatic underground bit.
For a small patio, the appeal is obvious. A bag sits where it is put. It does not invade the lawn, it can be moved while it is still light enough to handle, and it keeps the crop contained rather than requiring you to dig around in a border at harvest time. If you have around 2m² of usable patio space, several bags can produce a worthwhile crop without making the whole area feel as though it has been requisitioned by a root-vegetable enthusiast.
There is also a useful psychological advantage. Potatoes grown in the ground can feel slightly mysterious. You plant a tuber, wait for leaves, hope for the best and then eventually dig. Bags make the stages easier to see and manage: compost at the bottom, shoots above, more compost around the stems, then a whole bagful of soil to empty when the haulms have finished. It is a good crop for children, impatient cooks and gardeners who enjoy seeing a definite beginning, middle and end.
The bag-growing advantage
Potatoes in containers are not "mini potatoes" by default. The key is matching the number of seed potatoes to the volume of compost, then earthing up steadily rather than filling the bag to the rim on day one. Space is finite, so every litre has a job to do.
This guide is deliberately about potato bags and containers rather than traditional rows in open ground. That matters because the rhythm is slightly different. A bag on paving warms quickly when spring sunshine appears, then cools quickly when the temperature falls after dark. It drains differently. It dries differently. And because there is no surrounding soil reserve, poor watering habits show themselves with the subtlety of a brass band.
The three things that make the biggest difference are chitting, earthing up and reading the right harvest signals. Get those right and the rest is mostly calm, regular care. Get them wrong and you can still harvest potatoes, but perhaps not enough to justify the amount of compost you carried through the house.
Bag School: Decoding Sizes, Materials and What the Numbers Actually Mean
"Potato grow bag" covers an enormous range of things. It can mean a small reusable polypropylene bag, a heavy fabric planter, a woven polyethylene sack or simply a roomy container pressed into service. The label may promise a bumper crop. The important part is less romantic: volume, depth, drainage and whether you can lift or empty it without the handles conducting a surprise engineering test.
Capacity is the first figure to notice. A small 8-litre bag is a single-plant proposition. A 36- to 40-litre bag is a more useful all-round size for patio growing, with enough room for several seed potatoes and the repeated additions of compost that potatoes need. Larger bags can hold more plants, but they also hold more water, more compost and more opportunity to discover that you should have put them in their final position before filling them.
Plant 1 tuber
Several tubers
Depth is usually more important than diameter. Potatoes are planted low in the bag and then covered as their stems grow. This earthing-up process protects developing tubers from light and makes proper use of the bag's vertical space. As a rule of thumb, you want at least 30–35cm of usable height above the original planting level. A wide but shallow tub may grow a handsome display of foliage, but it leaves very little room to build the compost level around it.
That is why a tall, modestly wide bag often outperforms a broad decorative planter. Potatoes do not need a grand entrance. They need depth, enough compost to stay evenly moist, and roots that are not compressed into a dense, airless lump. The bag does not have to be beautiful. It does, however, have to remain upright when wet compost is added. There is a difference.
Examples of useful bag sizes
Thompson & Morgan's reusable black and grey bags hold 8 litres and measure approximately 20cm by 28cm. They are designed for a single seed potato per bag, and trials found a 186% yield increase when one tuber was planted per 8-litre bag rather than following older, more crowded planting advice. That is a useful lesson beyond one product: a small container is not improved by cramming in extra seed potatoes. It is improved by letting one plant use the available compost properly.
At the other end of the compact-patio scale, Potato House grow bags are available in 36-litre pairs, with a filled size of about 38cm by 38cm. Haxnicks Potato Patio Planters hold 40 litres and measure 35cm across by 45cm deep. Their pack guidance allows for three to five seed potatoes per bag, although I would use the lower end of that range if you are growing a vigorous variety, using a heavy compost or still learning how quickly your patio dries out.
There are larger choices too. A 50-litre ASDA bag has been listed at 45cm by 32cm, while some patio bundles use 45-litre bags measuring 50cm by 50cm. Bigger bags are attractive because they give more root room and are less likely to dry out in a single sunny afternoon. They are also more cumbersome, so choose the final position before you fill them. A filled bag is not a houseplant. It will not appreciate being shuffled about every few days to "see where it looks nicest".
Drainage is not optional. Use bags with drainage holes, or make several generous holes in the base of an improvised container. Stand bags on paving, pot feet, bricks or a slatted surface if water tends to pool beneath them. Potatoes dislike sitting in saturated compost, but a bag that drains freely will also need closer watering in warm weather.
Chitting in Confined Quarters: Getting Seed Potatoes Ready for Bag Life
Chitting is simply the process of encouraging seed potatoes to produce short shoots before planting. It is not witchcraft, although an egg box full of sprouting tubers on a spare-room windowsill can make the household feel faintly agricultural. You are giving the potatoes a head start, not trying to grow a small forest indoors.
For bags, that head start is especially welcome. Containers warm earlier than open ground when the sun reaches them, but they also lose heat quickly on a cold night. A seed potato with sturdy shoots is ready to use those warmer spells promptly. An unchitted potato will still grow, so do not abandon the project if you forgot. But chitting is a sensible way to make the most of a shorter, more changeable early season on an exposed patio.
Choose certified seed potatoes rather than using potatoes from the kitchen. The "rose end" is the end with the most eyes or tiny dimples. Set the potatoes with that end facing upwards in an open egg box, seed tray or shallow carton. Give them a cool, light-filled place away from direct sun. They should not be roasting on a south-facing sill, and they should not be tucked into a dark cupboard where they produce long, pale, fragile shoots that snap if you look at them sternly.
After around four weeks, aim for chits about 25mm long. Short and stocky is the ideal. Long shoots are not a sign of superior enthusiasm; they are usually a sign of insufficient light or too much warmth. Handle chitted potatoes gently at planting time. Breaking off one small shoot is not the end of the world, but there is no reason to test their resilience by dropping them into the bag from a height.
Start with the rose end upwards
That is the end with the greatest concentration of eyes. It gives the strongest shoots the best chance to grow directly towards the light.
Give them light, not heat
A cool, bright room helps produce compact chits. Direct sunshine and a very warm room encourage weak, stretched growth.
Plant at about 25mm of shoot growth
That is long enough to establish quickly, while remaining short enough to survive handling without becoming a casualty of spring gardening.
For a normal UK spring, begin chitting early varieties from late January, second earlies around mid-February and maincrop potatoes during March. Patios can be chilly, particularly if they are shaded by fences or face north-east, so use the weather rather than the calendar as your final judge. Chitting can happen indoors whilst you wait for conditions to become more cooperative outside.
If you are reading this in October, do not rush out to buy seed potatoes immediately unless you have a suitable cool place to store them. Instead, decide where the bags will stand, check that the area receives decent light, and think about the number of plants you can realistically water. Come late winter, buy your seed potatoes and start chitting in good time.
Do not confuse chitting with forcing
The aim is not lengthy shoots. You want compact, healthy buds that will cope with planting. If your seed potatoes make pale, thread-like stems, move them somewhere cooler and brighter rather than congratulating yourself on an early start.
Filling Up: Compost Choices, Drainage and the First Planting Depth
A potato bag starts surprisingly empty. This is the detail that catches out many first-time growers. Do not fill it to the top with compost, bury your seed potatoes halfway down and then wonder why you have nowhere left to earth them up. Begin with a base layer of about 10–15cm of compost. That is enough for the seed potato to settle into whilst preserving the vertical room you need later.
Use a good multi-purpose compost and mix in around 20% perlite by volume if you can. The perlite is not there to make the job look technical. It helps keep the mix open, reducing compaction and improving drainage in a confined bag. Potato tubers need room to expand. Heavy garden soil, particularly clay soil, tends to settle into a dense mass in containers. It is difficult to wet evenly, difficult to re-wet after drying out and not especially generous to developing tubers.
Place the chitted seed potatoes on the starting layer with the shoots pointing up. In an 8-litre bag, one tuber is enough. In a 36- or 40-litre bag, space the tubers around the surface rather than piling them close together in the centre. Cover them with compost so the shoots are safely buried but not at the bottom of a very deep bag. Then water lightly to settle the compost around them.
Watering deserves a little more attention than it usually gets in generic potato advice. Grow bags often drain from the base very efficiently. That sounds perfect, until you realise that a thorough soak can leave the lower compost wetter than you want whilst the upper compost dries out quickly. Some experienced users of polypropylene patio planters find this wet-base, dry-top pattern particularly noticeable.
The answer is not to stop watering. It is to water with more observation and less ceremony. Little and often is usually better than occasional flooding. Put a finger into the compost near the top and check beneath the dry surface. Lift the edge of a smaller bag if possible: a very light bag usually needs water, while a noticeably heavy one may not. In hot, dry spells, check daily. In cool or wet weather, do not water simply because it is Tuesday.
Keep the compost evenly moist, not permanently wet. Water after adding fresh compost during earthing up, then return to regular checks. Irregular watering is especially unhelpful when tubers are swelling, because the bag has no surrounding soil to soften the extremes.
Place the bag where it will receive as much useful light as possible. A sunny patio is ideal, but a bright site with several hours of direct sun can still produce a crop. Avoid putting bags beneath a roof overhang where rainfall never reaches them, unless you are exceptionally reliable with a watering can. Many of us are not. We have busy lives. The potato does not take it personally, but it does respond to it.
The Earthing-Up Ladder: Stage-by-Stage Technique for Bags and Containers
Earthing up is the central skill of bag-grown potatoes. It means adding compost around growing stems in stages. This keeps developing tubers in darkness, preventing them from turning green, and helps you make the most of a bag's depth. It also gives the plant a longer buried stem area from which stolons can develop. Stolons are the underground stems that carry tubers, which is the quietly important bit of the entire enterprise.
Do not earth up because a calendar says so. Earth up because the shoots have reached the right height. Watch the plants from the moment the first green tips appear. They will often seem to do very little for a while, then suddenly look as though they have grown overnight. This is not unusual. Potatoes enjoy making you doubt your observations.
Stage one: let the shoots establish
When the shoots are about 15–20cm above the compost surface, add roughly 10cm of fresh compost. Leave the top 5–8cm of each shoot visible. Do not bury every leaf and turn the bag into a compost-filled crime scene. The exposed foliage needs light so it can continue growing strongly.
Scatter the compost gently around and between the stems. A small hand scoop is useful, although a clean yoghurt pot does the job perfectly well. Try not to snap the shoots. Water the new compost in after you have added it. Fresh compost can shed water at first, especially if it has dried out in storage, so a gentle watering and a brief check a few minutes later are worthwhile.
Stage two: repeat once the stems have regrown
Allow the new growth to reach 15–20cm above the raised compost level, then repeat the process. Add another layer of compost, again leaving 5–8cm of leafy growth visible. With a typical tall potato bag, this second earthing-up takes you close to the useful top of the container. Do not keep adding compost indefinitely just because the bag technically has a little space left. You want foliage above the surface, good air movement and a stable plant, not a very tall mound with a few apologetic leaves at the top.
Wait for 15–20cm of stem growth
Use plant height rather than a fixed date. Growth speed depends on variety, weather, light and how warm the bag becomes during the day.
Leave 5–8cm of foliage showing
That visible growth is the plant's energy factory. Cover the stem, not the entire plant.
Water in each new layer
Fresh compost must be settled and moist enough for roots to grow into it. A dry cap on the bag is not useful growing space.
The temptation with potatoes is to keep fussing. Resist it. Once the bag is filled to its working height, your main job becomes watering and observation. Keep the compost evenly moist. Remove any obviously damaged foliage if necessary, but do not strip healthy leaves away. The plant needs them. A full, leafy bag may look rather overgrown by midsummer; that is generally the point.
Greening is a warning, not a garnish
If a tuber becomes exposed near the top of the bag, cover it immediately with compost. Light turns potatoes green, and green potatoes should not be eaten. A quick top-up prevents the problem from spreading through what would otherwise be a perfectly good crop.
Containers without flexible sides need the same treatment. Start them partially filled, add compost as the stems grow, and stop once you have reached a sensible final level. The method is not exclusive to purpose-made bags. Bags simply make it easier because they are tall, light when empty and uncomplicated to empty at harvest.
Choosing a Potato Bag: Four Practical Options Compared
You do not need specialist equipment to grow potatoes, but purpose-made bags can make life easier. They tend to offer suitable depth, integrated drainage and handles for moving an empty or only partly filled bag. The right choice depends mainly on how many plants you want, how much compost you can store and whether you want a single tidy plant or a more substantial patio crop.
The comparison below focuses on the figures that actually affect growing. Capacity tells you how much compost is available. Dimensions hint at how comfortably the bag can be earthed up. Material affects long-term handling and how well the bag holds its shape. None of these replaces good watering, unfortunately. The bag cannot water itself, however confidently it is marketed.
| Grow bag | Capacity | Dimensions | Material and features | Planting guidance |
|---|---|---|---|---|
| Thompson & Morgan potato bag | 8 litres | About 20cm × 28cm | Reusable polypropylene blend with at least 30% recycled content | 1 seed potato per bag |
| Potato House grow bag | 36 litres | About 38cm × 38cm when filled | Made from recycled material; available in several colours | Suitable for a compact multi-plant crop |
| Haxnicks Potato Patio Planter | 40 litres | 35cm diameter × 45cm deep | Polypropylene, reinforced top rim, handles and drainage holes | 3–5 seed potatoes per bag |
| ASDA potato grow bag | 50 litres | 45cm × 32cm | Purpose-made potato grow bag | More compost volume for a larger crop |
The 8-litre Thompson & Morgan option makes sense where space is very limited, or where you want several separate single-plant bags. At £1.99 each, it is an accessible way to try the method. The trial result showing a 186% yield increase with one tuber per 8-litre bag is a particularly helpful reminder that plant spacing matters even in a small container.
For most gardeners, 36–40 litres is the sweet spot. It is large enough to justify the compost and watering effort, while remaining manageable on a patio. The Haxnicks planter has a useful 45cm depth, reinforced rim and handles, and it is sold as a three-pack. Its polypropylene construction is generally valued for being sturdy and reusable. The trade-off is that the drainage pattern needs attention: the top can dry out whilst the base stays wetter than expected, so regular modest watering works better than a rare deluge.
A 50-litre bag gives you more compost volume and more buffering against a hot day, but it is also more demanding to fill and empty. Larger bags are best if you want fewer containers overall and have enough room for them to stand with a little air around each one. A cramped cluster of damp bags against a fence is less pleasant to manage than two or three well-spaced planters you can actually inspect.
Why bags work well
- They bring potato growing to paved patios and balconies.
- Harvesting is simple: tip out the compost and search through it.
- Depth supports staged earthing up.
- Reusable bags fold away when empty.
What to watch
- Compost can dry out quickly in warm, breezy weather.
- Large filled bags are difficult to move.
- Too many seed potatoes reduce the room available to each plant.
- Drainage can create a dry top and wet base if watering is careless.
Reading the Signs: How to Know Exactly When to Harvest
Harvesting is where bag-grown potatoes become particularly satisfying. Instead of driving a fork into the soil and hoping you have not speared half the crop, you can loosen the bag, tip the compost onto a sheet or tray and find the potatoes by hand. It is gardening's version of a lucky dip, except the prizes are edible and occasionally muddy.
Most potatoes take around 70 to 120 days to reach harvest, depending on the variety and the conditions. That is a broad range because potatoes are sensitive to weather, planting time and growing conditions. Bags often warm up readily in spring sunshine, which can encourage early growth, but do not treat the bag as a shortcut that overrides the variety's natural schedule. Look at the plants as well as counting the weeks.
First earlies are the potatoes you harvest young for tender "new potato" meals. You do not wait for full die-back. Once plants have flowered, or once buds appear and then drop without opening, there are often usable tubers beneath the compost. Varieties such as Charlotte, Swift and Rocket can be harvested at this young stage. In typical UK spring conditions, this is often around 10–12 weeks after planting.
For a first early, the best approach is exploratory harvesting. Carefully reach into the side of a bag or gently ease compost away at the edge, then take only the potatoes that are a good eating size. Leave the smallest ones in place with the plant still growing. If your bag has no harvest window, there is no need to cut one in. Tipping out the bag ends the crop, so use that method only when you are ready to harvest all of it.
Second earlies and maincrop potatoes are different. Let the foliage yellow and die back naturally. This is the clearest sign that the plant has finished sending energy into the tubers. A full harvest commonly falls 90–120 days after planting. The skins will be firmer at this point, which matters if you intend to store them rather than cook them promptly.
Flowers are a clue, not a command
Flowers or dropped buds are useful signs for first earlies, but not every variety flowers in the same way. If you are unsure, gently investigate the outer compost for a few tubers rather than harvesting the whole bag prematurely.
When full harvest time arrives, stop watering for a few days if the compost is very wet. This makes the bag easier to handle and the potatoes less muddy. Lay out a tarp, old compost bag or sheet on the patio, tip the contents out and work through it with your hands. Keep aside any damaged potatoes for immediate cooking. Brush loose compost from sound potatoes and let them dry briefly before storage. Do not wash potatoes that you plan to keep; moisture shortens their storage life.
Yield varies enormously. A standard grow bag may produce around 3.2kg of potatoes, with up to 5.9kg possible in a good year. Real-world trials with Root Pouch bags recorded 39 potatoes weighing 1.258kg in one soil trial, and 33 potatoes weighing 1.275kg in another. Those figures are a useful reality check: number of potatoes is not the whole story. A bag can contain fewer, larger tubers or lots of smaller ones depending on variety, planting density and water management.
Common Bag-Growing Problems and How to Avoid Them
Potatoes are forgiving enough to be enjoyable, but not so forgiving that they will quietly overlook every mistake. Most problems in bags come down to four things: too many seed potatoes, insufficient depth, uneven watering or harvesting at the wrong moment. The good news is that all four are manageable once you know what you are looking for.
Lots of foliage, disappointing potatoes
This often happens when too many plants are sharing the available compost. A generous-looking bag can deceive you. The foliage above ground may appear lush because several plants are competing successfully for light, while below ground there is not enough space for each plant to make a decent crop. Follow the planting guidance for your bag size and err on the side of fewer seed potatoes if you are unsure. A lightly planted bag is not a waste of space; it is room for tubers.
Compost dry on top, wet below
This is a familiar container problem, especially in bags with strong bottom drainage. Avoid occasional heavy soakings that send water straight down through the channels in the compost. Water more gently and more regularly, checking moisture beneath the surface. If the top few centimetres are dry but the bag feels heavy and cool, wait. If the compost is dry deeper down too, water slowly until it begins to drain.
Green potatoes near the surface
Cover them immediately with compost and check whether the bag needs another earthing-up layer. Any potato that has turned green should not be eaten. This is one of the few potato problems with a very straightforward prevention: keep the developing crop in darkness. It is why earthing up is worth the modest effort.
Stems flattened by a cold night
Spring can be deceptive. A warm afternoon makes everything seem settled, then a cold night arrives and reminds us that British weather does not sign contracts. If frost is forecast while the plants are still small, move lightweight bags into a more sheltered spot if practical, or protect the foliage temporarily. Once bags are huge and full, moving them becomes an event involving questionable lifting technique, so think about shelter before planting.
Plants have died back but the potatoes are tiny
Do not assume failure immediately. If you harvested a first early young, smaller potatoes may simply reflect the stage you chose. If a maincrop has finished early and the crop is genuinely poor, consider whether it received enough light, steady moisture and adequate compost volume. Keep notes. A potato bag is a very good teacher because you can alter one part of the routine next year and see the effect clearly.
A Simple Seasonal Plan for UK Patio Potatoes
Potatoes reward gardeners who get the sequence right. You do not need to be rigid about exact dates, but it helps to know what belongs in late winter, spring, summer and autumn. Since we are in October, the immediate job is planning rather than planting. Clear a sunny space, decide how many bags you can manage, and make sure water is available nearby. Carrying a watering can through three doors every evening is a fine way to lose enthusiasm by June.
October to January: prepare the setup
Choose bags, check drainage, decide on their final positions and make room for compost. Do not fill bags months before planting; empty bags are easier to store and move.
Late January to March: chit seed potatoes
Start early varieties first, then second earlies and maincrops. Keep them cool and bright until the shoots are around 25mm long.
Spring: plant and begin earthing up
Start with 10–15cm of compost, plant at the correct density, and add compost in stages once shoots are 15–20cm high.
Summer: keep moisture steady
Check bags frequently, particularly in warm wind or prolonged dry weather. Harvest young potatoes once first earlies begin to flower or drop their buds.
Late summer to autumn: harvest and reset
Wait for foliage to yellow and die back before lifting second earlies and maincrops. Empty bags, inspect them, and store them dry for another season.
When you empty the bags, do not assume the compost must go straight into the bin. It can be spread as a soil improver around ornamental beds or used where you are not immediately growing another potato crop. What matters is avoiding the temptation to reuse it immediately for potatoes again. A fresh bag of compost for the next potato crop is a cleaner, simpler starting point.
Frequently Asked Questions About Potatoes in Bags
The GardenScout verdict
Growing potatoes in bags is one of the most practical ways to make a patio productive. Start with the right-sized bag, chit seed potatoes in a cool bright place, plant low rather than filling the bag at once, and earth up as stems reach 15–20cm. Then water consistently and let the foliage tell you when harvest is close. It is not instant gardening, but it is satisfyingly straightforward—and few things make a modest patio feel more useful than tipping out a bag and finding dinner underneath.