
How to Grow Chillies From Seed on a UK Windowsill
A patient, warm and surprisingly productive route from tiny seed to proper home-grown heat — even when the British summer appears to have misplaced its enthusiasm.
Why British Windowsills Are Surprisingly Good Chilli Nurseries
It is September now, which means many windowsill chilli growers are in the satisfying final stretch. Pods may be changing colour, plants may be looking slightly overgrown in that cheerful, unruly way, and there is every chance your kitchen has begun to resemble a very small jungle with a spicy agenda. This is the time to help what is already growing to finish well: give plants as much light as possible, keep watering steady, and remove any fruit that has gone soft or damaged.
If you are reading this with an empty windowsill and a packet of seed waiting in a drawer, do not worry. You have not missed the boat forever. You have simply reached the planning bit. Come the darker months, you can organise the space, choose varieties sensibly and decide how you will supply warmth and light. Then, next spring, you will be ready to start early rather than doing the traditional British gardener's thing of beginning enthusiastically after the weather has already made other plans.
Chillies are often described as difficult in the UK. That is only partly true. They are not difficult in the same way as a plant that needs endless specialist care. They are particular. They want warmth around their roots, decent light above their leaves, reliable watering and a growing season that does not begin halfway through it. Give them those basics and a sunny windowsill can be a very effective nursery, especially for compact plants bred to crop in containers.
The appeal is obvious. You can watch the whole process at close range: the first hooked shoot pushing through compost, the first proper leaves, the flower buds, then the small green fruits that gradually become something worth cooking with. A chilli plant is both useful and decorative. It can look entirely at home beside a basil pot, yet quietly provide enough heat to make dinner considerably more interesting.
The windowsill advantage
A windowsill is not just a place to put a pot. It is a naturally sheltered growing position close to household warmth, where you can notice drying compost, pests and drooping leaves before they become a saga. That daily visibility is one of the biggest advantages a beginner has.
South-facing glass is the obvious favourite, because it gives the strongest available daylight. A west-facing window can also work well, particularly later in the season when the afternoon sun has more warmth in it. East-facing positions are useful for seedlings and plants that need gentler light, whilst a north-facing sill is usually better reserved for houseplants with lower expectations. Chillies will tolerate less-than-perfect conditions, but they do not perform miracles. Nor should they be asked to.
There is also an important distinction between starting chillies on a windowsill and finishing them there. Seeds need dependable warmth to germinate. Young seedlings need strong light so they do not stretch. Mature plants need enough root room, water and airflow to carry flowers and fruit. Each phase asks for something slightly different, and success comes from adjusting as you go rather than finding one magic spot and hoping for the best.
Picking Your Pods: Best Chilli Types for a UK Windowsill
Variety choice matters more with chillies than it does with many easy vegetables. A plant that thrives under long, hot, bright conditions may spend a British summer looking handsome but unhurried. It may set fruit late, hold it green for ages and leave you standing at the window in autumn willing it to hurry up. This is not a personal failure. It is simply a mismatch between plant and place.
For a windowsill, favour compact chilli types described as suitable for pots, containers, patios or indoor growing. Look for plants that naturally make a neat bush rather than a tall, wide specimen with ambitions of taking over the room. A compact plant makes better use of a limited root area, is easier to turn towards the light, and is less likely to lean dramatically into the glass like it is attempting an escape.
Fast-fruiting types are especially useful in the UK. The key phrase on a seed packet is not necessarily "hottest" or "largest". It is "early", "quick to crop", "compact" or "suitable for containers". These are the practical clues. You want a chilli that can germinate, grow, flower and ripen fruit without needing a season that begins with a Mediterranean forecast.
| Chilli type | Why it suits a windowsill | What to watch for |
|---|---|---|
| Compact ornamental chilli | Usually naturally tidy, colourful and well suited to container life. | Fruit can be very hot despite the cheerful appearance. Keep labels. |
| Small-fruited culinary chilli | Smaller pods often have a better chance of maturing in a modest indoor space. | Plants still need bright light to produce worthwhile crops. |
| Medium-heat container chilli | A good compromise between usable fruit, manageable growth and a realistic season. | Give it room as it develops; "compact" does not mean "happy in a teacup". |
| Large-fruited or very hot chilli | Can be rewarding for an experienced grower with warmth and supplementary light. | Often slower to mature and less forgiving of dull, cool spells. |
There is nothing wrong with growing a challenging chilli, by the way. If your dream is a fiercely hot variety with a long growing cycle, go for it — just treat it as a project rather than a casual windowsill experiment. Start as early as your indoor conditions properly allow, provide warmth for germination, and expect the plant to need more support from you. That might mean a grow light, more careful feeding and a bright indoor finish when the outdoor season fades.
For a first attempt, I would rather grow a modest plant that gives you ripe pods than a glamorous variety that spends months conducting a slow-motion botanical protest. Reliable harvests teach you how chillies behave. They also mean you have something to show for your efforts besides a slightly intimidating collection of labels and compost bags.
Choose for habit, not just heat
A compact, branching plant is a more natural fit for a sill than a type which wants to become tall and sprawling.
Choose for speed
Early fruiting and early ripening are valuable traits where the summer is short and the light can be variable.
Read the packet properly
Seed packet notes often reveal whether a variety has been selected for container growing, protected conditions or a longer season.
Keep plant labels
It is surprisingly easy to forget which plant is mild and which one can derail a bowl of pasta. Labels avoid domestic misunderstandings.
It is also worth considering how you want to use the fruit. Small, hot chillies are excellent when you only need a little heat at a time. Larger, milder pods are useful for stuffing, grilling or slicing into everyday cooking. A mixed windowsill can be ideal: one dependable mild plant, one medium plant for regular use, and one hot specimen for the person in the household who says "I like it spicy" with misplaced confidence.
Whatever you choose, avoid sowing old, poorly stored seed if you can help it. Chilli seed can remain viable, but germination becomes more unpredictable as seed ages and storage conditions vary. Fresh seed, clean compost, warmth and patience are the uncomplicated foundation. Gardening does occasionally allow us uncomplicated things.
The January Head Start: Mastering Sowing Timing for the British Calendar
The golden rule for British chilli growing is simple: start early, but not absurdly early. The plant needs time to develop before summer, yet seedlings started in the darkest part of winter can struggle if they do not have enough light. It is tempting to sow as soon as the festive decorations are down. The seed packet is there. The propagator is there. The windowsill is there. But a tiny chilli plant cannot be persuaded by enthusiasm alone.
For many growers, the sensible sowing period begins around the turn of the year and runs into early spring, depending on the chilli type and the equipment available. Slower, hotter chillies deserve the earliest slot. Fast, compact and milder types can wait a little longer. If you only have natural window light, leaning towards the later part of that window often makes life easier because daylight is improving rather than fading.
At this point in September, the useful job is to make a note of what worked. Which plant ripened first? Which one stayed compact? Which had lots of flowers but few pods? Which was constantly thirsty? That little record is much more useful than a grand plan made in the depths of January whilst eating toast beside a radiator. Next season, sow the varieties that earned their place and be ruthless with the ones that did not.
Early is useful. Darkness is not.
Starting seed before there is enough usable daylight can produce weak, stretched seedlings unless you supplement the light. A later sowing made under improving conditions often catches up quickly and produces a sturdier plant.
A chilli has several jobs to complete before you can pick ripe fruit: it must germinate, make roots, build leaves, form flowers, set fruit and then mature that fruit. Each stage slows if the plant is cold, underlit or repeatedly stressed. This is why a late sowing may still create a lovely green plant, yet not deliver the red, orange, yellow or purple pods you were hoping for before autumn arrives.
Do not judge sowing time by outdoor temperature alone. Chillies begin indoors, where you control more of the environment. The question is not, "Is it warm outside?" It is, "Can I provide warm compost, good light and enough room for a young plant over the coming weeks?" If the answer is yes, you are ready. If the answer is "possibly, but it will live behind the bread bin", perhaps wait until you can give it a fairer start.
British springs can turn cool and dull without warning. Do not rush tender chilli plants into an exposed outdoor position simply because one sunny afternoon made it feel like summer. Protected indoor growth is often safer until conditions have genuinely settled.
Staggering sowings can be useful if you have room. It spreads the risk of a poor germination batch and stops every plant reaching its most demanding stage at once. The drawback is that it also creates a rolling parade of pots. On a narrow sill, that can become less "productive kitchen garden" and more "compost-based obstacle course". For most households, a small, well-managed batch is better than an ambitious collection of plants you cannot properly accommodate.
Once seedlings are up, rotate pots regularly so growth stays even. Window light comes strongly from one direction, and young chilli plants will lean towards it with great determination. Turning them is not cosmetic fussing. It encourages a balanced plant and makes it easier to avoid a stem that grows long and weak on one side.
Heat From Below: How to Use Propagator Heat Mats Properly
For chilli seed, warmth at compost level is one of the most helpful things you can provide. A bright windowsill may feel pleasant to us, especially with a mug of tea involved, but the compost in a seed tray can still be cooler than chilli seeds would choose for themselves. That matters because chilli seeds do not simply need moisture. They need warmth to wake up evenly.
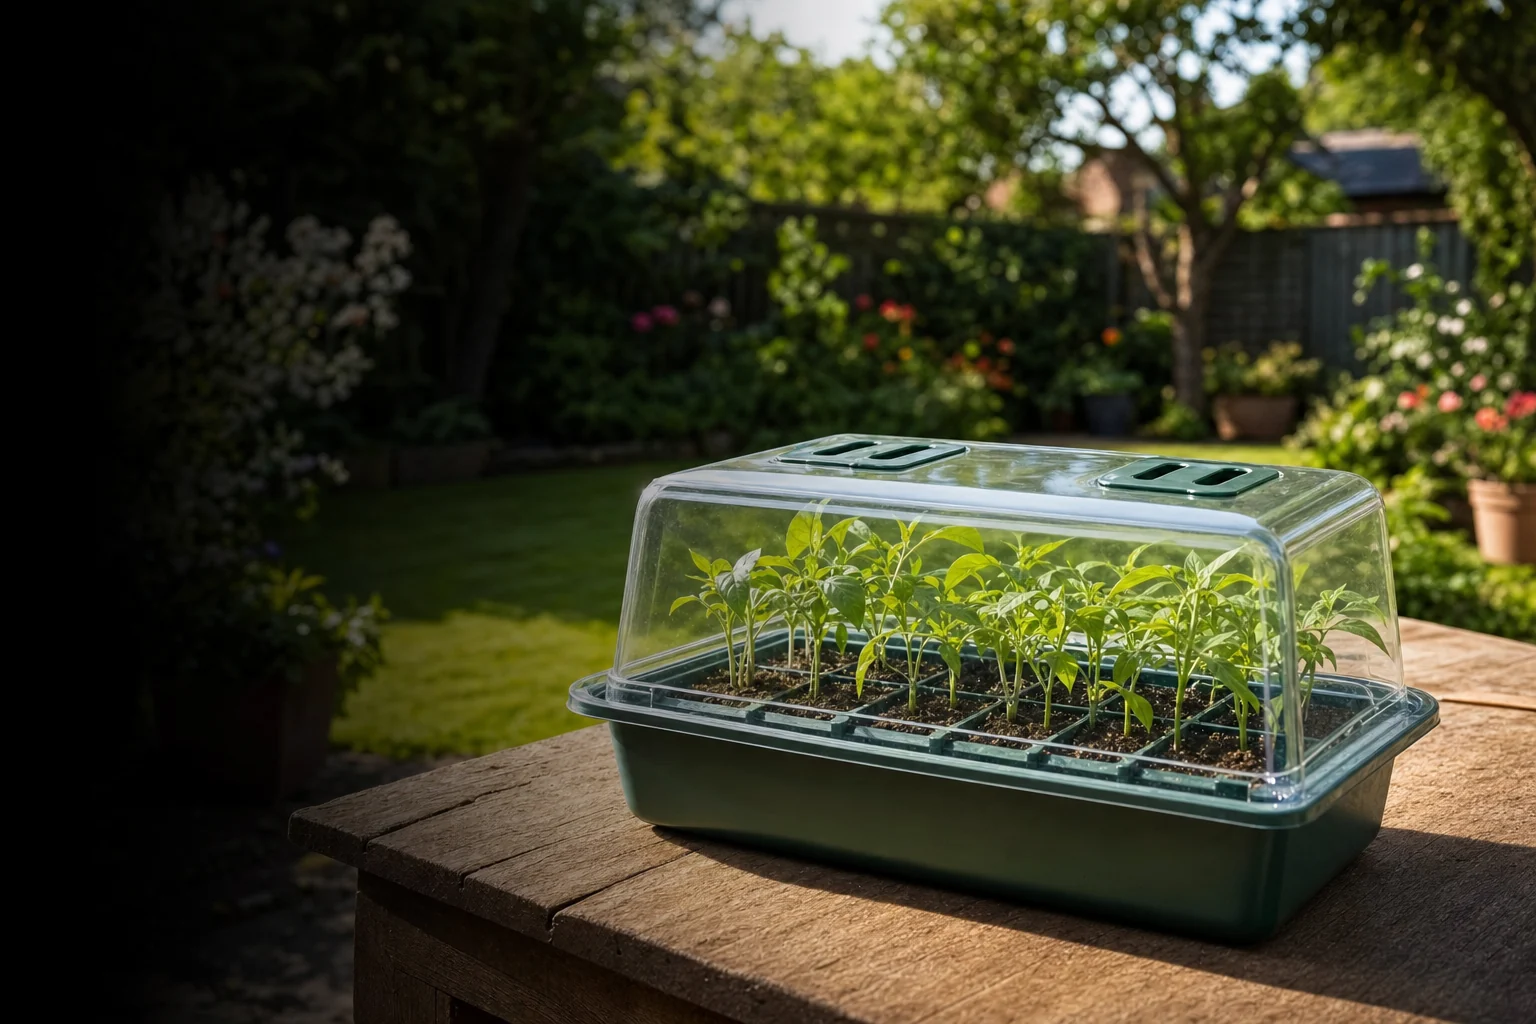
A heated propagator is the tidiest all-in-one approach. It provides an enclosed space, helps hold humidity around newly sown seed and gives the root zone a more stable environment. A standalone heat mat is more flexible. You can place one beneath trays or small pots, use it in a bright room rather than directly against cold glass, and move it out of the way once seedlings establish. The important thing is not the gadgetry. It is the consistency.
Do not put a heat mat somewhere you will forget about it. That is the quickest route to compost drying out at speed whilst you assume all is well. Check moisture every day. The surface may look dry while the compost below is fine, or it may look damp while the roots are sitting in cold, heavy wetness. Lift the tray if you can. With practice, its weight tells you more than the surface does.
As soon as shoots emerge, the balance changes. Seeds can sit in warm, enclosed conditions whilst they germinate. Seedlings need fresh air and brighter light. Leaving a cover tightly shut once green growth appears can encourage weak, humid growth and fungal problems. Begin venting the propagator or removing the cover for increasing periods, then move seedlings into their bright growing position.
What bottom heat does well
- Encourages more even germination from warmth-loving seed.
- Makes indoor sowing less dependent on a chilly window ledge.
- Helps you start in a controlled spot before moving seedlings to brighter light.
- Can be used with small trays, modules or pots rather than demanding a huge setup.
What it cannot fix
- It does not replace bright light once seedlings have appeared.
- It can dry compost quickly if you do not check regularly.
- It cannot compensate for overcrowding or poor drainage.
- It will not make a slow variety magically finish in a gloomy room.
A thermostat is helpful where available because it prevents the root zone becoming unnecessarily warm. Chilli seeds appreciate warmth; seedlings do not need to be cooked. Think of the mat as a gentle nudge, not a tropical holiday. Once plants are established, reduce reliance on bottom heat and focus on giving them a stable, bright environment. Excess warmth combined with poor light encourages long, soft growth, which is exactly what you are trying to avoid.
If you do not own a heat mat, you can still grow chillies. Find the warmest reliably bright place in the house and use a covered tray to retain a little humidity until germination. A shelf near a warm room can be better than a beautiful but cold window. Just remember to move seedlings promptly towards better light after they emerge. The first green shoots are a cue to change the conditions, not simply a reason to celebrate. Although you may absolutely celebrate. Tiny plants have a way of earning it.
Keep warmth and light separate in your mind
Seeds need warmth to start. Seedlings need light to grow well. Mature plants need both warmth and light, alongside enough compost and regular care. Treating every stage the same is where many windowsill chilli attempts go sideways.
Compost, Containers and the Art of the Perfect Seedbed
The seed compost question is gloriously unglamorous, but it matters. For germination, use a fine seed compost or a similarly fine, free-draining peat-free alternative. Young chilli roots are delicate and do not need a rich, heavy compost at this stage. A seed compost makes it easier for small shoots to emerge and helps moisture spread more evenly through the tray.
Multi-purpose compost is useful later, especially when mixed with a loam-based compost or used in larger pots, but it can be coarse for tiny seed. Large pieces of bark, uneven texture and a very rich mix make early growing less predictable. You can pick out obvious lumps if that is what you have, but if you are buying compost specifically to sow chillies, start with the proper seed mix. It gives seedlings a cleaner beginning.
Modules are particularly handy on a windowsill. Each seedling gets its own small area, roots remain separate and you can move the strongest plants on without disturbing every neighbour. Small pots work too. Open trays are fine if you are happy to prick seedlings out carefully later. There is no single correct container. The best one is the one that drains, fits your available space and lets you handle seedlings without turning the kitchen table into an archaeological dig.
Fine compost supports small seed
A fine, free-draining seed compost gives emerging roots and shoots a more even medium to work through.
Drainage is non-negotiable
Every container needs a route for excess water to leave. Chillies dislike sitting in permanently wet compost.
Match containers to the stage
Small containers make sense for seed. Increase pot size only as roots and foliage begin to need it.
Sow seed shallowly, then cover lightly with compost or fine vermiculite. You are aiming to keep the seed moist without burying it under a compacted layer it must struggle through. Firm the surface gently. Not hard. There is no prize for recreating a patio in miniature.
Watering immediately after sowing is best done gently. A fine rose on a small watering can, a mister used carefully, or watering from below can all work. The goal is to moisten the compost without washing seed into a single mysterious corner of the tray. If you water from below, remove the tray from standing water once the compost has taken up what it needs.
If algae, mould or a sour smell develops on the compost surface, conditions are usually too wet, too enclosed or too stagnant. Improve airflow, reduce watering and avoid keeping a lid sealed after seedlings emerge.
Label every sowing. This sounds obvious until you have a row of identical green shoots and cannot remember whether the left-hand tray contains a mild cooking chilli or something capable of making your eyes water from the next room. A simple label with the variety, sowing date and any useful note is enough. Pencil is often more reliable than marker pen, which has a mysterious habit of fading just when you begin to rely on it.
Keep seed trays clean, too. Reused pots and modules are perfectly sensible, but wash away old compost and residue first. Good hygiene does not need to be fussy. It simply reduces the chance of bringing old problems into new seedlings. Start with clean containers, fresh compost and a tidy watering routine, and you have already dealt with a large proportion of early chilli mishaps.
Pricking Out and Potting On: The Three-Stage Transplant Ladder
Windowsill gardening is mostly a negotiation with space. Chilli seedlings begin tiny, then suddenly seem to own the place. One week you have a neat tray. A little later you have leaves touching the glass, pots crowding the kettle and an uneasy feeling that the houseplants are being edged out by a vegetable coup.
The answer is not to put a seedling straight into a huge final pot. A very large pot takes up precious room, holds more wet compost around a small root system and makes it harder to judge watering. Instead, pot on in stages. Start small, move seedlings into individual pots once they are established, and only increase container size when the roots have properly occupied the compost.
Prick seedlings out when they have developed their first true leaves. These are the leaves that appear after the initial seed leaves and look more like recognisable chilli foliage. Hold seedlings by a leaf rather than the stem whenever possible. A damaged leaf can be replaced. A crushed stem is much harder for the plant to negotiate.
Use a dibber, pencil or similar slender tool to lift each seedling gently from beneath. Try to keep a little compost around the roots, but do not panic if some falls away. Make a hole in fresh compost, lower the seedling so it sits securely, then firm around it lightly. Water it in gently and keep it out of fierce direct sun for a short settling period if it looks stressed.
Do not pot on just because leaves are wide
Look for roots filling the current pot or appearing at drainage holes. A plant with a compact root system can remain in its pot a little longer; a root-bound plant needs fresh compost and more room before growth stalls.
For the next stage, choose an individual pot that gives the roots room without becoming oversized. A loam-based compost formulated for young plants can work well, as can a good peat-free potting mix with enough structure to hold moisture and air. The exact brand matters less than the texture and drainage. You want compost that holds together when moist but does not turn into a dense, airless mass.
As plants grow, they will need a larger final container suitable for the variety and your windowsill. A compact chilli can still make an extensive root system over the season, so avoid keeping it in a tiny pot simply because it looks neat. Restricted roots lead to erratic watering, reduced vigour and fruit that struggles to ripen. A saucer beneath the pot protects the sill, but do not leave the plant standing in runoff for long periods.
After transplanting, give plants a little time before feeding. Fresh compost contains nutrients, and newly disturbed roots need to settle. Your job is to provide steady moisture and good light, not to throw every bottle from the shed at them.
Turn plants regularly as they grow. A windowsill gives directional light, so stems often bend towards the glass. A gentle rotation helps create a more evenly shaped plant. If a branch carrying fruit becomes heavy, support it with a small cane or discreet plant support. There is no shame in staking a chilli. Fruit is the point, after all, and gravity remains stubbornly committed to its role.
Do not be alarmed if growth pauses briefly after potting on. The plant is directing energy towards its roots. Once those roots have settled into fresh compost, new leaves usually follow. This is one of the reasons staged potting works so well: each move is manageable, and you can respond to the plant rather than forcing it to adapt to a vast container all at once.
Feeding, Watering and Keeping Windowsill Chillies Happy Through Summer
Watering is where most windowsill chilli plants either thrive or become dramatic. They dislike drought, but they also dislike permanently saturated compost. The trick is to water in response to the plant and the compost, not according to a rigid calendar. A sunny spell can dry a pot quickly. A cloudy week can leave it damp for much longer than expected. British weather is not known for consistency, and neither is a windowsill beside a warm kitchen.
Use the finger test. Press a finger gently into the compost near the edge of the pot. If it feels dry below the surface, water thoroughly enough that moisture reaches the lower roots. If it still feels damp, leave it alone and check again later. This takes moments and is more reliable than watering every morning because it feels like a gardening thing to do.
When you do water, aim for a proper drink rather than constant tiny sips. Frequent dribbles can leave only the top layer moist and encourage roots to stay near the surface. A thorough watering, followed by a period in which compost begins to dry, encourages a healthier root system. Empty any water that remains in the saucer after the pot has drained.
Signs your routine is working
- Leaves are a healthy green and feel firm rather than limp.
- New growth appears gradually and looks compact.
- Compost is moist through the pot but never sour or swampy.
- Flowers and young fruit remain on the plant without constant dropping.
Common watering mistakes
- Leaving pots in a puddle inside the saucer.
- Allowing plants to dry completely, then flooding them.
- Watering by habit without checking the compost.
- Using cold water straight onto stressed roots in a chilly room.
Feeding comes later. Fresh compost should carry a young plant for a while, so do not rush to add fertiliser immediately after sowing or potting on. Once a chilli is growing strongly and has settled into its main pot, a regular liquid feed can help it sustain leaves, flowers and fruit. Early in growth, a balanced fertiliser is sensible. Once flowers and fruit become the main event, a feed intended to support flowering and fruiting can be useful.
The important word is regular, not excessive. Too much feed can create lots of soft leafy growth at the expense of flowers and can stress roots in a confined pot. Follow the dilution guidance on the product you choose and resist the urge to double it. More fertiliser is not extra kindness. It is just more fertiliser.
Flowers occasionally drop from chilli plants, particularly when conditions swing from cool to hot, dry to wet, or dim to bright. A little flower drop is not unusual. If it becomes persistent, look at the basics: is the plant too dry, too wet, cramped, shaded or overheated against the glass? Is there airflow? Has it recently been moved? The answer is often environmental rather than mysterious.
Help pollination along
Indoors, there may be fewer insects visiting flowers. A gentle tap on the stems or a light brush over open flowers can help move pollen around. Be gentle; this is encouragement, not percussion.
In high summer, protect plants from extremes. Glass magnifies sun, and leaves pressed against a hot pane can scorch. A sheer blind, a little distance from the glass or gentle airflow can help on very bright days. Equally, avoid leaving plants in a cold draught beside an open window during a gloomy spell. Chillies appreciate stability, even if the forecast has other ideas.
As autumn approaches, reduce any urge to force lots of new leafy growth. Your focus is on helping existing fruit mature. Keep plants bright, warm and evenly watered. Remove badly damaged fruit and fading leaves. If a plant is carrying more fruit than it can reasonably finish, you can remove the tiniest, latest arrivals so energy is directed towards pods already well developed. It feels harsh. It is also practical.
Light, Leggy Growth and the Grow-Light Question
Light is the great British chilli challenge. Our brightest windows can be excellent in spring and summer, but winter daylight is brief, low and often filtered through cloud. A chilli seedling does not care that you have chosen a charming windowsill with a view of the garden. It wants usable light. If it does not get enough, it stretches towards the source, making a long, pale stem and sparse growth.
This is called legginess, and it is not something to ignore. A leggy seedling is weaker, less stable and slower to become a productive plant. You will usually see it leaning hard towards the window, with wide gaps between leaves and a general look of someone reaching for the last biscuit on the top shelf.
The simplest solution is to use the brightest window you have and keep seedlings close to the glass without allowing foliage to be chilled by it. Rotate pots so all sides receive light. Keep the window clean. It sounds laughably minor, but a layer of winter grime does not improve anything. If a windowsill is crowded, give the chilli seedlings priority over less demanding plants during the early stage.
| Lighting approach | Best use | Practical limitation |
|---|---|---|
| Bright south-facing window | Spring and summer growth; maturing fruit; growers with naturally good light. | Winter and early spring cloud can still leave seedlings short of light. |
| West- or east-facing window | Useful for established plants or seedlings supported by careful positioning. | Usually less intense than a sunny south-facing position. |
| Full-spectrum grow light | Early sowings, darker homes and growers aiming for sturdy seedlings. | Needs a safe position, a timer and enough room above plants. |
| Clip-on light bar | Small batches and a simple introduction to supplementary light. | Coverage can be limited as plants become larger and bushier. |
A grow light is not compulsory, but it can make early sowing much more forgiving. Full-spectrum LED units are popular because they provide useful plant light without giving off the excessive heat associated with older lighting systems. For a few seedlings, a modest clip-on bar can be enough. For a larger tray or several maturing plants, a broader panel gives more even coverage.
Whatever light you use, keep it at a sensible distance above the foliage and adjust it as plants grow. Too far away and seedlings stretch towards it. Too close and leaves can show stress. Check your particular light's guidance, use a timer rather than relying on memory, and make sure cables, plugs and watering arrangements remain safely separate. This is gardening, not an attempt to introduce irrigation to the electrical system.
Supplementary light is most useful when natural light is weakest. Once spring daylight improves, many windowsill growers can rely more heavily on the sun, using a grow light only where plants still look stretched or shaded.
Leaf colour gives clues, but interpret it alongside everything else. Pale leaves can indicate inadequate light, a hungry plant, cold roots or watering problems. Dark, lush leaves with few flowers can suggest the plant is concentrating on vegetative growth. Curled leaves might point to heat, dryness, pests or a recent environmental shock. There is rarely one universal diagnosis, which is why daily observation is so valuable.
Check the underside of leaves for aphids, whitefly and fine webbing that may suggest mites. Indoor plants are not automatically pest-free. In fact, a warm, sheltered windowsill can be very inviting for insects with no respect for your crop plans. Catching a small infestation early is much easier than discovering an entire colony at the point you hoped to harvest.
Strong, even light
Encourages compact growth, darker foliage and better energy for flowering and fruit development.
Regular rotation
Stops plants leaning too far in one direction and helps create a balanced shape.
Frequent leaf checks
Look beneath leaves as well as above them. Pests are rarely considerate enough to make themselves obvious.
Ripening Chillies Indoors When a British Summer Runs Short
By September, ripening is the priority. Plants may still be producing flowers, but late flowers are not always worth chasing. In a short season, the most useful fruit is the fruit already set and beginning to swell. Give those pods the best chance by keeping plants in maximum light, maintaining even moisture and protecting them from cold nights or draughty windows.
Fruit colour change can feel slow, especially when the weather has been dull. Green pods are not necessarily unripe in every culinary sense, and many can be used green. But if your aim is fully coloured, sweeter and more developed fruit, patience and warmth help. A bright indoor position is often better than leaving plants outdoors through cool, wet autumn weather.
If you have moved plants outside during summer, inspect them carefully before bringing them back indoors. Check stems, leaf undersides, pot rims and compost for hitchhiking pests. Wash the outside of pots if needed, remove damaged foliage and place plants a little apart from houseplants at first. It is much easier to deal with one questionable chilli plant than explain to every houseplant in the room why it now has aphids.
Do not overwater in autumn. Lower light means plants use water more slowly, even in a warm room. Compost that once dried quickly in summer may now stay damp for longer. Keep checking rather than assuming. This is also a good time to ease off feeding as fruit matures and growth slows.
Harvest with purpose
Pick ripe fruit regularly with clean scissors or secateurs rather than tearing it away. Removing mature pods can help the plant direct its remaining energy towards the fruit still developing.
Harvested chillies can be used fresh, frozen or dried, depending on their thickness and your preferred cooking style. Always wash your hands after handling hot chillies, especially before touching your face. This advice sounds deeply obvious. It remains necessary because somebody, somewhere, learns it the difficult way every year.
When the season ends, you can choose whether to keep a healthy plant through winter. Chillies are capable of living beyond a single season if they are kept frost-free and managed carefully, but overwintering is a separate project. Plants need pruning, reduced watering, pest checks and enough light to remain healthy. It can be worthwhile if you have a particularly good plant, but do not feel obliged. Starting fresh seed next season is often simpler and gives you a chance to improve your approach.
Common Windowsill Chilli Questions
The GardenScout verdict
Growing chillies from seed on a UK windowsill is absolutely achievable, but it rewards preparation more than bravado. Start with compact, early-fruiting types; give seed warm compost; move seedlings quickly into strong light; pot on gradually; and keep watering responsive rather than automatic.
Right now, focus on helping existing pods ripen in the brightest, warmest position you have. Then use what you learn to plan next spring's sowing. A small batch of well-grown plants will nearly always beat a crowded windowsill full of hopeful stragglers. And when the first home-grown chilli lands in your cooking, you will forgive the pots by the kettle. Probably.