
Cold Composting vs Hot Composting: How to Get Usable Compost Faster
The faster route to dark, crumbly compost is not mysterious. It is largely a matter of air, moisture, particle size and getting your browns and greens to stop arguing.
Two Heaps, One Goal: An Introduction to Composting Methods
Late September is one of the great composting months. The lawn is still producing clippings, the kitchen caddy has not taken a seasonal holiday, and the first dry leaves are beginning to gather in every corner of the garden. It is also the point at which many heaps develop a slightly sulky expression. They seem full enough. You have fed them faithfully. Yet nothing much appears to be happening.
Composting is simply the biological breakdown of organic matter into a useful soil amendment. Given time, the bacteria, fungi and other tiny workers already present in garden waste will turn leaves, peelings and prunings into a dark, earthy material often called black gold. It is not magic, although opening a bin that has quietly made excellent compost can feel rather close to it.
There are two broad ways to get there. Cold composting is the patient, low-maintenance approach. You add material as it arises, let it break down at its own pace and accept that the finished compost may take many months to appear. Hot composting is active composting: a deliberately balanced, aerated heap built to heat up and decompose quickly.
Neither method is morally superior. A cold heap is not lazy gardening; it is a sensible system for gardeners who do not have enough material, time or inclination to turn a large pile every day. A hot heap is not necessarily complicated, but it does ask you to pay attention. It rewards that attention with speed and with the sustained high temperatures that can help deal with weed seeds and some unwanted organisms.
The useful distinction
Think of cold composting as a continuous queue: waste joins the back and slowly works its way forward. Think of hot composting as a batch: collect enough ingredients, mix them well, then manage the pile while it races through its busiest phase.
The central trade-off is straightforward. Hot composting can yield usable compost in around 4–8 weeks when it is properly built and managed. Cold composting usually takes 6–24 months, but asks very little of you once underway. The aim here is not to turn every garden into a compost laboratory. It is to help you choose the approach that suits your space, then make it work properly.
Cold Composting Unpacked: The Patient Gardener's Method
Cold composting is how many gardens begin, often without anyone formally deciding to do it. A bin goes in beside the shed. Vegetable peelings, tea leaves, a few weeds and the odd armful of leaves are added whenever somebody remembers. The contents settle. A year or so later, the lower layer looks promising. That is cold composting in its most useful form.
The process relies mainly on mesophilic microorganisms: the vast crowd of decomposers that work happily at ordinary, moderate temperatures. A cold heap typically remains below 32°C. It will not produce the dramatic steam or unmistakable warmth of a true hot heap, but biological activity is still happening. It is just happening in a more leisurely British-garden sort of way.
Its great virtue is flexibility. You do not need to wait until you have the exact right quantity of ingredients. You can add kitchen scraps on Tuesday, dried leaves at the weekend and a small bag of grass cuttings whenever the weather permits mowing. Cold composting accepts a wide range of organic material without strict ratio-making, which makes it particularly forgiving for beginners.
Add as you go
A cold bin is well suited to the uneven rhythm of household and garden waste. There is no need to save material for a formal heap-building day.
Keep it damp, not drowned
Rain will usually help, but a covered bin can become surprisingly dry. The ideal feel is damp, like a wrung-out sponge, rather than dusty or dripping.
Small pieces still matter
Cold composting is patient, not inert. Chopped stems, shredded cardboard and mower-chopped leaves offer more surface for organisms to work on.
A basic bin, open bay or contained pile is enough. Add material loosely rather than pressing it into a sodden mat. If you can, add a covering of dry leaves, torn cardboard or other brown material over wet kitchen waste and fresh grass. This is less about achieving laboratory precision than preventing the familiar bin problems: sour smells, flies, a compacted layer and a frighteningly wet section at the bottom.
At this point in the UK gardening year, falling leaves are particularly useful. Keep some dry beside the bin rather than adding the entire lot at once. They become your balancing material for wetter, nitrogen-rich additions through autumn and winter. It is the compost equivalent of having a clean tea towel to hand before you start cooking. You may not always need it, but you will be pleased it is there.
Cold compost can contain recognisable fragments for quite some time. That does not mean the system has failed. Sieve it if you want a finer material for seed trays or pots, then return the rough pieces to the bin for another turn around the circuit.
There are limitations. Because a cold heap does not reach thermophilic temperatures, it cannot be relied upon to destroy weed seeds in the way a well-managed hot heap can. Avoid adding weeds that have already set seed if you do not want future surprises. Likewise, tough woody pieces can take a long time, especially when left whole. Cold composting is wonderfully undemanding, but it does not perform miracles whilst you are making a cup of tea.
Hot Composting Unpacked: The Accelerated Science of Thermophilic Breakdown
Hot composting begins with a rather different idea: give microorganisms a generous, well-balanced meal, enough air and the right moisture, and they multiply rapidly. Their activity generates heat. As temperatures climb, thermophilic bacteria take over. These heat-loving organisms thrive in the range of 54–71°C, breaking down suitable material at a startling pace.
For a gardener accustomed to a quiet cold bin, a hot heap can be genuinely thrilling. You turn a mixed pile, push your hand carefully into the centre a day or two later and discover that it is warm. Properly managed, the centre can become too hot to touch comfortably. That heat is not a decorative feature. It is the evidence that the pile is working through the rapid phase that makes hot composting worthwhile.
There are three useful stages to recognise. First comes the warm-up phase, when ordinary mesophilic bacteria get to work on accessible food and raise the temperature. Next is the thermophilic peak, the important fast-working window. This is the period gardeners are trying to create when they talk about making a hot heap. Eventually, the easily available material diminishes, temperature falls and the heap enters a cooling and curing phase. Fungi and other organisms continue the slower work of finishing the compost.
Hot composting works best as a batch process. Rather than adding a handful here and there for weeks, collect enough browns and greens, chop bulky items, mix them thoroughly and build the heap in one go. This gives microorganisms access to a consistent meal and lets the central mass retain the heat it is generating. Repeatedly opening a small, half-filled pile and adding tiny amounts makes a fast hot cycle much harder to sustain.
Air is the other half of the bargain. The desirable organisms are aerobic: they need oxygen. Turning redistributes the cooler outer material into the active centre, breaks up compacted sections and refreshes the air spaces. For the quickest result, daily turning is the stated best practice. It is an engaged system, and this is why hot composting suits somebody who enjoys a regular garden task rather than somebody who wants the heap to manage itself.
Heat is a clue, not the finish line
Do not rush hot compost straight onto the garden simply because it has cooled. Let it cure until it is dark, crumbly and earthy-smelling. A heap may have completed its hot burst whilst still containing pieces that need more time to settle down.
The Carbon-Nitrogen Equation: Getting Your Ratios Right
If composting has one bit of jargon worth keeping, it is carbon-to-nitrogen ratio, usually shortened to C:N. It sounds like something you might be tested on at school, but it describes a very ordinary garden problem: whether the tiny organisms in your heap have enough energy and enough nitrogen to grow and work efficiently.
Carbon-rich materials are usually called browns. They provide energy and structure. Nitrogen-rich materials are greens. They provide the nitrogen that supports microbial growth. The names are useful shorthand, but they are not always literal colours. Coffee grounds are brown to look at but count as a green in compost terms. Hay can be yellow and still contain enough nitrogen to behave more like a green than a dry autumn leaf. Compost, like gardening generally, refuses to be entirely tidy.
For fast hot composting, aim for a carbon-to-nitrogen ratio of approximately 25–30:1 by weight. In that window, there is enough carbon to supply energy and enough nitrogen to keep microbial populations multiplying quickly. Too much carbon and the heap tends to sit there dry, cool and stubborn. Too much nitrogen and it can become wet, smelly or sharply ammonia-scented.
The phrase "by weight" is important because greens and browns have very different textures and densities. In an ordinary garden, nobody expects you to weigh every handful of leaves and every carrot top. Use the numbers as a guide to what materials are likely to do, then watch the heap itself. Does it heat? Is it moist but airy? Does it smell earthy? Those are useful practical answers.
| Material type | What it contributes | Typical C:N ratio | What it can do in a heap |
|---|---|---|---|
| Wood chip | Very carbon-rich structure | About 200:1 | Useful in moderation, but can slow a heap if it dominates. |
| Cardboard | Dry carbon and absorbency | About 60:1 | Balances wet greens when torn or shredded. |
| Balanced hot heap | Fuel for rapid microbial growth | About 25–30:1 | Supports a sustained thermophilic phase. |
| Fresh green material | Nitrogen and moisture | Generally lower ratios | Provides the kick a cool heap often needs. |
For a hot heap, mixing is more effective than neat layers. Layering can work in a loose cold bin, but a dense sheet of grass clippings followed by a thick slab of cardboard gives microbes rather isolated neighbourhoods. Mixing chopped browns and greens together helps moisture, food and air meet in the same places. That is what the decomposers need.
In autumn, the common mistake is to add leaf after leaf after leaf because there are so many of them. Leaves are valuable, but a heap made almost entirely from dry leaves is short of nitrogen and often slow. Pair leaves with grass clippings, vegetable scraps, fresh weeds that have not seeded, coffee grounds or manure. If the heap is not warming, this is usually the first adjustment to make.
A simple diagnostic rule
If the heap is cool and dry, add moisture and more nitrogen-rich green material. If it smells unpleasant or feels wet and compacted, add dry brown material and turn it. The heap is usually telling you which ingredient is missing.
Do not become paralysed by ratios. Cold composting does not require strict balancing, and even a hot heap can tolerate approximation. The goal is not mathematical perfection. It is a mixture that is varied, damp, open enough for air to move through and sufficiently rich in greens to become biologically active.
Browns, Greens, and the Materials That Belong in Neither Bin
A good compost heap is built from ordinary things that would otherwise leave the garden in bags or the kitchen in the caddy. The trick is understanding the role each one plays. Ratios vary with moisture, age and source, so regard the figures below as useful working guides rather than a reason to start weighing your hedge trimmings in the rain.
Browns: carbon, bulk and breathing room
Autumn leaves are around 60:1; cardboard around 350:1; straw around 80:1; wood chips around 400:1; and shredded paper around 175:1. These materials absorb excess moisture and help prevent dense green additions from becoming airless.
Greens: nitrogen and rapid activity
Grass clippings and kitchen vegetable scraps are around 15–20:1. Coffee grounds are about 20:1, fresh garden weeds about 15:1, and manure about 10–15:1. They are the energetic part of the mix.
The in-between material
Hay can sit around 15–32:1 depending on its type. Treat it cautiously: it may help a heap heat, but it can also arrive carrying seeds, which is not a gift anyone needs.
For day-to-day composting, keep a small store of dry browns close to the bin. Torn cardboard is especially useful for this. Add it over vegetable peelings, mix it into grass clippings or use it to correct a heap that has become too wet after a damp spell. In a typical British autumn, that is not a niche job.
Grass clippings deserve special attention. They are a powerful green addition, but a thick mass of them can compact into a wet blanket. Mix them with dry leaves, shredded paper or cardboard rather than tipping in a dense slab. The same goes for coffee grounds: they are useful, but spread and mix them rather than creating a single dense layer.
Some things are better left out of an ordinary home compost system. Diseased plant material, perennial weeds with persistent roots, and weeds carrying ripe seed heads can create problems later. When in doubt, do not give a difficult plant a comfortable second home.
Woody material has a place, especially when chopped small, but it is slow. Thick branches and chunky wood chip are not quick compost ingredients simply because they are organic. Use pruners on stems where practical, and do not expect a cold bin to reduce large woody pieces on a useful timetable. They may be better handled separately or returned repeatedly to the heap until they finally surrender.
Head to Head: Cold vs Hot Composting Compared Across Every Key Metric
The best method is the one you will maintain. That sounds almost too obvious, but it saves a great many disappointing compost setups. A beautifully built hot heap that is never turned becomes an ordinary slow heap. A humble cold bin that receives regular, sensible additions may quietly supply a reliable amount of compost year after year.
| Question | Cold composting | Hot composting |
|---|---|---|
| Time to usable compost | Typically 6–24 months | About 4–8 weeks when properly managed |
| Working temperature | Below 32°C | 54–71°C during the thermophilic phase |
| Labour | Minimal once set up | Frequent monitoring and turning; daily is best for speed |
| Material balance | Forgiving and flexible | Needs a roughly 25–30:1 C:N balance for best speed |
| Weed seed concern | Seeds may survive | High temperatures are useful where weed seeds are a concern |
| Best rhythm | Continuous additions | Built and managed in batches |
Why gardeners like cold composting
- Easy to begin with a bin, bay or simple pile.
- Works around the irregular flow of household waste.
- Requires very little physical effort.
- Forgiving if the mix is imperfect.
Where cold composting frustrates
- It is slow, particularly with woody material.
- Finished compost can be uneven and need sieving.
- It does not provide a reliable high-heat weed-seed solution.
- Wet, compacted material can still smell if neglected.
Why gardeners like hot composting
- It can produce compost in 4–8 weeks.
- Rapid activity makes good use of seasonal surges of material.
- High temperatures support the breakdown of a well-built pile.
- It feels satisfyingly productive when you have lots of waste.
Where hot composting asks more
- It needs enough suitable material at the same time.
- Turning and moisture checks are part of the method.
- Incorrect balance can quickly lead to a stalled or smelly pile.
- It is less convenient for tiny, occasional additions.
If you garden in a small space, a cold bin may be entirely sufficient. If you manage an allotment or a productive garden with repeated flushes of weeds, leaves and grass, hot composting offers a more rapid route back to usable soil conditioner. Plenty of experienced gardeners use both. It is not cheating; it is simply making the waste stream work harder.
Revive a Sluggish Heap: Six Science-Backed Ways to Speed Up Slow Compost
Before buying anything or giving up on a disappointing heap, take a look at its texture, smell and moisture. Most slow compost is not fundamentally broken. It is short of one of the conditions microorganisms need. The following changes are practical, inexpensive and particularly useful through autumn, when there is plenty of material available to correct the balance.
1. Reduce particle size
Smaller pieces expose more surface area to microbial attack. Run a mower over fallen leaves, use pruners on woody stems, and break up clumps with a shovel. A whole branch is a long-term project. A chopped stem is lunch.
2. Turn it more often
Turning with a pitchfork brings oxygen into the heap and redistributes materials. Daily turning is best when the aim is the quickest hot compost. Even moving a cold heap every few weeks can encourage faster breakdown.
3. Get moisture right
The target is a wrung-out sponge: damp throughout, but not dripping. Add water gradually to dry material, then turn it in. If water runs from a squeezed handful, add dry browns and aerate.
4. Add a nitrogen-rich green
If the heap is not warming, it may be short of nitrogen. Grass clippings, vegetable waste, fresh weeds and coffee grounds can revive a predominantly leafy or cardboard-heavy mix.
5. Hold onto the heat
If a heap is struggling to warm, insulating it with hay or straw can help retain the heat generated by microbial activity. This is especially useful as nights become colder.
6. Introduce living soil
A small addition of native garden soil can introduce beneficial bacteria, fungi and archaea. It is not a substitute for air, water and balance, but it can help a new heap get going.
Turning deserves emphasis because it is the intervention most gardeners avoid, usually for understandable reasons. It is hard work, it can be messy and it rarely looks urgent from the kitchen window. But oxygen is central to rapid aerobic composting. A pile that has settled into dense, wet layers cannot work at its best, however many peelings you add to the top.
Try the handful test
Take a small amount from the middle of the heap and squeeze it. If it falls apart dusty, add water while turning. If it releases liquid or feels slimy, add shredded cardboard, dry leaves or straw, then mix thoroughly to reopen air spaces.
At this time of year, do not underestimate the mower. Mower-chopped leaves mixed with a modest amount of grass clippings can make a far more active heap than whole leaves alone. Likewise, tearing cardboard before adding it is worth the brief inconvenience. Large flat sheets create layers that shed water and exclude air; smaller pieces disperse through the mixture.
If you want a fast hot batch, avoid constantly topping it up. Start another cold bin or holding area for daily kitchen scraps while the hot pile completes its cycle. This is one of those small organisational changes that sounds fussy, then makes immediate sense when you see the difference in how evenly the batch breaks down.
Troubleshooting Your Heap: Diagnosing and Fixing Common Problems
Compost has a fairly direct vocabulary. Heat, smell and texture are clues. Once you learn to read them, most problems become a quick adjustment rather than a mystery involving expensive additives and a great deal of sighing.
First, check moisture. A dry heap needs water worked through as you turn it. Next, add more nitrogen-rich green material such as grass clippings or vegetable waste. If it is mostly dry leaves, woodier material or cardboard, the microorganisms may simply lack nitrogen fuel.
That usually points to too much nitrogen-rich green material. Add dry browns such as torn cardboard or dried leaves, then turn the heap to improve aeration. The aim is to rebalance the mixture, not to disguise the smell.
This suggests anaerobic conditions, often caused by excess moisture or compaction. Turn it thoroughly and add dry browns to improve drainage and airflow. A rotten smell is your signal that the heap needs more oxygen.
They may be too large, too dry, or simply newer than the material around them. Chop future additions smaller and return unfinished pieces to the heap after sieving.
Break them apart and mix in dry, fibrous browns. Grass is a useful green material, but it needs structure around it. Add it in thinner mixed additions rather than one solid layer next time.
That is normal in a working hot heap. Turning moves the cooler outer material into the centre, where it gets its chance to decompose quickly.
Let it cure. A finished material should become dark, crumbly and earthy-smelling. Cooling is part of the process, not an inconvenience to skip.
Yes. Chop ingredients, keep moisture even, include a mixture of greens and browns, and turn it occasionally. It may not reach hot-compost speed, but it will be noticeably less sluggish.
A compost thermometer is useful for a hot system, but your senses remain valuable tools. Earthy and warm is generally encouraging. Slimy, sour or sharply ammonia-like means the balance needs attention.
Equipment, Bins, and Bays: What UK Gardeners Actually Need
You can compost without buying a complicated system. The material and the management matter more than the container. A basic plastic compost bin, simple wooden pallet bay or open pile can all support cold composting. Many councils offer compost bins free or at a subsidised cost, which makes checking local arrangements a sensible first step.
For cold composting, choose the arrangement that you can reach easily in wet weather and actually use. A bin hidden behind three pots, a broken trellis and an increasingly ambitious bramble is unlikely to receive thoughtful mixing. Put it somewhere practical. Compost is a working part of the garden, not something that needs to be displayed like a prize hydrangea.
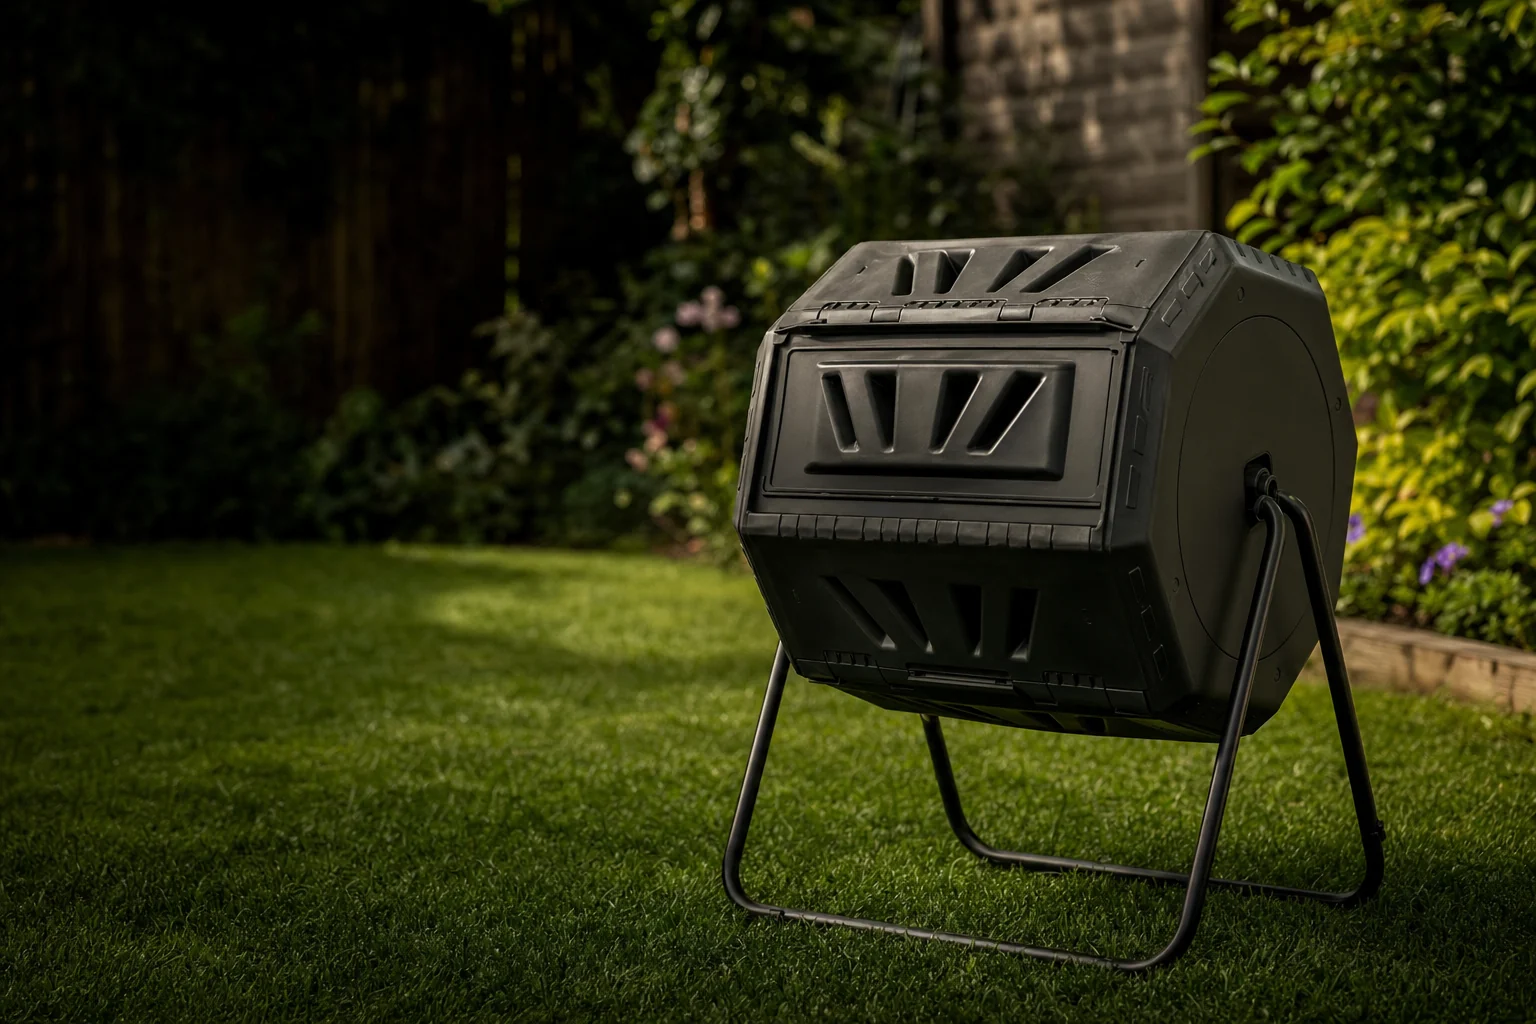
For hot composting, more room to mix and turn is helpful. A larger insulated bin can retain warmth, whilst a multi-bay wooden system is useful for separating fresh material, an active batch and compost that is curing. The arrangement is not essential, but it makes the batch method much easier to follow.
A thermometer is helpful rather than compulsory. It can confirm whether a hot pile is in the thermophilic 54–71°C range, which is difficult to judge precisely by touch. A long-handled pitchfork remains the standard tool for full turning. In a narrow bin where lifting and rebuilding the heap is awkward, a compost aerator spiral can help introduce air, though it is not quite the same as properly remixing the contents.
Keep a dry supply of browns nearby. A lidded container of torn cardboard or bag of dry leaves makes it much more likely that you will balance wet additions immediately. It is a modest bit of preparation that prevents a surprising number of compost dramas.
Which Method Is Right for You? A UK Gardener's Decision Guide
The decision comes down to volume, time and temperament. If you have a large garden, an allotment or a productive plot that generates lots of material in bursts, hot composting can turn that abundance into something useful swiftly. If you have a modest garden, limited mobility or little appetite for hauling a fork through a heap every day, cold composting is a perfectly good answer.
Choose hot composting if…
You produce substantial quantities of grass, leaves and plant material, need compost for seasonal planting, or enjoy a practical routine with visible progress.
Choose cold composting if…
You want an easy, low-risk introduction, have limited waste, or need a system that does not depend on regular lifting and turning.
Use both if…
You want the best of each approach: a continuous bin for kitchen additions and a dedicated hot batch for the autumn glut of leaves and clippings.
I am a strong believer in the hybrid approach. Keep a cold bin ticking over for the daily odds and ends. When the lawn, borders and trees deliver a sudden mountain of material, build a separate hot heap using those bulk ingredients. The cold bin takes the pressure off; the hot heap gives you a focused project and potentially much faster compost.
Right now, as autumn gathers pace, start by collecting dry leaves and chopping what you can. If you are building a hot heap, combine those leaves with green material, moisture and regular turning rather than expecting leaves alone to perform a miracle. If you are using a cold bin, add steadily, keep the contents open and damp, and trust the slower process.
The GardenScout verdict
Hot composting is the clear route to usable compost fastest: around 4–8 weeks when the mix is balanced, damp, aerated and actively managed. Cold composting takes 6–24 months, but its simplicity makes it the better choice for many real gardens. Choose the method that fits your routine, then give the microorganisms what they need. They are remarkably good workers once you stop making them eat only cardboard or swim in grass soup.