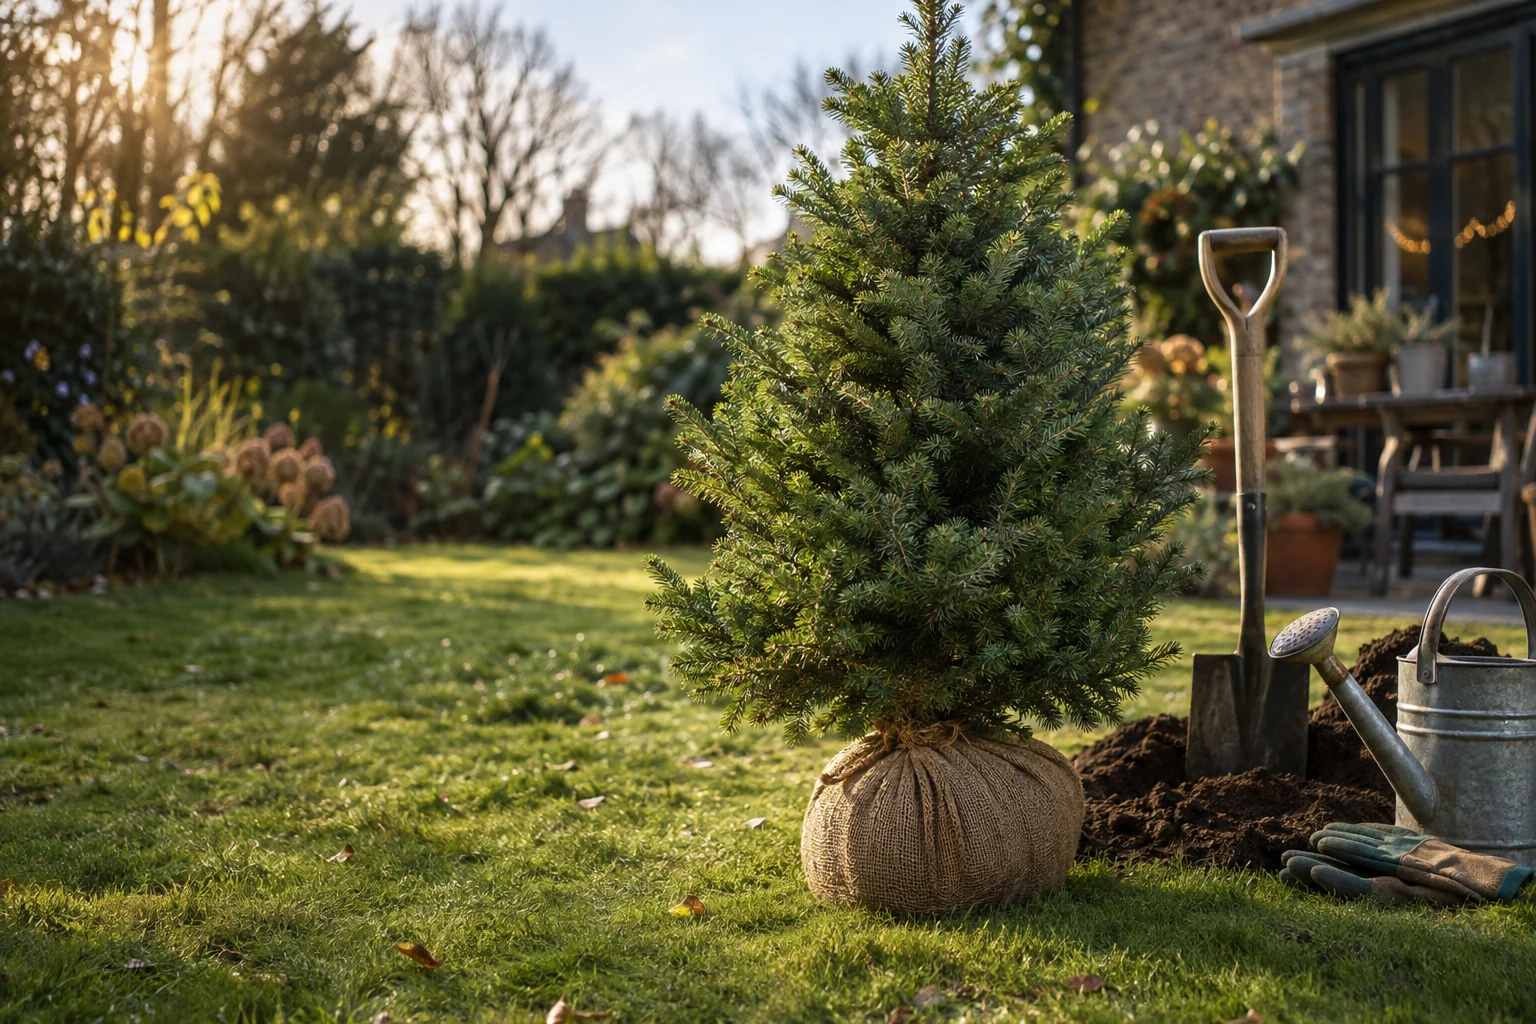
The short answer
Buy a pot-grown or intact root-balled tree, keep it outside in shade, then give it a week or two in an unheated garage before bringing it indoors for 12 days at most in a cool room away from heat. Check the compost daily. Afterwards reverse it and plant by the end of January, root flare level with the soil.
When to do it
Now: November is a good time to dig the planting hole.

Useful for loosening compacted ground before planting and working soil around the site without slicing through as many roots as a spade.
Check price on AmazonWe link to the exact model on Amazon UK. Prices change often, so check the live price before you buy. As an Amazon Associate we earn from qualifying purchases.
Why a Living Christmas Tree Is Worth the Extra Effort
Every year, somewhere around the second week of January, Britain's pavements sprout a small, melancholy forest. Brown-edged firs propped against bins. Spruces lying on their sides with a stray strand of tinsel still clinging on for dear life. It is one of the less festive sights of the year, and it always makes me slightly sad.
A living Christmas tree offers a rather nicer ending. Bought with its roots intact, it can do two jobs: a glittering centrepiece in the sitting room for a week or so, and then a permanent resident in the garden, putting on growth for decades. Some families plant one every year and end up with a little shelterbelt of past Christmases along the bottom fence. I find that idea quietly lovely — each tree a marker of a particular year, the children measuring themselves against it.
It is also, plainly, the more sustainable choice. You are not buying a tree to be composted in January; you are buying a tree full stop. Its festive appearance is simply its first public engagement.
I won't pretend it's effortless, though. A cut tree asks very little of you: a bucket of water and the occasional apologetic sweep of needles. A living tree asks for planning. It needs to be acclimatised before it comes in, kept cool and correctly watered whilst it's indoors, weaned back out again afterwards, and then planted properly in a spot that will suit it for the rest of its life. Miss one of those stages and you may well end up with a very expensive brown tree anyway.
The good news is that none of the stages is difficult. They just need to happen in the right order, at the right time — and since it's mid-November as I write, you're catching this at exactly the right moment. The planting hole is best dug now, whilst the soil is still workable. The tree can be bought now and kept outside. Everything that follows slots neatly into the weeks between here and the middle of January.
Before we go any further, though, there is one rule that matters more than every other piece of advice in this guide.
Only trees with intact roots can be replanted. That means a tree grown in its pot, or one sold with its root ball intact (often wrapped in hessian and sold as "root-balled"). A cut tree — however fresh, however carefully you water it — has no roots and will not survive in the ground. Ideally look for a genuinely pot-grown tree, raised in its container, rather than a field-grown tree that has been dug and stuffed into a pot shortly before sale. The latter has lost much of its root system and is a far riskier bet.
That distinction between "pot-grown" and "potted" is worth checking in the shop. Gently tilt the tree and give the trunk a light tug. A properly pot-grown tree should feel anchored, with the compost held together by roots. If the tree wobbles about and loose compost tumbles away to reveal a few chunky severed roots, it was very probably lifted from a field recently. It may still be a pleasant Christmas tree. It is unlikely to be a garden tree.
Know Your Tree: Species That Survive (and Those That Won't)
If I could get one message across to anyone planning a living Christmas tree, it would be this: choose the species with its whole life in mind, not just Christmas week. The species decides how well the tree holds its needles in a warm room and, more to the point, how big it will be in your garden in twenty years. Whether it survives the move depends far more on how it was grown and how you look after it, which is what the rest of this guide is about.
These are the five trees the Royal Horticultural Society lists as Christmas trees, and the ones you will find for sale in pots in the UK.
| Tree | Needles indoors | Worth knowing |
|---|---|---|
| Norway Spruce (Picea abies) | Quick to drop | The traditional tree, with a good scent; a forest tree that reaches 20–30m in time |
| Nordmann Fir (Abies nordmanniana) | Very slow to drop | Dark green needles; costs more than Norway Spruce |
| Blue Spruce (Picea pungens Glauca group) | Holds better than Norway Spruce | Blue needles, and pricklier than the others |
| Korean Fir (Abies koreana) | Excellent | The smallest in the long run, at about 10m |
| Fraser Fir (Abies fraseri) | Good | Fragrant, with the regular shape of a Norway Spruce; about 20m eventually |
Norway Spruce: the traditional choice
Norway Spruce is the tree most of us picture when we think "traditional Christmas tree". It does have a reputation. Indoors, particularly as a cut tree in a warm room, Norway Spruce is notorious for dropping needles, which is why many households have drifted towards other species. But as a rooted, pot-grown tree kept cool and well watered for a short stay, it behaves far better. It is also widely available as a pot-grown tree and costs less than a Nordmann Fir.
Just be aware of what you're taking on long-term. That cheerful metre-high tree is a forest species and can, given decades and no interference, reach 20–30m. More on site choice later.
Nordmann Fir: the one most households buy
Nordmann Fir is the best-selling Christmas tree in the UK, because its dark green needles are very slow to drop. You pay more for it than for a Norway Spruce of the same size. Like the spruce, it becomes a large tree in time, so it needs the same thought about where it will eventually stand.
The rest of the shortlist
Korean Fir is the one I'd look at first for an ordinary garden. It holds its needles very well and is the smallest of the five when mature, at about 10m. Fraser Fir has good needle-holding, a lovely fragrance and the regular shape of a Norway Spruce, reaching about 20m in time. Blue Spruce holds its needles better than Norway Spruce and is worth having for the colour alone, but the needles are sharp, which is worth knowing before the children help decorate it.
If a garden centre label simply says "Christmas tree" without naming the species, ask. If nobody knows, I'd walk on. It's a small question that saves a lot of disappointment in March.
Before It Crosses the Threshold: The Pre-Indoor Acclimatisation Stage
Here's the part most people skip, and it's arguably as important as anything you do once the tree is inside. A conifer outdoors in a British December is dormant: its growth has shut down, its tissues have hardened against cold, and it is essentially sitting out winter. Carry it straight from a frosty garden centre forecourt into a room at 20°C and you are asking it to leap from deep winter to late spring in an afternoon.
The damage from that shock isn't dramatic. The tree won't collapse in front of you. It happens at a cellular level, invisible until weeks later when new growth fails or needles brown from the inside out. That's what makes it so frustrating: you can do everything else right and the tree was already compromised the day you brought it in.
Stage one: keep it outside, and keep it dormant
Once you've bought your tree, the best place for it is outdoors, in a shady spot — the north side of the house is ideal — out of direct sun. The aim is simple: keep it cold, keep it dormant, and keep its roots moist. Winter sunshine on a south-facing patio can warm a pot surprisingly well on a bright day, nudging the tree towards waking up when you'd much rather it stayed asleep.
Leave it there until the last week or two before you want to decorate. There's no prize for bringing it in early. Every extra day indoors comes off a strictly limited allowance, as you'll see in the next section.
Stage two: the cold buffer
Rather than going straight from garden to sitting room, give the tree a week or two somewhere unheated but sheltered — a garage, shed, cold porch or outbuilding that stays above freezing. This intermediate stage lets the tree adjust gradually without being jolted out of dormancy all at once. Think of it as hardening off a tray of seedlings, only in reverse and in a scarf.
It's also the perfect moment for an inspection. Look closely along the branches and inside the canopy for any hitchhikers. A sheltered, slightly warmer garage is where you want to discover them — not the living room carpet.
Pulling it all together, here's how the coming weeks might look if you're planning on the tree going up a few days before Christmas:
Now (mid-November)
Choose your species, decide on a planting spot and dig the hole whilst the soil is still workable. Store the excavated soil under cover. If you've already bought the tree, stand it outside on the shady north side of the house and keep the compost moist.
Late November to early December
The tree stays outside, dormant and in shade. Check the compost every few days; containers can dry out even in winter, particularly in windy spells or if sheltered from rain by eaves.
One to two weeks before decorating
Move the tree into an unheated garage, shed or porch that stays above freezing. Inspect branches for insects. Keep watering.
The week before Christmas
Bring it indoors, into the coolest suitable room, for no longer than 12 days. Count backwards from the day it must go back out, not forwards from the day you fancy decorating.
Check Before You Carry
Do your bug check in the garage, not the hallway. Run a hand gently along a few branches, look underneath and peer into the centre of the tree. Conifers can harbour the odd overwintering insect or spider, and a warm room is an excellent alarm clock for them. Ten minutes with a torch now avoids a surprise on Boxing Day.
The Indoors Rules: Temperature, Light, and Placement Done Right
Let me be firm about this, because it's the rule people most like to bend. A living Christmas tree should be indoors for no longer than 12 days, which is the limit the Royal Horticultural Society gives, and fewer is better. A warm, dry room is hard on a tree that ought to be resting outdoors, and the longer it stays, the harder the return to the cold. Bring it in as late as you can — the weekend before Christmas is ideal — and if it starts to look unhappy, put it back outside.
I know. The temptation to have the tree up from the first weekend of December is very real, especially with children in the house. But a living tree is not a cut tree that happens to be in a pot. If a long display matters to you, the honest answer is to have a cut tree (or a well-loved artificial one) for the early part of December and bring the living tree in later — or accept that a long stay indoors makes it a one-season tree. What doesn't work is pretending the limit isn't there.
Keep it cool
Aim for a room temperature of roughly 18–20°C, and cooler is better if you can manage it. Warmer air pulls moisture from the needles faster and puts the root ball under stress. Turning the thermostat down a couple of degrees for the tree's stay helps, and if you have a choice of rooms, pick the coolest one that still gets used. A dining room that's only heated for Christmas lunch beats a snug lounge with the heating on all evening.
Placement: away from every source of heat
Position matters as much as the thermostat setting. Keep the tree well away from radiators, heating vents, fireplaces and wood-burning stoves. Be wary of underfloor heating too — a pot standing on a warm floor is having its roots gently cooked from below, which rather defeats the point of keeping the room cool. Avoid south-facing windows that catch the low winter sun as well; it may only be December sunlight, but through glass it can heat one side of the tree noticeably.
A spot near (not against) a cool north or east-facing window often works well: good light, no direct heat.
Lights and decorations
Use LED fairy lights or small low-heat bulbs rather than old incandescent sets, which give off more warmth right against the needles. Keep decorations reasonably light, too. Heavy baubles on the tips of young branches aren't fatal, but there's no need to make the tree carry more than it must.
Watering Without Drowning: The Root Ball Moisture Balance
If I had to name the single most common reason living Christmas trees fail — both indoors and in the months after replanting — it would be watering. Not pests, not cold, not even the dreaded radiator. Watering. And it goes wrong in two opposite directions.
The first is drought. Indoor air in a centrally heated home is remarkably dry, and a root ball in a modest pot can lose moisture far faster than you'd expect. Once the compost dries out completely, the fine root tips — the bits that actually do the work of drawing up water — die off. That damage is irreversible. The tree may look perfectly fine on 1 January, but it's going into the ground with its plumbing broken.
The second is drowning. Overcompensate, pour in a jug every evening "just to be safe", and stand the pot in a sealed decorative container, and you create a waterlogged, airless soup around the roots. Roots need oxygen as well as water; deprived of it, anaerobic rot can set in within around 48 hours. Two days. That's the gap between Christmas Eve and Boxing Day.
The daily check
So the routine is: check every single day. No exceptions, not even on Christmas morning amid the wrapping paper. Push a finger 2–3cm into the compost. The surface can look damp whilst the compost just below has dried out, particularly in a warm room, so don't judge by appearance alone.
If it feels dry at that depth, water slowly and steadily until moisture reaches the whole root ball, rather than splashing a little on top. If it still feels moist, leave it. Watering by the calendar rather than by touch is how both drought and drowning happen.
What "evenly moist" actually means
The target is compost that's evenly moist throughout — never dry, never soggy, never flooded. The old squeeze test is a good guide: take a small pinch of compost from a couple of centimetres down and squeeze it. If water drips out, it's too wet. If it crumbles to dust, it's too dry. You want it to hold together loosely and leave your fingers damp, a bit like a wrung-out sponge.
Put a drip tray or saucer under the pot to protect floors and catch the excess. But treat that saucer as a temporary catch, not a reservoir: tip out any water still standing in it.
Decorative pot covers: the upsides
- Hide a plain plastic nursery pot and make the tree look properly dressed
- Add a little insulation between the root ball and a warm floor
- Protect the floor if the drip tray overflows
- Give a more stable base for a top-heavy tree
Decorative pot covers: the downsides
- Sealed covers hide standing water — the fastest route to root rot
- Make the daily check and the saucer-emptying easy to forget
- Tight covers can prevent air reaching the base of the pot
- Lifting a heavy tree out to check drainage is a two-person job
My own compromise is a wicker basket or a loose fabric wrap rather than a solid ceramic outer pot, with the drip tray inside it. It looks festive enough, and I can see and feel what's happening at the base.
The Half-Hour Rule
Whenever you water, come back about thirty minutes later and look at the saucer. Anything sitting in it at that point has drained through and is doing nothing useful — tip it away. It takes seconds and it's the simplest insurance against waterlogging there is. If you're going away for a night or two over Christmas, give the tree a careful drink before you leave and ask whoever's feeding the cat to do the finger test too.
The Post-Christmas Transition: Bringing Your Tree Back from the Brink
Christmas is over, the decorations are back in the loft (or at least in a box in the hallway, which counts), and your tree has done its festive duty. The temptation now is to carry it straight out into the garden and plonk it in its hole. Please don't.
The journey back out must mirror the journey in, in reverse, with the same patience. Your tree has spent a week in conditions that have nudged it some way towards waking up. Its tissues have softened slightly. Putting it straight out into a hard frost is the same shock you carefully avoided at the start, only now the tree is in a weaker position. It needs to be eased back towards dormancy, step by step.
Step one: the coolest room (2–3 days)
As soon as the decorations come off, move the tree to the coolest part of the house — an unheated spare room, a chilly hallway, a back porch. This takes the edge off the warmth before the bigger drop to come. Keep checking the compost daily.
Step two: the cold buffer (3–7 days)
Next, back to the unheated garage, shed or cold porch, ideally for around a week. Here the tree re-acclimatises to near-freezing temperatures under shelter, rebuilding its winter hardiness before it faces open frost, wind and rain.
Step three: pick your day
Choose a mild, still spell for planting. If a hard cold snap arrives just as the tree's ready, simply leave it in the garage and wait. A few extra days under cover do no harm; planting into iron-hard ground during a severe frost can.
Throughout: keep the roots moist
A garage is dry, and pots stored under cover don't benefit from rain. The daily-check habit should continue right up to planting day.
If you brought the tree in on, say, 18 December and it comes out of the living room on 27 December, you might reasonably be planting it somewhere around the first or second week of January. That's ideal timing, as the next sections explain.
Ground frozen solid? If January arrives with the soil locked hard and no thaw in sight, don't force it. Keep the tree in an unheated, wind-protected spot such as a garage, keep the root ball watered, and plant in spring once the ground is workable. A pot-grown tree can wait under cover far more comfortably than it can be wedged into a half-dug hole in frozen earth.
One small observation from years of doing this: the trees that struggle in spring are very rarely the ones that waited an extra week in the garage. They're usually the ones that went out on 27 December into a hard frost because everyone was keen to have the sitting room back. Patience, here, really is the cheapest gardening tool you own.
Choosing and Preparing the Planting Site: Setting Your Tree Up for Decades
It's easy to think of the planting spot as an afterthought — somewhere to put the tree once Christmas is done. In reality it's the most permanent decision in this whole process. A tree planted in the wrong place will either fail to thrive or, worse, thrive enthusiastically in a way that becomes your problem (or your neighbour's) in fifteen years' time.
That little Norway Spruce is the perfect example. On the patio it's a charming metre-or-so of festive greenery. In the ground, without management, it can grow into a 20–30m forest tree. That isn't a reason not to plant one; it's a reason to plant it where it can grow, or to accept from the outset that you'll be managing its size, or that it may eventually need to come out.
Space and surroundings
As a starting point, allow a clear diameter of at least 3–5m of open ground for most species, and more for the bigger growers. Then look up. Check the eventual height against overhead cables and phone lines, the eaves of the house, the shed, the greenhouse and — tactfully — the neighbour's garden. A tree that blocks someone's afternoon sun in 2040 won't win you friends, however nice the story about its first Christmas.
Also think about where you'd see it from. Many people like a living Christmas tree somewhere visible from the house, where it can be strung with outdoor lights in future Decembers. That's a lovely touch, and one more reason to plant it where it's visible and accessible rather than squeezed into a back corner.
Soil: match the tree to the ground
Spruces and firs all want much the same thing: soil that holds moisture but drains freely, ideally neutral to slightly acid. What none of them will put up with is a planting hole that fills with water in winter.
If you're not sure what your soil is like, the hole you're about to dig will tell you. Sticky, shiny, heavy spadefuls that hold their shape mean clay; gritty, crumbly soil that falls apart means something lighter; white fragments of chalk speak for themselves.
Dig the Hole Now — Really
This is the one job that genuinely belongs in November. Digging the planting hole now, whilst the soil is still workable, means you aren't attacking frozen ground with a spade in January. Store the soil you remove in a garage or shed (a couple of old compost bags are ideal) so it doesn't freeze into one solid lump. Cover the open hole with a board or similar, partly to keep it from filling with rain and partly so nobody — including the dog — falls into it in the dark.
When you dig, make the hole wide rather than deep. Aim for at least twice the width of the root ball and the same depth as it. Some guidance goes further and suggests making it 30–60cm (1–2ft) wider than the root ball, with sides that taper outwards so new roots can spread easily into the surrounding soil. On heavy clay, rough up the sides of the hole with a fork so they don't become smooth, glazed walls that roots struggle to break through.
Planting Day: The Techniques That Determine Long-Term Success
You've chosen well, acclimatised patiently, watered faithfully and weaned the tree back outdoors. Planting day is where all of that effort either gets locked in or quietly undone, so it's worth slowing down.
Timing
Plant as soon as the reverse acclimatisation is complete and the ground allows — ideally before the end of January. That makes the most of the remaining cool, damp months, when the tree can quietly start growing new roots into the surrounding soil before spring growth begins and its water demands rise. A tree planted in early January has a couple of months' head start on one planted in April. If the ground is frozen, though, refer back to the contingency: wait in the garage and plant in spring rather than forcing it.
Water first
Give the root ball a thorough soaking an hour or two before planting. This sounds trivial but matters: a dry root ball set into moist soil will tend to stay dry, because water moves out of it into the surrounding ground rather than in. Start with the root ball well hydrated and it settles into its new home on the right footing.
Free the roots
For a pot-grown tree, lay it on its side if needed and slide it carefully out of its container — tap the pot or run a knife round the inside edge if it's reluctant, rather than yanking the trunk. Then look at the roots. If they're circling round and round the outside of the root ball, the tree is pot-bound. Gently tease those outer roots outwards with your fingers before planting. Left as they are, circling roots can carry on growing in a spiral and, years later, girdle the trunk — effectively strangling the tree from below.
For a root-balled tree, the wrapping is the key thing to deal with:
| What you're planting | What to remove | What to watch for | Replanting outlook |
|---|---|---|---|
| Pot-grown tree | The pot, entirely | Circling roots — tease them outwards | The best option, provided it was genuinely grown in its pot |
| Root ball in natural hessian | All twine and any wire; loosen the hessian | Finding the root flare — you may need to fold back the wrap | Good, if the root ball is intact and moist |
| Root ball in synthetic wrap or wire basket | Wire, twine and all synthetic material | Synthetics break down poorly and restrict roots | Good once fully unwrapped |
| Field-grown tree potted shortly before sale | The pot | Few fibrous roots; loose compost | Risky — much of the root system was lost when lifted |
| Cut tree | Netting, trunk wrap | No roots at all | Cannot be replanted; compost or recycle it |
Get the depth exactly right
Set the tree in the hole so that the root flare — the point where the trunk starts to widen out into the roots — sits level with the surrounding ground or very slightly above it. On a root-balled tree, you may need to loosen the hessian or brush away some soil from the top to find it; nurseries sometimes leave the flare buried. Lay a spade handle or cane across the hole to check the level by eye.
The Most Common Mistake
Planting too deep is one of the commonest reasons new trees fail. It feels instinctively "safer" to tuck a tree in snugly, but burying the root flare starves the upper roots of air and invites rot at the base of the trunk. If anything, err slightly high — the soil will settle a little over the coming weeks. And resist digging the hole deeper "to loosen things up underneath"; the tree will sink into loosened soil.
Backfill, firm and water
Use the soil you stored in the shed — which, if you followed the November advice, will be crumbly rather than one frozen lump. Backfill in stages, firming each layer gently with your hands or heel as you go, then water well to settle everything and remove air pockets around the roots. Air pockets are where roots dry out, so this matters more than it might seem. Top up with more soil if it slumps after watering.
Mulch
Finish with a 5–7.5cm (2–3in) layer of mulch over the root area. Composted bark or leafmould both work well: the layer insulates the soil and helps the roots settle in. Keep the mulch a few centimetres clear of the trunk itself, so the bark isn't sitting against damp material.
Then stand back, admire your work, and perhaps hang a single bauble on it for luck. I won't tell anyone.
The First Year: Aftercare That Gets It Established
Planting isn't the finish line; it's the start of the tree's first season in the ground, and that year is the one that counts. Most failures of living Christmas trees don't happen in January. They show up in late spring and summer, when a tree with a still-limited root system meets its first spell of dry weather.
Keep watering — especially when you think you don't need to
Through the rest of winter, British weather usually takes care of watering for you. Just check after any long dry, cold spell, and remember that a tree planted close to a wall or under the eaves may get much less rain than you'd think. Come next spring, as the days lengthen and new growth begins, the tree's thirst increases noticeably. Its roots haven't yet spread far into the surrounding soil, so it can't forage for moisture the way an established tree can. Check regularly through spring and summer, using the same finger test you used indoors, and give a slow, deep soak when it's needed rather than a little and often.
Don't fuss with feeding
There's no need to rush in with fertiliser. A newly planted tree's priority is root growth, and a decent mulch slowly improving the soil is usually all the encouragement it needs in its first year. Top up the mulch in spring if it has thinned, again keeping it clear of the trunk.
Watch, but don't panic
Some browning or needle drop in the first spring isn't unusual; the tree has been through a lot. What you're really looking for is healthy new growth at the branch tips once the season gets going. Fresh, soft growth means the roots are working. If a tree has made no new growth at all by early summer and the needles are dull and dry throughout, it may not have made it — and it's worth honestly reviewing which stage went wrong before trying again next year.
Keep competition at bay
Grass and weeds growing right up to the trunk will compete hard for water in the first summer. Keeping a clear, mulched circle around the tree makes a real difference, and also keeps strimmers and mowers away from the young bark — an underrated cause of damage.
After that first year, a well-sited tree largely looks after itself. You'll just need to keep an eye on its size relative to where you planted it, and perhaps — come next December — string it with outdoor lights for its anniversary.
Kit that makes this easier
A few tools that help with the jobs above. We link to the exact model on Amazon UK.
Spear & Jackson 4550DF Traditional Stainless
Useful for loosening compacted ground before planting and working soil around the site without slicing through as many roots as a spade.

Check today's price: Spear & Jackson 4550DF Traditional Stainless on Amazon UK
Living Christmas Tree Questions, Answered
The Bottom Line
A living Christmas tree isn't difficult, but it is a commitment with a timetable. Choose a species you have room for in the long run — Korean Fir stays the smallest, whilst Norway Spruce and Nordmann Fir become forest trees. Buy a tree genuinely grown in its pot. Keep it outside and dormant until December, ease it in through a cold garage, and limit its indoor stay to 12 days at most in a cool room, well away from heat, with the compost checked every single day.
Then reverse the whole process with the same patience: a cool room, a week in the garage, a mild day, and a wide, shallow hole with the root flare sitting level with the soil. Do the November job — digging that hole — this week, and the rest of the plan falls neatly into place. Get it right and the tree that stood beside your presents this year could be standing at the bottom of your garden for decades to come.
- Spear & Jackson 4550DF Traditional StainlessHandy for heavy soilView on Amazon
Buying for a gardener? See our gifts for houseplant lovers, checked on Amazon every day.