
How to Divide Perennials for More Plants for Free
Lift, split and replant hostas, hardy geraniums and ornamental grasses with less fuss, healthier borders and a very pleasing number of spare plants.
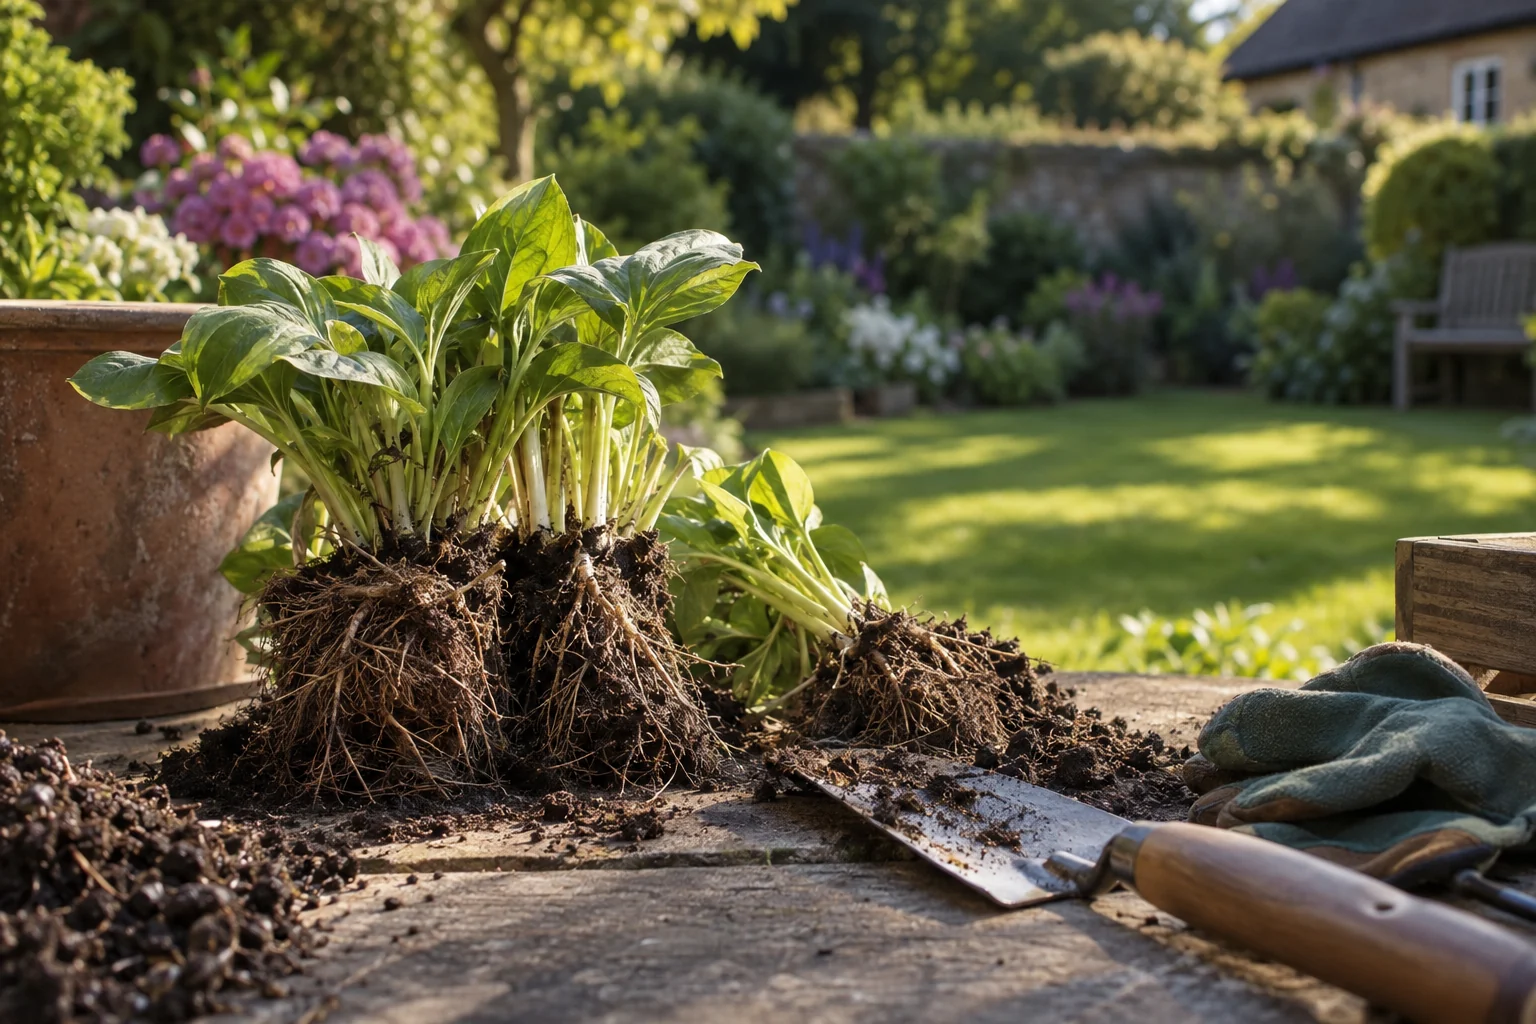
Why Dividing Perennials Is the Savviest Trick in Any Gardener's Toolkit
There is a particular satisfaction in making new plants without placing an order, opening a wallet or waiting for a seed tray to do something interesting. Dividing perennials is exactly that sort of gardening job. You lift a mature clump, separate it into smaller living pieces, replant those pieces, and end up with more plants than you began with. It is propagation with muddy gloves rather than labels and spreadsheets.
More importantly, division is not just a thrifty way to fill gaps. It is often a kindness to the original plant. Many herbaceous perennials gradually become crowded at their centre. The oldest section may lose vigour, flower less enthusiastically or die away altogether, leaving healthy growth around the outside and a disappointing hollow middle. From above, the plant can look as though it has formed a doughnut. Lovely with jam; less impressive in a border.
That decline is rarely a personal failing on the gardener's part. A plant has simply been doing what plants do: growing outwards, competing with itself and using the same patch of soil year after year. By lifting the clump, removing tired material and giving vigorous pieces room to establish, you reset the whole arrangement. The parent plant gets a fresh start and you gain divisions for elsewhere.
Mid-October is a useful moment to look around the garden with this in mind. You may not want to attack every perennial now, especially where ground is wet or cold weather is close, but the signs are easy to spot. Perhaps a hosta has become much wider than its allotted space. Perhaps a geranium has spread happily into a neighbour's territory. Perhaps a grass has become a substantial tuft that now requires its own postcode. Make a note, take a photograph, or push a label into the soil beside it. Future-you, in the less frantic conditions of spring, will be grateful.
The three groups in this guide are particularly good places to begin. Hostas show you how to work around a crown and its developing shoots. Hardy geraniums teach the useful art of easing apart a fibrous, forgiving root system. Ornamental grasses demonstrate that division can occasionally be physical work, and that choosing the right season matters rather more than bravado.
The simple rule
Only divide a plant that is healthy enough to recover. If it is suffering from drought, serious pest damage, disease or a difficult move, let it regain strength first. Division is rejuvenation, not a rescue trick for every problem in the border.
Do not be put off by the word "divide", either. There is no need to create a collection of tiny, struggling fragments in pursuit of maximum plant numbers. The best divisions are comfortably sized pieces with roots and growing points attached. A few robust plants that settle quickly are far more useful than a tray full of nervous-looking bits that need nursing for the rest of the year.
I also find division changes the way you view an established border. Instead of seeing a plant that has become too large, you see planting material. A crowded clump becomes the beginning of a repeated drift through the border, a few new plants for a shadier corner, or a contribution to a plant swap. It is one of the rare gardening tasks where the work itself tends to make the garden better immediately and more interesting later.
Know Your Plant Before You Reach for the Spade
Perennials are not all built alike, and that matters. Some form crowns with distinct shoots. Some have loose, fibrous root systems that more or less invite you to pull them apart. Others develop dense, woody-looking bases that make a spade feel optimistic. Before you lift anything, take a moment to identify how your plant grows and when it naturally wakes up.
For this guide, we are concentrating on hostas, hardy geraniums and ornamental grasses because they represent three very different approaches. They also occur in an enormous number of British gardens, often quietly getting on with life until the day you realise the border has become rather full.
Hostas: split around the crown
Hostas are clump-forming herbaceous perennials with a central crown and a mass of fleshy roots beneath. In winter they disappear completely, which can make the inexperienced gardener wonder whether the plant has left the country. It has not. It is simply dormant. As spring begins, tightly rolled shoots emerge from the soil. These are often called noses, and they are your useful visual guide for division.
When the shoots are visible but still young, you can see where the plant's individual growing points lie. That makes it much easier to cut or pull a large clump into sensible pieces. You are not working blind, and the foliage has not yet become a great leafy sail that loses water rapidly after transplanting. Hosta cultivars vary hugely in eventual spread, leaf size and growth rate, so judge the clump in front of you rather than relying on a generic timetable.
Hardy geraniums: not the windowsill kind
Hardy geraniums, often called cranesbills, are not the tender pelargoniums commonly sold for summer pots. This distinction is worth making because the names cause endless low-level confusion in garden centres. Cranesbills are outdoor perennials, frequently tough, generous and inclined to weave themselves through a border in the most charming manner imaginable.
Most form mounded or spreading growth with fibrous roots. Those roots are often easier to tease apart than a hosta crown, particularly in younger clumps. Many hardy geraniums respond well to being cut back after their first flush of flowers, then make a fresh mound of leaves. That regrowth can provide another useful moment for division when weather and soil moisture are favourable.
Ornamental grasses: first identify their rhythm
"Ornamental grass" describes a broad church. Some grasses begin active growth early, enjoy cooler weather and can be divided when conditions are mild. Others sit through the cold months as a dormant clump, only beginning properly once spring is well under way. The latter should not be rushed. A warm-season grass divided too early can sit in chilly soil, unable to make the new roots it needs.
Carex and Deschampsia are familiar examples of cool-season grasses. Miscanthus and Pennisetum are among the warm-season group. Hakonechloa is another grass that benefits from a thoughtful spring approach rather than being disturbed during deep winter dormancy. If you retain only one grass rule from this article, make it this: know whether yours is waking up or winding down before you start cutting through its roots.
Check the label if you still have it. Cultivar labels often provide the clearest clue to what you own. If the label vanished years ago, watch the plant through a season. The timing of its new growth tells you far more than a hopeful guess with a spade in hand.
Timing Is Everything: A UK Gardener's Division Calendar
There is no single perfect day for dividing every perennial. British weather would consider that far too straightforward. Instead, use the plant's growth cycle, soil condition and forecast together. The ideal moment is generally when a plant can make fresh roots without being asked to support a full canopy of foliage, and when the soil is moist without being waterlogged.
At this point in the gardening year, in mid-October, the most useful immediate jobs are selective ones. Cool-season grasses can be divided in a mild autumn spell, provided the ground is workable and there is time for roots to settle before hard weather. Hardy geraniums may also tolerate autumn division in favourable conditions, although spring remains the safer all-purpose choice if you garden in a cold or exposed spot. Hostas are best left on the list for spring once their new shoots appear.
Late autumn and winter: observe, prepare and resist impatience
As autumn deepens, avoid lifting plants from waterlogged ground. Wet soil is easily compacted beneath your boots, and a newly disturbed root system is more vulnerable to rot if it sits cold and saturated. Frozen ground is an equally obvious stop sign, though it is remarkable how tempting a dry-looking clump can be when you have finally found an hour outside.
Winter is better used for preparation. Clear away obviously diseased material. Make space in the border where future divisions will go. Improve planting areas with garden compost if your soil needs more organic matter. Check whether there are old nursery pots, labels and mulch available. This is not glamorous gardening, but it means you will not be standing over a lifted hosta in spring while wondering where, precisely, you intended to put it.
Early spring: the great all-round opportunity
Spring is the main division season for a reason. Soil is beginning to warm, rain is often more reliable than in summer, and plants are preparing to grow. Hosta shoots emerge and make their crowns easy to read. Hardy geraniums begin to show new basal growth. Cool-season grasses are often actively growing again. Even many warm-season grasses can be tackled later in the spring, once there is clear evidence that they are waking.
Work on a cool, overcast day if you can. A little drizzle is no hardship here; it is free help. Bright sun and a drying wind are much harder on roots and leaves, particularly if you have several divisions to replant. If a fine day is your only available day, simply organise everything before lifting the first clump and keep exposed roots shaded and damp.
Summer: use the geranium opportunity, but be realistic
Summer is not automatically off limits. Hardy geraniums that have been cut back after flowering can be divided once they are producing fresh basal growth, especially if the weather is not hot and dry. They are remarkably accommodating plants. Even so, this is not an invitation to split every perennial during a heatwave. Plants moved in dry conditions need more attention, and a generous gardener can still become unpopular with their watering can.
Hostas can sometimes be moved in summer if necessary, but it is a compromise. Their large leaves transpire freely, slugs are often active and the plant will need careful watering. It is much easier to wait for the spring window unless a building project, redesign or rescue situation gives you no choice.
Autumn: good for some, not all
Early autumn has long been a traditional planting period because soil retains warmth after summer whilst the air is cooler. Cool-season grasses can respond well at this point. Geraniums may also settle if divided early enough and kept moist. The closer you get to persistent cold and saturated ground, however, the more sensible it becomes to pause.
Read the soil, not just the calendar
If soil sticks to your boots in heavy slabs, puddles in the planting hole or smells sour when lifted, wait. If it crumbles gently, feels moist and can be worked without smearing into a shiny paste, conditions are far more promising. The plant's calendar matters; the ground has a vote too.
Tool Up: Everything You Actually Need — and What You Can Skip
Division sounds like a tool-heavy operation, but the useful kit is fairly modest. The goal is not to assemble a Victorian surgical theatre at the edge of the border. You need tools that make clean cuts, let you lift roots with control and help you replant promptly. Everything else is optional.
A sharp border spade
A narrow, sharp blade is excellent for cutting around a clump and slicing through compacted roots where needed. It is more precise than a broad digging spade and less likely to turn a tidy job into a crater.
A garden fork
Use a fork for lifting fibrous-rooted plants and loosening soil around a clump. It often preserves more roots than a spade, and it is particularly helpful with hardy geraniums.
A clean, sharp knife
For hostas, a sturdy knife or hori-hori lets you make a controlled cut between visible growing points. A blunt blade crushes tissue rather than cutting it, which is not doing the plant any favours.
Something robust for dense grass crowns
Older ornamental grass clumps can defeat ordinary hand tools. A pruning saw or an old bread knife reserved for garden use can be the practical answer. This is not cheating. This is adapting to reality.
A hose, watering can or both
Water before lifting when soil is dry, and water immediately after replanting. It is one of the least exciting parts of the job, which is precisely why it is so often the part that decides whether divisions thrive.
For dense grass clumps, two garden forks can be surprisingly effective. Push them back-to-back into the crown, then lever the handles apart. The forks work like a slow-motion pair of hands, widening a natural split without hacking indiscriminately through every root. It requires a steady stance and some effort, but it is often kinder than repeatedly striking the clump with a spade.
Gloves are sensible, particularly with grasses whose leaf edges can be sharp. Eye protection is worth considering when cutting old stems or wrestling with a tough crown. A tarp, trug or old compost bag is also handy for carrying divisions across the garden without trailing soil through the lawn. None of this is glamorous. All of it makes the job calmer.
Worth having
- Sharp tools that cut rather than crush roots.
- A fork for loosening and lifting fibrous-rooted clumps.
- Water ready before you expose the roots.
- Labels for divisions that will otherwise become anonymous very quickly.
Usually unnecessary
- Rooting powder or elaborate propagation equipment.
- Fertiliser in the planting hole, which can encourage soft top growth before roots establish.
- Trying to preserve every last root at the expense of making a clean, workable division.
- Turning a straightforward task into an afternoon-long excavation project.
Before beginning, clean soil from cutting tools and wipe the blade between plants if you suspect disease. This is particularly worthwhile if you are dividing several clumps in one session. Garden hygiene is not exciting conversation, admittedly, but neither is explaining why you have moved a problem from one border to another.
Hostas: The Easiest Split You'll Ever Make
Hostas have a reputation for being easy to divide, and in most cases they deserve it. Their crowns tend to form distinct growing points, their roots make a satisfying mass beneath the plant, and spring growth gives you a clear map of where to work. A very old clump can still require effort, but hostas are one of the best confidence-building plants for a gardener trying division for the first time.
Wait for the right stage of growth
The clearest time to divide a hosta is in spring when the shoots have emerged from the soil but the leaves have not unfurled fully. You should be able to see the individual points of growth without battling a full dome of foliage. In sheltered gardens, this may happen earlier than you expect; in colder areas and exposed sites, it can be later. The plant decides. Your job is to notice.
There are two advantages to this stage. First, the crown is legible. You can see where a division might naturally separate. Second, there is less leaf area demanding water, so the plant can concentrate on recovering roots. Hosta leaves are beautiful, but immediately after division they are also rather like small umbrellas you have asked the root system to support.
Water, then lift with room to spare
If the soil is dry, water the hosta thoroughly before you intend to lift it. Moist soil is easier to work and roots are less likely to tear. Do not water a heavy clay border into a bog, obviously. The aim is evenly moist soil, not a mud-wrestling contest.
Use a sharp border spade to cut around the outside of the clump, keeping far enough from the visible shoots that you are not severing the roots immediately beneath them. Work all the way around before levering gently. If the plant resists, do not yank. Slide the spade beneath the root mass from another side, loosen again and allow the clump to come free gradually.
Once lifted, place it on a tarp or directly onto cleared soil. Brush away enough loose compost and soil that you can see the crown. You do not need to wash every root clean. You merely need to locate the natural sections.
Choose sensible divisions
A good hosta division has healthy roots and at least one viable growing point. Larger pieces establish faster and retain a fuller look; smaller ones produce more plants but take longer to become substantial. There is no universally correct answer. If you need a bold replacement in a visible border, keep divisions generous. If you have room in a nursery bed and patience on your side, you can make more modest pieces.
Some hostas will pull apart with your hands once you find a gap in the crown. Others need a knife driven decisively down between shoots. A clean cut is preferable to repeated sawing or twisting. If the centre is dark, hollow, mushy or clearly dead, remove it rather than dividing around it. Healthy outer pieces are what you want to preserve.
Do not panic about a cut crown
Hostas are not porcelain. A cleanly divided crown with roots and a growing point attached is perfectly capable of recovering. The greater danger is leaving divisions out in sun or wind while you debate the exact geometry of every cut.
Replant at the correct level
Prepare the new planting holes before you split the clump if possible. Set each division at roughly the same soil level it occupied before. Burying the crown too deeply can slow it down; leaving roots exposed is equally unhelpful. Firm soil around the roots with your hands, then water thoroughly to settle air pockets.
Hostas appreciate moisture-retentive soil and shade or partial shade, depending on the cultivar. A division moved into a very dry, rooty spot beneath a hedge may survive, but it is hardly an equal opportunity placement. Give the new plants a fair start. A mulch around, not over, the crown helps keep the soil from drying too rapidly.
Expect a settling-in period
A divided hosta may look rather unimpressed for a short while. Leaves can pause, growth may seem slower than expected and the plant may not reach its usual size in the first season. That is normal. The roots have been disturbed and are rebuilding their hold on the soil. Keep it watered during dry spells, protect young leaves from slug damage where that is an issue in your garden, and resist the urge to keep lifting it for progress reports.
If the division has a sound crown, viable shoots and reasonable aftercare, it should resume growth. By the following season, you will often wonder why you waited so long. This is the joyful thing about hostas: they can look like a serious operation on the day, then behave as though nothing remotely dramatic happened.
Hardy Geraniums: The Most Forgiving Plant You Can Split
If hostas are the tidy introduction to division, hardy geraniums are the reassuring friend who tells you not to overthink it. Many form spreading, fibrous-rooted clumps that separate readily and regrow with startling goodwill. They are excellent plants for beginners because they tend to respond to sensible treatment without demanding surgical precision.
That does not mean every cranesbill is identical. Some form neat mounds, others travel through the border on spreading stems, and a few make a more substantial crown over time. But the broad principle remains the same: look for young, vigorous growth around the outside, preserve a good root mass with each piece and do the work when weather is mild enough for recovery.
Choose spring or post-flowering regrowth
Spring is a dependable time to divide hardy geraniums. Fresh growth is beginning, roots can establish into moist soil and the plant has a full season ahead. Lift and split before it has become a large, flowering mound, and it will usually settle quickly.
The other useful opportunity comes after flowering, when many cranesbills benefit from a firm cutback. This encourages fresh foliage and can produce a tidier plant. Once regrowth is underway and the weather is not punishingly hot or dry, divisions can be made. The key is to be honest about your watering capacity. A divided geranium in a dry summer will not look after itself merely because its ancestors were tough.
Lift with a fork where possible
Start by cutting back any lank, tired stems if they are in the way. This makes the root area easier to handle and reduces water loss after replanting. Slide a fork into the soil around the clump and ease it up gradually. A fork often threads between roots rather than slicing through them, which gives you more living material to work with.
Once the plant is lifted, shake or tease away loose soil. Younger clumps may pull apart in your hands into sections that already have plenty of roots attached. It can feel suspiciously easy. Enjoy it. Older, tighter plants may need two forks placed back-to-back at the centre and gently levered apart. If that is still not enough, use a sharp spade or knife for a clean division.
| Plant group | What you are looking for | How it usually separates | Most useful division moment |
|---|---|---|---|
| Hosta | Distinct growing points on a crown | By hand where loose, or with a clean knife cut | As fresh shoots appear in spring |
| Hardy geranium | Healthy fibrous roots and fresh basal growth | Teased apart by hand or levered with forks | Spring or after a post-flowering cutback |
| Ornamental grass | Vigorous outer growth and a viable crown | Forks, spade or saw for dense clumps | According to whether it is cool- or warm-season |
Keep the best material and be unsentimental about the rest
Older centres can become woody, sparse or weak. There is no prize for replanting the least promising piece simply because it exists. Select divisions from vigorous outer growth, each with healthy roots and shoots. Compost tired, diseased or clearly unproductive material rather than giving it a ceremonial new home at the back of the border.
When replanting, spread roots into the planting hole rather than folding them into a tight ball. Backfill with the excavated soil, firm gently and water thoroughly. Hardy geraniums generally dislike sitting in permanently waterlogged ground, so do not bury the crown deeply in a damp hollow. If your soil is very heavy, improving the surrounding planting area with organic matter is usually more beneficial than fussing endlessly with the division itself.
It is also worth giving new geranium divisions a little space. Because they look modest when first replanted, it is tempting to pack them close together. Then, after a season of healthy growth, they meet in the middle and you are back where you began. Gardeners have been repeating this cycle since time began. We call it optimism.
A useful border-making trick
Use divisions of the same geranium to repeat a colour or leaf shape through a border. Repetition gives a mixed planting a more deliberate feel, even if the original plan was mostly "that gap looks a bit bare".
Ornamental Grasses: The Division That Demands Muscle — but Is Worth It
Ornamental grasses are wonderfully generous plants. They bring movement, texture and structure when many flowering perennials are resting. They catch low light, sway in wind and make a border feel less static. They also have a talent for becoming formidable clumps. A mature grass can appear innocent from a distance, then reveal itself as a dense, determined mass the moment you attempt to lift it.
This is where timing matters most. The basic distinction is between cool-season and warm-season grasses. Cool-season grasses begin growing in the cooler parts of the year and can generally be divided in autumn or early spring. Warm-season grasses wait for spring warmth before making serious growth, so they are best divided once they are clearly waking up. Dividing them in cold, dormant conditions leaves them sitting in soil before they are ready to recover.
Do not divide by appearance alone. A grass with last year's dried foliage can look equally dormant whether it is a cool-season or warm-season type. Identify it first, then work with its growth pattern. This is the difference between a productive task and a long period of wondering why nothing is happening.
Cool-season grasses: autumn or early spring
Carex and Deschampsia are common examples of grasses that remain active in cooler conditions. In a mild early autumn, they can be divided while soil still has some warmth and moisture. Early spring is another good option, especially if your winter tends to be wet or harsh. You are looking for a plant that can quickly respond with root growth rather than one that is heading into a long, cold pause.
Stipa tenuissima and Festuca are sometimes treated differently from robust clump-forming grasses because their habit can be shorter-lived or less inclined to make a large divisible crown. If a grass is loose, sparse or has a small root system, it may be better rejuvenated by replacing it than by forcing it into multiple weak pieces. Division is a useful technique, not a moral obligation.
Warm-season grasses: wait for visible life
Miscanthus and Pennisetum are classic warm-season grasses. Leave their old stems standing through winter if you enjoy the structure and if they are not collapsing across paths. Then cut back old growth before new shoots become entangled with it. When the plant is clearly beginning to grow in spring, you can lift and divide it with much more confidence.
Hakonechloa also benefits from being handled in spring rather than in the coldest part of the year. Its elegant growth can make it seem delicate, but a well-rooted clump can be divided successfully when it is ready to grow. Again, the plant gives you the cue. Work with it, not against it.
How to split a grass clump without losing the will to live
Start by cutting back old foliage if it is still present and in the way. Tie the leaves loosely first if needed, then trim them down carefully. Gloves and long sleeves are sensible with sharper-leaved grasses. Remove debris from around the base so you can see where the crown meets the soil.
Dig around the outside of the clump with a sharp spade, working gradually rather than trying to force one heroic lift. Once it is loose, use the spade or fork to lever it from below. Large clumps may be easier to shift in sections. There is no rule stating that you must lift the entire thing in one magnificent piece while your back provides a concerned running commentary.
With the clump out of the ground, inspect it. Healthy material is generally found around the outer edges, where new shoots and firm roots are active. The centre of an old clump can become woody or exhausted. Remove dead material, then divide the healthy crown. Two forks back-to-back can prise open some grasses. Others need a sharp spade driven through the root mass. Particularly dense crowns may require a pruning saw or old bread knife.
Prepare new positions first
Grass roots should not sit exposed while you clear a planting hole. Have space ready, especially if dividing on a breezy spring day.
Keep divisions substantial
A grass division needs enough crown and roots to make a convincing recovery. Avoid shaving a clump into slivers simply to make the number of plants look more impressive.
Water deeply after planting
Grasses may look tough above ground, but newly divided roots still need reliable moisture while they establish in their new positions.
Label if you are uncertain
Warm-season and cool-season timing is easy to forget next year. A label now avoids future detective work.
Replant grass divisions at their original depth and firm them well. A shallowly replanted grass can rock in wind before roots establish, while a deeply buried crown is more likely to struggle. Water the soil thoroughly and mulch around the base, keeping the crown itself clear. Then give the plant time. Grass divisions may look static initially, especially if spring is cool, before suddenly making growth when conditions suit them.
Aftercare That Makes or Breaks Your New Divisions
Most failures after division are not caused by the act of splitting. They happen afterwards, when a newly disturbed plant dries out, sits in unsuitable soil or receives no attention during the period when it is trying to rebuild roots. It is not a dramatic lesson, but aftercare is the part that turns a successful afternoon's work into plants that are still thriving next year.
Water immediately after planting. This settles soil around the roots, reduces air pockets and helps the plant make contact with its new surroundings. Do not merely sprinkle the leaves and consider the matter dealt with. Aim water at the soil around the root zone and give it time to soak in.
For the first few weeks, check newly planted divisions regularly. Push a finger into the soil nearby rather than judging by the surface alone. Soil can look dry on top whilst still holding moisture beneath, particularly under mulch; conversely, a light shower can make the surface look encouraging whilst the root zone remains thirsty. Plants do not care what the paving looks like.
During dry spells, water deeply enough to moisten the root area rather than applying frequent tiny drinks. The exact need will depend on your soil, exposure, rainfall and the plant itself. Sandy soil dries quickly. Clay soil holds moisture but can become compacted. A sheltered border under a wall may receive much less rain than you assume. This is why a little observation is more valuable than a rigid watering schedule.
Mulch around, never over, the crown
A layer of garden compost, leaf mould or bark around a new division can make a real difference. Mulch conserves moisture, moderates soil temperature and suppresses weeds that would otherwise compete with a recovering plant. Keep it clear of the crown and emerging shoots, however. Piling mulch directly over the centre creates a damp, airless spot where rot can begin.
Do not be overly generous with fertiliser at planting time. A division's first task is making roots. Rich feeds can encourage lush top growth before the root system is ready to support it. In reasonably fertile garden soil, compost used as mulch is often enough. If your soil is very poor, improve the wider planting area rather than placing a concentrated pocket of fertiliser beneath a vulnerable crown.
Protect from accidental damage
Newly divided plants are easy to forget because they can look small and insignificant in a large border. Label them. This helps you remember what they are, but it also prevents a later weeding session from becoming unexpectedly efficient. A short cane beside a hosta division can stop a wandering boot, a dog or an enthusiastic helper from flattening the emerging shoots.
Hostas may need particular protection from slugs and snails when new growth appears. The exact approach is personal and depends on your garden, but inspect regularly. A healthy division can be set back quickly if every emerging leaf is treated as a restaurant opening. Geraniums and grasses tend to be less tempting in this regard, though all newly planted material benefits from being checked.
New division aftercare checklist
- Water thoroughly as soon as the division is planted.
- Check soil moisture regularly while roots establish.
- Mulch around the plant, leaving the crown uncovered.
- Keep weeds from competing around the base.
- Label each division before memory becomes unreliable.
- Watch for pest damage, wilting or waterlogging and respond early.
It is normal for a newly divided perennial to look less impressive for a while. It has been moved, cut apart and asked to begin again in a new piece of ground. A brief pause in flowering or a smaller first flush of growth is not failure. If leaves are firm, shoots are appearing and the crown remains healthy, allow the plant time to settle.
The temptation to over-care
Do not keep digging around a new division to check root growth. Do not soak permanently wet soil because the plant seems nervous. Do not feed heavily in the hope of speeding things up. Consistent moisture, reasonable conditions and a little patience are usually the best treatment.
Common Problems — and How to Avoid Them Next Time
Even experienced gardeners occasionally divide at the wrong moment, underestimate a grass clump or discover that the "small section" they planted is actually a full-scale perennial with ambitions. The good news is that most issues are preventable once you know what to watch for.
The division wilts immediately
Sudden wilting is usually a water-balance problem. Roots have been disturbed, foliage is losing moisture and the plant cannot keep up. Move quickly: water the soil deeply, shade the plant temporarily if it is in fierce sun and remove some damaged or excessive foliage if that is appropriate for the species. For future divisions, choose a cooler day, water beforehand and prepare planting holes before lifting.
The centre was dead or rotten
A dead centre is often the exact reason division was needed. Remove it. Do not feel obliged to preserve every portion of the original clump. Keep the firm, healthy outer pieces with active roots and shoots, then replant those. If rot is widespread, consider whether drainage, planting depth or prolonged wet conditions are contributing factors before replacing the plant in the same spot.
The grass barely grows after division
Check whether it is a warm-season grass that was divided before soil and weather had warmed sufficiently. If so, patience may be required. Also consider whether the divisions were made too small, allowed to dry out, or planted in a spot with unsuitable light. Grasses are not all interchangeable. A plant chosen for a sunny, open position will not necessarily thrive in a shaded, damp corner simply because there was a gap there.
The plant is growing but has not flowered
That can be entirely normal after division. A perennial often directs energy into roots and new foliage before it returns to its usual flowering performance. Avoid trying to force the issue with strong feed. Give it a season to settle, keep it watered in dry weather and assess again once it has had time to establish.
I made too many divisions
This is not really a problem, although it can become one if every spare plant ends up languishing in a pot. Plant the best pieces promptly, pot up only what you can care for and offer genuinely surplus divisions to neighbours, friends, local gardening groups or plant swaps. A named hardy geranium or handsome hosta is a much more welcome gift than an apologetic carrier bag of anonymous roots.
Questions Gardeners Ask About Dividing Perennials
It is usually better to let a newly bought perennial establish first. A plant that has just been planted out is already adapting to new soil, light and moisture conditions. Once it has formed a healthy clump, division becomes a sensible way to increase it.
No. Divide plants that are overcrowded, losing vigour at the centre, outgrowing their space or needed for propagation. Some perennials dislike disturbance, and others are better increased by cuttings, seed or layering. The method should suit the plant rather than the gardener's enthusiasm.
Yes, provided the pot is large enough for the roots and has free-draining compost. Potting can be useful when the intended border space is not ready or when you want to give divisions away later. Remember that potted plants dry out faster than those in open ground.
Only remove dead, damaged or obviously rotten roots. Healthy roots are the plant's recovery system, so there is no benefit in shortening them merely to make the division look tidy. Spread them naturally into the planting hole where possible.
Hostas can survive autumn division in suitable conditions, but spring is generally easier because emerging shoots show the crown clearly and the plant has a growing season ahead. In mid-October, it is usually more sensible to mark the clump and plan the job for spring.
A healthy hardy geranium is often the most forgiving starting point, particularly a clump that has spread beyond its allotted space. Hostas are also very approachable when spring shoots make the crown easy to see. Leave the oldest ornamental grass clump until you have a little confidence and a clear afternoon.
The Best Way to Start: One Clump, One New Border Opportunity
Division can sound like one of those gardening skills that requires confidence before you begin. In reality, confidence tends to arrive after the first successful attempt. Start with a healthy, established plant you understand. Choose a day with kind weather. Prepare the new homes before lifting the old clump. Then work steadily, without trying to turn a straightforward propagation job into a test of character.
For gardeners reading this in October, use the quieter season to plan. Notice which grasses are cool-season types and whether a mild autumn window might suit them. Mark hostas for spring division. Watch hardy geraniums and decide which ones could be repeated elsewhere. Clear planting spaces, improve soil and keep a few labels ready. These small preparations make the active season much easier.
Come spring, hostas will offer their emerging shoots as a practical map. Geraniums will begin making fresh growth and will usually forgive a little clumsiness. Grasses will tell you, if you pay attention, whether they are ready to wake and grow. The garden gives plenty of signals. We simply get better at reading them.
GardenScout's takeaway
Dividing perennials is one of the most useful free skills in gardening. Do it at the right point in the plant's growth cycle, keep each division healthy and substantial, replant without delay, and give it reliable aftercare. The result is not just more plants. It is a more vigorous original clump, a more generous garden and the deep satisfaction of having made something useful from what you already grow.