
Hostas and Slugs: How to Grow Them Without the Holes
A hosta-first defence plan built around sensible pot placement, copper barriers, gritty surfaces and leaves that are simply less tempting to a hungry slug.
It is October, which means the hostas are beginning their annual disappearing act. Leaves that looked magnificent in June are yellowing, folding and quietly getting on with the business of becoming compost. The slugs, meanwhile, are still about whenever the weather is mild and damp. They have not received the memo that the growing season is winding down.
This is actually a useful moment. Once the foliage has died back, you can see the pots, compost surface and surrounding paving without a great green canopy concealing everything. You can clean up, lift containers, remove places where slugs shelter and decide which hostas earned their place this year. Come next spring, those small preparations make a larger difference than a panicked search for a remedy after the first shoots have already been perforated.
There is no single magic answer to hostas and slugs. Anyone who promises one has either never grown hostas through a British spring or has a suspiciously dry garden. The reliable approach is a layered one: start with varieties whose leaves are less easily damaged, make the route to the plant awkward, use a physical barrier properly, and keep the top of the pot as unwelcoming as possible. Each measure catches the weaknesses of the others.
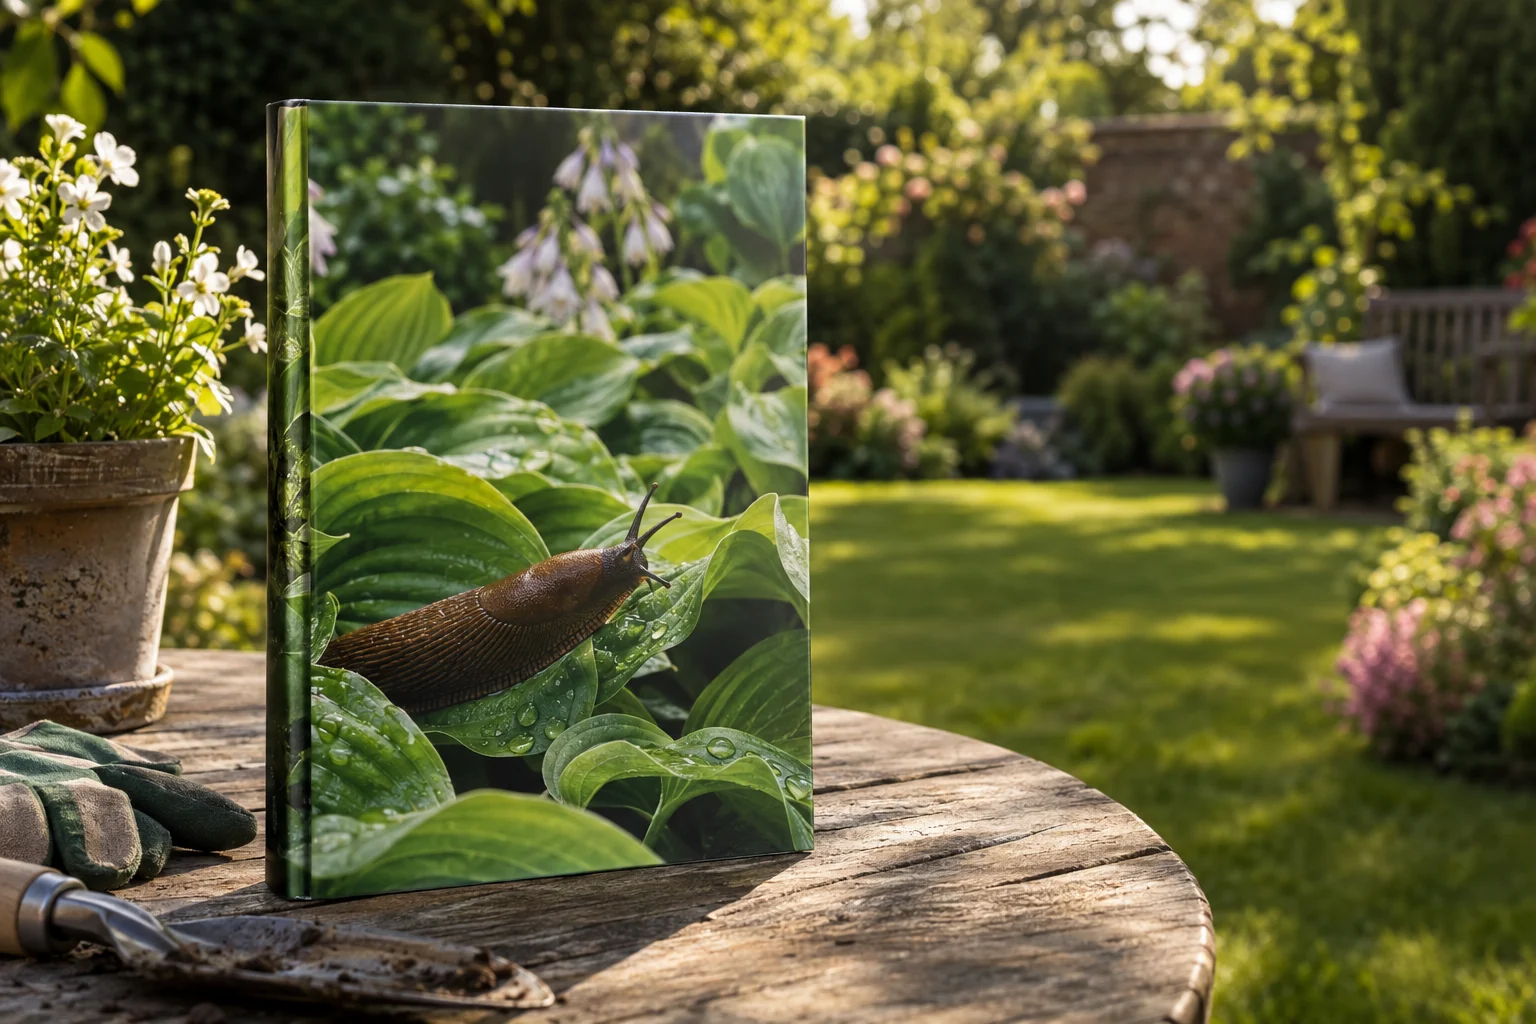
Why Hostas and Slugs Are the Garden's Most Infamous Rivalry
A hosta is a very generous plant. Give it shade or gentle light, reasonable moisture and a decent-sized pot, and it responds with a mound of handsome leaves that makes almost every neighbouring plant look like it should try a little harder. This generosity is, unfortunately, visible to slugs too.
The classic damage is instantly recognisable: irregular holes through the centre of leaves, ragged bites at the edge, and silvery trails that appear in the morning as if someone has been dragging a tiny tube of metallic toothpaste around the patio. A newly unfurled leaf is particularly vulnerable. It is soft, moist and close to the compost, so a slug can do a remarkable amount of damage before breakfast. You may have watched a pristine shoot open one day and found it looking like lace the next. It is enough to make a gardener question their life choices.
Hostas are not all equally vulnerable. Thin, smooth leaves tend to be easier for slugs to feed on than substantial leaves with a puckered surface or a waxy bloom. That does not mean a thicker-leaved hosta is invincible; a determined slug is not much troubled by our expectations. But it changes the odds, and gardening with better odds is usually more pleasant than gardening by apology.
The useful way to think about slug control
Do not aim to create a perfectly slug-free garden. Aim to make your hostas the most inconvenient meal available. A raised pot, an intact copper barrier, a dry gritty surface and a tougher-leaved variety together are far more persuasive than any one of them alone.
The hosta-specific part matters. General slug advice often concentrates on reducing the overall population in a garden. That can be helpful, but it does not always protect the particular plant you care about most. A hosta in a container has its own routes of access, its own damp compost surface and its own vulnerable period when shoots are emerging. Treat it as a small defended garden rather than one more plant in a broad campaign.
What to do now: as foliage collapses in autumn, remove it from the pot rather than leaving a damp skirt around the crown. Clear fallen leaves and debris from beneath containers too. This does not solve next year's problem on its own, but it removes cosy hiding places just when slugs are looking for them.
Know Your Enemy: Slug Behaviour in a Hosta Pot
Slugs are often described as nocturnal, which is true enough to be useful but not quite the whole story. They are most conspicuous after dark or in wet, overcast weather because moisture is central to how they travel. Their body needs a mucus layer to glide over a surface. When conditions are dry, exposed journeys are more difficult and risky. When a mild night follows rain, the patio becomes a motorway and your hosta is apparently the service station at the end of it.
That is why a container can be both a blessing and a trap. It lifts the plant above surrounding soil, which gives you a route to defend. Yet it also concentrates the things a slug likes: moist compost, sheltered space below a spreading clump, decaying leaf matter and often a nearby wall, paving edge or bench that provides cover. If a pot sits directly on soil, mulch or a crowded bed, the distinction between garden and container becomes rather theoretical. The slug simply strolls in.
Slugs also follow established routes. A damp run under a pot rim, a trailing leaf touching the paving, a stem leaning against a wall, or a plant label resting against the side can all become a bridge. This is why gardeners sometimes swear a barrier has "stopped working". Often it has not. Something has given the slug a way around it.
Moisture is the invitation
Hostas naturally prefer reliable moisture, but permanently sodden compost and damp debris around the pot create particularly easy travelling conditions. Water the compost rather than repeatedly soaking foliage and paving around it.
Contact points defeat good barriers
A leaf touching the ground, a label leaning across a rim or neighbouring foliage pressing against the pot can become a slug bridge. Check these after wind and rain, not just when you first set the container up.
Weather changes the pressure
Wet spells favour slug activity, whilst dry conditions make exposed movement harder. Your defence should stay useful in both, which is why a physical barrier and good placement are more dependable than a single weather-sensitive tactic.
Emerging shoots are the weak point
In spring, hosta shoots are low, tender and easy to reach. A plant can look well protected once its leaves are broad and elevated, yet suffer damage before it has properly opened.
There is another awkward detail: not every threat is obvious on the outside of the pot. Slugs can shelter in crevices around the base, in drainage areas, beneath a pot saucer or in the compost itself. A pot left undisturbed for months can become less of a container and more of a furnished flat. That is why lifting and inspecting containers is so useful, especially at the end of the season and again before growth starts.
Do not turn this into an invitation to obsessively dismantle every pot in the garden. You have better things to do. The point is simply to understand that a copper strip placed around the rim is only one part of the route. It cannot protect a pot that offers three other ways in.
Choosing Hosta Varieties With Better Natural Resistance
Variety choice is the quietly sensible part of slug control. It is not as dramatic as laying a barrier, and it does not give you the same pleasing sense of immediate action. Yet choosing a hosta with a heavier leaf can save a great deal of frustration over the years.
The three traits worth looking for are leaf thickness, texture and a waxy surface. A thick leaf is harder for a slug to damage than a thin one. A deeply textured or puckered leaf is less straightforward to rasp than a flat, smooth surface. A waxy bloom can make a leaf less inviting as well. None of these properties is a force field. But together they often make the difference between a leaf with the occasional small bite and one that has been converted into a horticultural colander.
You may see the word seersucker used in descriptions of hosta foliage. It refers to the raised, puckered texture that gives certain leaves their quilted or heavily veined appearance. It is a useful clue, particularly if you have had repeated trouble with smooth-leaved plants. It also happens to look lovely, which is fortunate. Gardening is much easier when the practical answer is not ugly.
'Halcyon' is often chosen for its blue-toned foliage and waxy character. It is a useful candidate where slug damage has been a repeated irritation, particularly if you also like cool foliage colours in shade. Blue hostas can lose some of their bloom as the season progresses or if foliage is handled roughly, so admire them from a respectful distance where possible. Like most good-looking things, they have their preferences.
'Sum and Substance' is known for very large, substantial leaves in a brighter tone. It has the sort of presence that allows one plant to anchor a shaded area or make a statement in a generous container. The leaves are not a promise that slugs will walk politely past, but their heft makes this an appealing choice for gardeners who want a bolder hosta without choosing something delicate and thin.
Hosta sieboldiana 'Elegans' is valued for its blue-grey foliage and pronounced texture. It is the sort of hosta that rewards looking closely: the puckering catches the light and gives the plant depth even in a quiet corner. That heavily textured character is useful in a slug-aware planting plan, especially when teamed with a pot defence rather than asked to perform miracles alone.
'June' is another widely grown hosta with attractive variegated foliage. Its colour pattern makes it popular in containers where each leaf can be seen properly, but variegation is not itself a defence. If you choose it, give it the same careful placement and barrier treatment as any hosta you particularly want to keep unspoilt.
Buy with your fingers as well as your eyes
When choosing a hosta, inspect the leaf character. A plant with visibly thick, textured or waxy foliage is often a more sensible starting point than one selected solely because the label photograph made your knees go weak.
It is worth stressing that local conditions matter. A variety that performs beautifully in one garden may be chewed in another with heavier slug pressure, more shade, wetter ground or a convenient hedge full of hiding places nearby. Treat resistance as a head start, not a warranty. The ideal approach is to select tougher foliage for exposed positions and reserve your more delicate favourites for the best-defended pots close to the house.
The Container Advantage: Make the Journey Difficult
Growing hostas in containers is not just a way to show off their foliage at eye level. It is a structural advantage. A pot creates a defined boundary between plant and garden, and defined boundaries are useful because you can improve them. You can raise the pot, clean around it, fit copper tape around it and inspect every likely route of access without crawling through a border at dusk with a torch and a deteriorating sense of humour.
The first improvement is simple: lift the pot off the ground. A raised container does not stop a slug from climbing, because slugs are more capable than we would like to admit. But it removes the easy, hidden route directly from soil to foliage and makes the climb exposed. Once you add a properly fitted copper barrier and a gritty surface on top of the compost, the container becomes a sequence of inconveniences rather than a buffet with a staircase.
Use pot feet, a stand or another stable support that allows you to see beneath the pot. The aim is not to build a lofty monument to hostas. It is to stop the pot base sitting permanently in dampness and debris. A raised pot also drains more freely, which benefits hosta roots provided you continue to water sensibly in dry periods.
Position is just as important as elevation. Do not press a hosta pot tightly against a wall and then allow other pots, trailing plants or stored garden clutter to crowd around it. A small gap is useful. It lets air move, makes inspection easier and prevents foliage from making contact with neighbouring plants. Think of it as giving the hosta personal space. It deserves some.
Glazed ceramic
A smooth, non-porous outer surface is straightforward to keep clean and works well with a copper tape barrier. Choose a pot with sensible drainage and enough root room for the plant, rather than treating the container as a decorative afterthought.
Fibreglass
Lightweight, smooth containers are useful where you want the raised-pot strategy without creating something impossible to move. They can be especially practical on patios, balconies and near doorways.
Terracotta
Terracotta is perfectly workable, although its surface is less smooth and can weather over time. A clean, dry band where tape is applied helps it adhere more reliably.
Wooden planters
Wooden joints, cracks and damp shaded edges can provide shelter. They are not impossible to use, but they are less helpful when the goal is to make a hosta pot simple to inspect and defend.
A small maintenance habit with a large payoff: every time you water, glance at the rim, the foliage and the space beneath the pot. You are looking for a leaf touching the ground, a label leaning against the side, fallen debris, peeling tape or a pot that has settled into damp material.
Copper Barriers: The Detail That Makes Them Work
Copper barriers have been used by gardeners for years because copper can deter slugs when they contact it. The interaction with the slug's mucus is unpleasant enough to encourage it to turn away. It is a deterrent rather than a killing method, and that is exactly what makes it useful around a prized hosta: the aim is to persuade the slug to choose another route before it reaches the leaves.
It is important not to treat any small strip of copper as a guaranteed solution. A barrier only works if it forms a complete route around the pot, stays clean enough to function and cannot be bypassed by another bridge. A tape that has lifted at one end, disappeared beneath compost, or been crossed by a dangling leaf is rather like locking your front door whilst leaving the patio doors open.
Choose tape wide enough to create a meaningful contact band rather than the narrowest strip you can find. Apply it around the outside of a clean, dry pot, ideally where rain splash and soil are less likely to cover it. Press it firmly as you go, especially over curves and textured surfaces. On a pot with a pronounced rim, fit the tape below the rim rather than across an awkward edge where it may peel.
Before fitting it, wash away dried compost, algae and grime. Copper is not a decoration; it needs to remain exposed. Through the season, inspect the strip after prolonged wet weather, after moving pots and whenever you notice new damage. You may need to replace sections that have peeled or become too dirty to be useful. It is a little bit of maintenance, but far less tedious than watching a favourite hosta get steadily eaten.
| Barrier approach | Where it works best | Main strength | What can undermine it |
|---|---|---|---|
| Copper tape around a pot | Raised containers with a clear outer surface | Creates a physical deterrent on the direct climbing route | Gaps, peeling edges, dirty tape and foliage bridges |
| Copper mesh around a pot | Containers where a more textured, flexible barrier suits the shape | Can be arranged around irregular surfaces | Must still be continuous and kept free of bridging material |
| Gritty compost mulch | On the surface of hosta containers | Makes the final approach to emerging shoots less welcoming | Becomes less useful if buried, constantly wet or too thin |
| Raised pot with clear surroundings | Patios, paths and open areas around the house | Removes hidden access and makes checks easy | Still needs a barrier if slugs can climb the pot |
Copper is at its most convincing when it is part of a system. On its own, it asks a lot of one narrow band. Combined with a lifted pot, no touching foliage and a coarse mulch on the compost, it has much less work to do. The slug has already had a difficult journey; copper is the final nudge that encourages it to reconsider.
Grit, Gravel and Dry Mulches: The Surface Fortress
The compost surface of a hosta pot is often overlooked. It should not be. In early spring especially, the crown and emerging shoots are close to the surface, exactly where a slug wants to be. A top dressing changes that final few centimetres from easy damp compost into a more awkward surface.
Horticultural sharp grit is a useful choice because its angular particles create a rougher route than smooth gravel. Crushed granite can serve a similar purpose, and coarse perlite is another lightweight material sometimes used in container mixes and surface dressings. The key word is coarse. A scattering of very fine material may look neat but does not create much of an obstacle. Likewise, smooth pea gravel tends to be more decorative than defensive.
Apply a proper layer over the compost rather than a token sprinkle. The mulch should cover the surface around the crown without being heaped against the emerging shoots. Leave enough room that you can still water steadily and observe what is happening. If water starts running straight off the surface, slow down and apply it in stages so it reaches the compost below. Hostas do not appreciate being kept dry merely because we are trying to outwit a mollusc.
Grit works best as the last line, not the only line
A coarse top dressing is especially helpful around emerging shoots, but it is more effective when slugs have already had to negotiate a raised pot and a copper barrier. Layered defences are the point; no one tactic needs to carry the entire campaign.
Grit also has visual benefits. A clean surface makes hosta foliage feel more considered, particularly in glazed containers. It can reduce compost splash during rain and makes it easier to spot fallen leaves, stray labels and the occasional obvious slug. It is one of those gardening jobs that looks rather fussy while you are doing it and quietly improves everything afterwards.
Do remember that a gritty mulch is not permanent. Wind, watering, birds and enthusiastic blackbirds can shift it. Organic debris accumulates. Moss may creep in around the edges. During autumn, clear the surface as leaves die back. Before spring growth begins, inspect it and top it up if it has become patchy or buried. This is a much better use of a mild late-winter afternoon than waiting until the first hosta noses appear and then trying to arrange gravel between them like a tiny civil engineer.
Comparing Your Hosta Defence Arsenal
There are several ways to tackle slug damage, and it is tempting to keep adding them until the hosta area looks like a low-budget science experiment. A calmer approach is to understand what each method contributes. Some deter access. Some make the compost surface less attractive. Some are aimed at slug populations more generally. They do not all have the same role, and they do not all suit every garden.
Copper tape is targeted. It makes the most sense on individual containers where you can keep the barrier continuous. Grit is inexpensive, simple and useful as an additional obstacle at the top of the pot. Biological controls, where suitable and used according to their instructions, are intended to work in the growing medium rather than creating a physical wall. Pellets are another option some gardeners consider, but should be selected and used carefully, especially where wildlife, pets and children use the garden.
What a layered system does well
- Focuses effort around the plants most likely to show damage.
- Uses physical changes rather than relying on a single treatment.
- Makes inspection straightforward, particularly with raised pots.
- Allows you to use tougher hosta varieties as part of the solution.
- Can be adjusted when the weather or slug pressure changes.
What it still cannot do
- Guarantee that no slug will ever reach a hosta.
- Protect a pot that has leaves or labels forming a bridge.
- Remove the need for spring checks when shoots are emerging.
- Make a delicate, smooth-leaved hosta behave like a heavily textured one.
- Stay effective forever without occasional cleaning and maintenance.
| Method | Best role in a hosta plan | Strength in wet weather | Maintenance to expect | Best paired with |
|---|---|---|---|---|
| Copper barrier | Stopping climbing access to a container | Remains useful if clean, intact and not bridged | Check adhesion and wipe away dirt or compost | Raised pot and clear surroundings |
| Sharp grit or crushed granite mulch | Making the compost surface less hospitable | Less persuasive when constantly wet or covered in debris | Top up and clear organic matter | Copper barrier and careful watering |
| Biological control | Supporting wider slug management where appropriate | Depends on conditions and correct use | Follow the product directions closely | Physical defences around prized pots |
| Slug pellets | A limited additional control where chosen responsibly | Suitability depends on the product and conditions | Use only as directed and reassess need regularly | Physical barriers, not instead of them |
My preference is to start with the least complicated measures that keep the plant presentable: a raised, clean pot; a continuous copper barrier; a coarse mulch; and a variety with good leaf substance. Those measures are visible, easy to check and unlikely to interfere with the rest of the garden. If slug pressure remains fierce, then consider additional control in a way that suits your garden and its wildlife.
Seasonal Timing: The Jobs That Matter Most
Hosta defence is easiest when it follows the plant's calendar. The current job, in October, is tidying and planning. The urgent work comes later, before new growth is exposed. By the time you see fresh shoots pushing up in spring, you want the container already in order, not halfway through a rescue operation with a roll of tape in one hand and a slug on the patio in the other.
Autumn: clean, lift and learn
As the foliage yellows and collapses, remove it from the pot. Do not leave a moist blanket of dying leaves around the crown. Clear the pot surface, check beneath the container and remove debris from the immediate area. If the pot has been sitting directly on soil, mulch or a permanently damp patch, decide now how you will raise it next year.
This is also the time to make an honest note of which hostas suffered. If a smooth-leaved favourite was repeatedly shredded whilst a textured hosta nearby stayed presentable, that information is worth more than a glossy catalogue description. Move the vulnerable plant into the most protected location next season, or choose a tougher variety for that particular spot.
Winter: prepare without disturbing unnecessarily
Hostas are dormant, but your containers still deserve a quick look during mild weather. Check that pots drain and are not sitting in water. Remove fallen leaves that gather beneath them. If you are repotting or dividing a hosta, use the opportunity to inspect the pot thoroughly and start the new season with clean edges and fresh thinking about placement.
Do not be tempted to keep everything immaculate at the expense of the wider garden. Wildlife needs cover elsewhere. The point is not to strip the garden bare; it is to avoid creating a damp, sheltered slug hotel immediately around the hosta pot.
Late winter and early spring: set the defences before shoots rise
Before growth begins, inspect the compost surface and pot base. Renew copper tape if it is lifting, dirty or damaged. Re-establish the gritty top dressing. Raise containers onto stable feet or stands if they are not already elevated. Check for bridges: neighbouring pots, trailing foliage, labels, canes, wall contact and clutter tucked against the side.
This is the moment to be thorough. Once pointed hosta shoots are emerging, it becomes harder to work around the crown without damaging them. Prevention is not glamorous, but it is very satisfying when you later notice the first leaves opening cleanly.
Spring and early summer: inspect little and often
Emergence is the period to be most attentive. A quick evening look is often enough to spot trouble before it becomes serious. Look beneath pot rims and around the base, not just at the leaves. Reposition anything that is touching the container. Water the compost carefully and avoid creating a permanently sodden halo around the pot.
As the leaves expand, make sure none rests on paving, soil or neighbouring plants. This sounds trivial until you realise how often one large leaf provides a perfectly convenient bridge. Hostas are generous plants, remember. They will happily offer a slug a ramp if we let them.
The spring checklist
Raise the pot. Clean the outside. Fit or refresh the copper barrier. Cover the compost surface with a coarse mulch. Remove bridges. Then inspect regularly while shoots are tender. That sequence is the heart of a practical hosta defence plan.
A Practical Set-Up for One Hosta Pot
If you have read this far and are wondering where to begin, start with one hosta you particularly care about. It might be the expensive one, the sentimental one, or simply the one in the pot by the back door that annoys you every time it develops holes. Set that plant up properly, observe the result through a season and then extend the system to the rest.
- Choose a suitable container. Use a pot with drainage and enough space for the hosta to develop without becoming permanently dry. A smooth-sided material is easiest to clean and defend.
- Lift it clear of the ground. Use stable feet or a stand so that you can see and clean beneath it. Avoid tucking it among dense planting or clutter.
- Keep a clear perimeter. Leave a visible gap around the pot. Ensure no foliage, label, cane or neighbouring plant touches it.
- Fit a continuous copper barrier. Apply it to a clean, dry outer surface and check that there are no gaps or peeling ends.
- Dress the compost surface. Use a coarse, sharp material that remains visible around the crown rather than a thin decorative scattering.
- Water thoughtfully. Keep the compost reliably moist for the hosta, whilst avoiding a constantly wet, debris-filled zone around the base.
- Inspect during vulnerable growth. Pay closest attention as shoots emerge and leaves begin to unfold.
The beauty of this arrangement is that it does not make the garden look defensive. A well-chosen pot, a neat grit surface and a healthy hosta look intentional. Visitors will see the leaves. They will not see the small bits of strategy that kept those leaves looking that way. That is usually the nicest kind of gardening success.
Common Mistakes That Leave the Door Open
The most frustrating hosta problems are often caused by small details. The gardener has bought copper tape, added grit and chosen a handsome pot, yet the leaves are still damaged. Before abandoning the whole approach, work through the simple failures below. They are common because they are easy to miss.
Using one defence in isolation
Copper without pot lifting, or grit without a barrier, can help but asks one measure to solve every route. Combine them so each one reduces the pressure on the next.
Allowing foliage to touch the ground
A beautiful leaf drooping onto paving can look romantic. It can also become a ladder. Lift, reposition or move the pot before it creates an easy crossing.
Forgetting beneath the pot
A raised pot only helps when the space underneath stays open enough to inspect. Damp piles of leaves, a buried saucer or thick mulch around the base undo much of the benefit.
Leaving tape to peel and collect grime
A barrier needs occasional attention. If the tape is lifting or hidden beneath compost splash, clean or renew it before deciding copper does not work in your garden.
Choosing every hosta for looks alone
There is nothing wrong with a delicate-leaved favourite, but place it where your defences are strongest. Let tougher, thicker and more textured hostas take on the less protected spots.
It is also worth accepting that old damage does not disappear. Once a leaf has holes, it will remain holey. The question is whether new leaves are emerging cleanly and whether the plant has enough intact foliage to look good overall. Do not judge a defence solely by the battered leaves that were already present when you put it in place. Look at the growth that follows.
Hosta and Slug Questions Answered
No. Thick, textured and waxy foliage can be more resistant to damage, but no hosta should be treated as guaranteed slug-proof. Think of leaf texture as a useful advantage that works best alongside pot placement and barriers.
Copper is used as a deterrent. Contact with copper is unpleasant for slugs, encouraging them to turn away. For hosta growers, that is the useful part: it helps prevent the slug reaching the foliage.
Slugs can climb pots. Check whether the pot sits directly on damp ground, whether foliage touches another plant or surface, whether a label creates a bridge, and whether the copper barrier has gaps or has become dirty and lifted.
You can use a decorative top dressing, but smooth rounded gravel is generally less useful as a hostile surface than coarse, angular material. If slug defence is the aim, choose the surface for function first and appearance second.
Hostas are outdoor garden plants and generally look best where they can enjoy suitable shade, moisture and seasonal conditions. A well-defended outdoor container is a more practical answer than trying to turn the kitchen into a hosta sanctuary.
The GardenScout verdict
The best way to grow hostas without the holes is not to wage a dramatic war on every slug in the garden. It is to make a smart little fortress around each treasured plant. Choose substantial, textured or waxy foliage where you can. Lift containers off the ground. Keep their sides and surroundings clear. Add a continuous copper barrier and a coarse top dressing. Then pay attention when shoots first emerge.
Start now, whilst the leaves are dying back and the evidence is still visible. By next spring, your hostas will have the sort of layered protection that gives them a fighting chance to open beautifully — and gives you far fewer reasons to inspect every leaf with the expression of a disappointed detective.