
Garden Sieves and Riddles: Getting Fine Soil, Compost and Leaf Mould
The humble mesh frame is not glamorous, but it can turn a rough heap into seed-ready compost, soft leaf mould and soil that is genuinely pleasant to work with.
It is late October, which is exactly when a garden sieve starts to look rather more useful than it did in July. The compost heap is cooling down, leaves are arriving in quantities that seem faintly personal, and there is a good chance you have a pot or border that could use a mulch before winter properly settles in. This is not the season for chasing perfection. It is, however, an excellent season for separating the useful stuff from the bits that need another turn in the heap.
A sieve, or riddle, is one of those tools that can seem unnecessary until you have used a decent one. Then you start eyeing every lumpy bag of compost with mild suspicion. It will not make poor compost fertile, nor will it magically turn clay into a free-draining loam. What it does do is make a growing medium more even. That means a more level sowing surface, neater pot filling, fewer large pieces of bark around tiny seedlings, and leaf mould that feels like a soft woodland floor rather than a tangle of half-decayed leaves.
The important point is this: you do not need to sieve everything. That would be a splendid way to turn an enjoyable garden into an unpaid industrial process. You sieve when texture matters. Seed trays matter. Small pots matter. Top dressing matters. A carefully prepared patch for fine seed matters. A barrow full of compost destined for hungry shrubs generally does not.
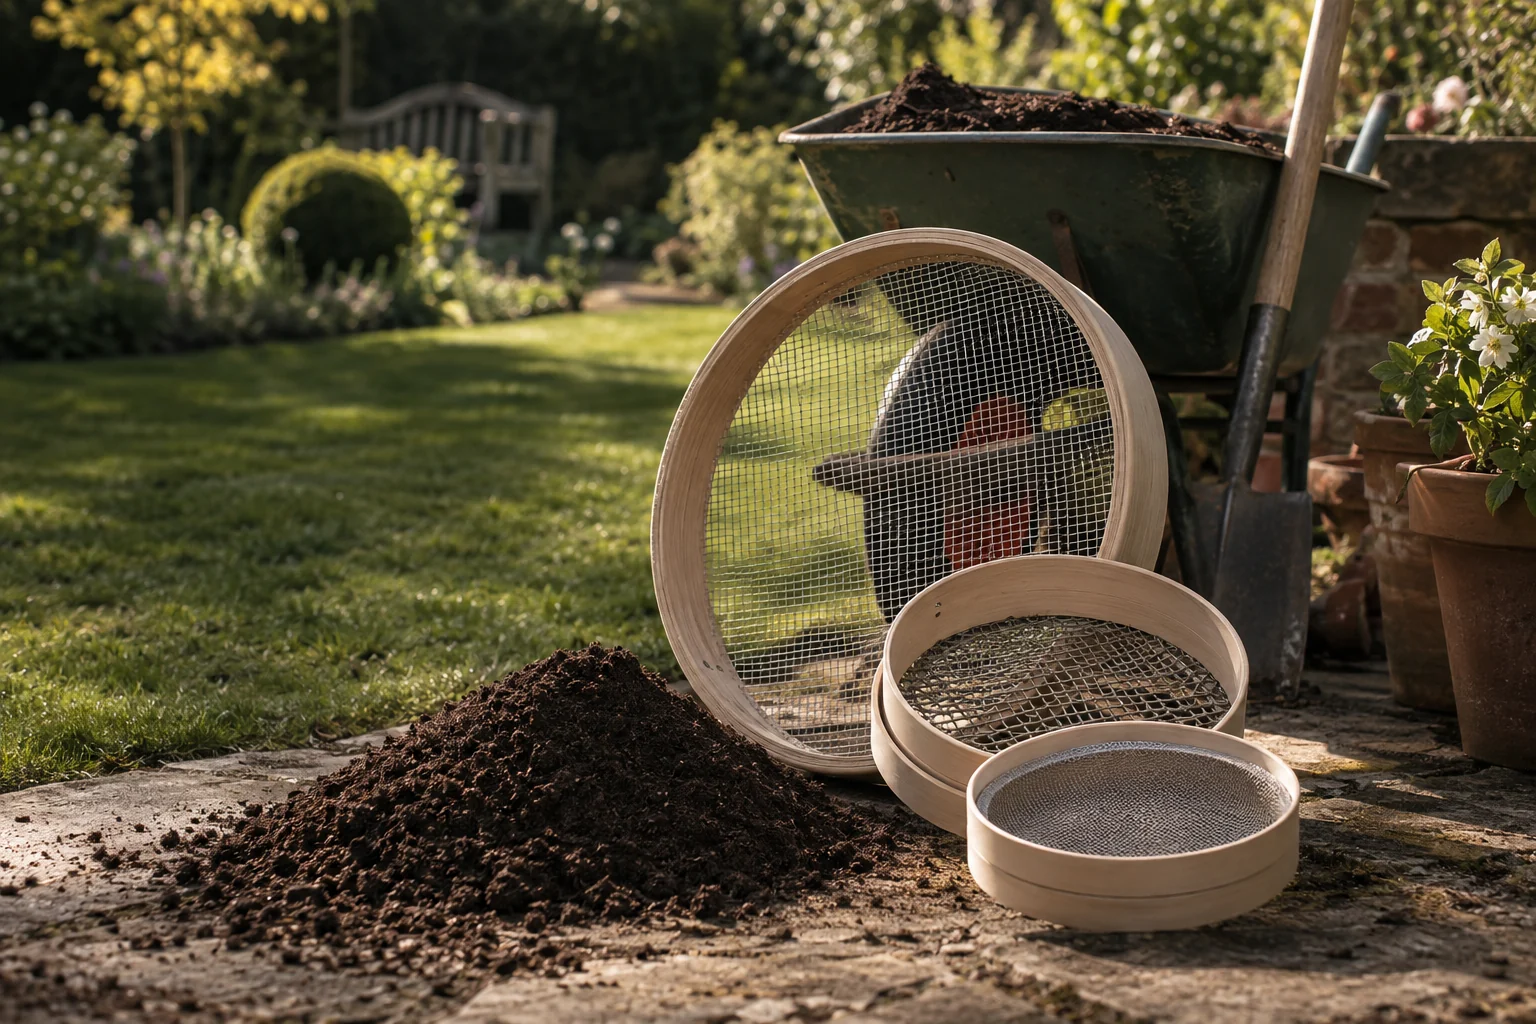
What Is a Garden Riddle — and When Does It Actually Earn Its Place?
Traditionally, a riddle was the larger, more robust sort of sieve: a broad frame with relatively coarse mesh, intended for shifting soil, rubble or compost in useful volume. A sieve was often the finer, hand-held version used for smaller jobs. In modern British gardening shops, though, the two names are cheerfully mixed together. A round hand tool may be sold as a riddle; a large wheelbarrow frame may be called a sieve. It is not worth losing sleep over. Look at the mesh and the working style instead.
The frame holds a sheet of wire mesh. Material that is small enough drops through; oversized pieces remain on top. Those leftovers are not waste. With homemade compost, they are usually the woody fragments, stems and slow-to-rot pieces that benefit from going straight back into the compost bin. With soil, they may be stones, couch-grass roots or clods. With leaf mould, they are the leaves that simply need longer. Nature is not late. It is merely operating on a timetable that does not acknowledge bank holidays.
A garden riddle earns its storage space for three jobs in particular.
Making seed and cutting compost finer
Fine seed sowing benefits from a loose, crumbly surface with no sizeable lumps. A mesh in the 3–6 mm range helps create it, especially when using multipurpose compost for propagation.
Grading homemade compost
A 6–9 mm mesh separates mature crumbly compost from the coarser material that should go back into the heap. It is a tidy closed loop, and a satisfying one.
Processing leaf mould
Leaf mould is often usable before every leaf has vanished completely. Passing it through a 9–12 mm mesh gives a more manageable mulch or a useful ingredient for potting mixes.
There are also smaller, slightly niche jobs. You can use a fine sieve to cover seeds with an even dusting of compost. You can make a clean-looking top layer for indoor pots. You can separate stones from a small amount of soil for a raised bed. You can even use one to rescue the fine material from the bottom of an old compost bag. That last job has the faint air of making something from nothing, which gardeners are constitutionally unable to resist.
The simple test
If the material is going beneath an established shrub, spread as a rough mulch or mixed into a border, it rarely needs sieving. If a seed, cutting, small root system or visible finished surface will rely on it, a riddle starts to earn its place.
For most gardens, the best approach is not buying a collection of specialist frames for every imaginable task. It is choosing a sensible mesh size for the work you actually do, then accepting that one tool may have limits. A general 6 mm sieve is wonderfully useful, but it will not give the silky finish required for dust-fine seed compost. A coarse leaf-mould riddle is fast and forgiving, but it cannot make a refined propagation mix. Mesh size dictates the result. Everything else is secondary.
Mesh Size Is Everything: The Numbers That Determine What You Get
When you are choosing a sieve, start with the aperture: the width of each opening in the mesh, measured in millimetres. Ignore the optimistic packaging language for a moment. "Heavy duty", "professional" and "premium" may or may not prove true after a season outdoors. The mesh size tells you what can physically pass through. That is the number that changes your compost.
3 mm: for seeds, cuttings and the fussy end of gardening
A 3 mm mesh is for occasions when fine texture genuinely affects the result. It is useful for seed compost, small propagation trays and the top layer of pots in which you are sowing small seed. The RHS advises using a fine, crumbly compost for seed trays, without particles larger than around 3–4 mm. That is not gardening theatre. Large fragments can leave uneven gaps around seeds, interrupt capillary movement and make watering less consistent. They also create a lumpy surface, so one seed sits shallow whilst the next is buried rather more enthusiastically than intended.
Particles over about 5 mm are particularly irritating in small cells and shallow trays. They force seeds out of position, create air spaces that dry quickly and make delicate seedlings work harder to root evenly. The effect is most noticeable with very small seed, where even a modest chip of bark can feel like a boulder. For beans or peas, it is less important. For basil, lettuce, snapdragons or many alpine plants, the finer finish is far more useful.
6 mm: the sensible all-rounder
For many gardeners, 6 mm is the mesh size that sees the most action. It produces compost fine enough for general potting, larger vegetable seeds, potting on young plants and making an orderly sowing bed. It also gives you a pleasant material for topping up containers and works well for light lawn top dressing where you do not want chunks of woody compost sitting on the grass like misplaced croutons.
It is not as painstakingly fine as 3 mm, which is partly its charm. Material passes through at a useful pace. A 6 mm sieve will still leave behind sticks, undecomposed leaves and most chunky bark pieces, but it does not demand that every last fibre be reduced to dust. If you only intend to own one hand sieve, this is often the most practical compromise.
9 mm: for mature homemade compost
A 9 mm mesh is a good fit for compost that is going into pots, raised beds or around established plants. It gives a reasonably even finish but allows you to work faster than you would with finer mesh. Homemade compost rarely needs to imitate a shop-bought bag. In fact, it should not. A little texture is helpful in a general soil improver, and a 9 mm grade retains that useful openness whilst removing the obvious unfinished material.
12 mm: for leaf mould, soil and bulk work
The coarsest of the commonly useful sizes, 12 mm is for speed and volume. It is excellent for leaf mould intended as a mulch or a component in a wider mix. It is also useful when screening garden soil to remove larger stones and roots before filling a bed or blending a modest quantity for containers. You will not end up with the velvety material suited to fine seed, but you will get a consistent, friable result without spending all afternoon performing wrist exercises.
| Mesh aperture | Best used for | What stays behind | What to expect |
|---|---|---|---|
| 3 mm | Seed compost, small trays, fine potting mix | Bark, coarse fibres, small clods and undecomposed fragments | Very fine result; slowest to process |
| 6 mm | General potting, sowing beds and lawn top dressing | Most woody pieces, stones and larger lumps | Useful balance of speed and refinement |
| 9 mm | Homemade compost and general conditioning | Obvious unfinished compost and larger debris | Open, practical compost for everyday garden work |
| 12 mm | Leaf mould, bulk soil and coarse screening | Large leaves, roots, stones and major clods | Fastest option for a rougher finish |
It is worth understanding the difference between mesh aperture and wire thickness. The aperture is the gap through which compost falls. Wire gauge is the thickness of the wire creating that gap. Two sieves may both claim a 6 mm mesh, but a frame made with thin wire is more likely to distort when loaded with damp soil. It can also clog more readily, because the wire flexes and the intersections are less robust. A thicker galvanised wire tends to stay square and tolerate repeated brushing, tapping and washing far better.
Galvanising matters too. Compost, particularly compost that has been damp for months, is not kind to untreated metal. A galvanised mesh and a properly finished steel frame should last longer than bare wire. Plastic frames do not rust, of course, but the mesh is still usually metal and the frame itself needs to remain stiff enough that it does not twist under load. This is why a cheap sieve can be perfectly adequate for dry potting compost but become deeply unconvincing after one wet session with garden soil.
Hand Sieves: Shaken, Not Stirred
The traditional round hand sieve is still the easiest type to recommend for ordinary garden use. You hold it with both hands over a wheelbarrow, trug, large tub or potting bench, add a modest amount of material and shake it until the fine fraction drops through. It is simple, compact and easy to understand. You do not need a workshop, a special stand or a wheelbarrow with the exact temperament required by a particular frame.
Hand sieves are usually round, often made from steel or rigid plastic, and commonly carry mesh somewhere within the 3–12 mm range. The diameter varies, but the basic rhythm stays the same. Put in less than you think you need. Shake side to side or gently forwards and backwards. Let the mesh do the sorting. Tip the coarse material into a bucket for returning to the heap. Repeat.
The mistake most people make at first is overfilling. It is understandable. A heaped sieve looks efficient. In reality, it is like trying to dry a duvet with a hairdryer: technically possible, emotionally unwise. A shallow layer moves across the mesh. A heavy mound sits there, compacts itself and turns the job into an arm workout with poor results.
How to use a hand sieve without exhausting yourself
- Set up at a comfortable height. Rest the sieve on the edge of a wheelbarrow, tub or raised surface where possible. Holding it in mid-air works for small amounts, but it becomes tiresome quickly.
- Load it to no more than half full. This gives the compost room to move and prevents the mesh from immediately bridging with damp material.
- Use a short, controlled motion. A brisk side-to-side shake is generally more effective than wide circles. Think controlled maraca rather than enthusiastic cocktail hour.
- Stop when only the coarse fraction remains. Do not try to force every particle through. The resistant material is usually the part that needs more time to rot.
- Brush off the mesh before storing. A stiff brush while the residue is fresh saves a grim job later.
For dry, bought compost, a hand sieve feels wonderfully quick. For damp homemade compost, it can be slower, particularly at 3 mm. That does not make it a bad tool. It simply means you need to match the tool to the material. If your compost forms a sticky ball when squeezed, leave it spread under cover for a little while before sieving. You are aiming for damp and crumbly, not dry as dust, but neither should it behave like cake mixture.
Why hand sieves work well
- Easy to store in a shed, greenhouse or potting area.
- Excellent control for seed compost and small batches.
- Useful over a trug, tub, wheelbarrow or directly above a pot.
- Simple to clean and inspect for damage.
- Ideal when fine mesh is the priority.
Where they have limits
- Repeated shaking can be tiring with wet soil or compost.
- Small working area means slower progress on large heaps.
- Overloading rapidly reduces throughput.
- A very fine mesh can clog if material is not mature enough.
- Frames with weak mesh may distort under heavy use.
Frame depth is often overlooked. A deeper rim lets you hold a slightly larger charge of compost without it bouncing over the side. It is useful, but do not let it persuade you to heap material in. Comfort matters too. A rolled or smooth rim is kinder on the hands than a sharp metal edge, especially if you are working without gloves. The tool does not have to be luxurious. It merely should not punish you for using it as intended.
A 6 mm hand sieve is the most versatile starting point for a gardener who mainly pots up plants and raises vegetables from ordinary-sized seed. If you do plenty of propagation, adding a separate 3 mm sieve is a genuine upgrade rather than a gadget. Conversely, if you mainly make leaf mould and condition beds, a 9 mm or 12 mm frame may be all you require.
Stand-On and Wheelbarrow-Rest Sieves: When Volume Demands a Bigger Tool
There is a clear point at which a hand sieve becomes more character-building than useful. It usually arrives halfway through processing a barrow load of compost. If you make large quantities of leaf mould, manage an allotment, fill raised beds or regularly produce homemade compost for many containers, a larger frame that rests across a wheelbarrow can make the work much easier.
Stand-on and wheelbarrow-rest sieves use a larger rectangular or round frame. Some sit across the rim of a wheelbarrow. Others have legs or a simple support arrangement that creates a working platform above a barrow, trug or collection area. Instead of lifting and shaking the whole frame, you load compost on top and rub, press or work it across the mesh with gloved hands, a trowel or a flat block of wood.
The basic idea is less elegant than a hand sieve but more efficient for volume. Gravity does more of the work. You use your body weight gently rather than relying on forearms and wrists. The larger surface means you can spread the material into a thinner layer, and thin layers are exactly what sieve well.
How to make a barrow sieve work properly
First, make sure the frame is stable. It sounds obvious, but wheelbarrows have a tremendous talent for shifting just as you start applying pressure. Position the barrow on level ground. If the sieve uses support bars, set them securely on the rim. If you are using a timber stand, ensure the collection container fits comfortably underneath and that the whole arrangement does not wobble.
Load material with a fork or trowel in shallow batches. Spread it across the mesh, then work it with your hands rather than pushing one great mound down through the centre. Pressing a dense clod hard through fine mesh compacts it, strains the wire and often creates a plug that stops anything moving. Break clods apart first. Rub mature compost gently. Let the mesh decide what is ready.
For leaf mould, a 9–12 mm mesh is generally more forgiving and makes the process pleasantly brisk. The coarser pieces can go back into a leaf cage or bin for another season. For compost, a 9 mm mesh is often a practical fit. If you need seed-grade compost, you may still prefer to do the final 3 mm pass with a hand sieve. That is not duplication. It is using each tool for the job at which it is least irritating.
Large sieves are not automatically better for every garden. They take more storage space and are less convenient for a few seed trays. Their strength is reducing effort when you have enough material to justify setting them up.
Cleaning is part of the ownership experience. A broad wheelbarrow sieve is easier to brush because the mesh is accessible, but it is also more likely to be left outdoors after a productive afternoon. Try not to. Knock off residue, brush the underside and stand it somewhere dry. A sieve stored flat in wet grass will have a shorter and sadder life than one hung on a shed wall.
Do not be tempted to use a garden riddle as a general rubble screen unless it is clearly built for that kind of abuse. Stones and dry soil clods are far harder on mesh than compost or leaf mould. A little garden soil is fine. Repeatedly attacking it with heavy, stony subsoil is a different proposition altogether.
Rotary and Trommel Sieves: Are They Worth Considering?
Rotary sieves and trommels replace the shaking action with a turning drum. Material goes into one end of a cylindrical mesh section. As the drum rotates, fine material falls through and larger fragments travel onwards to emerge separately. Manual versions use a handle; powered versions use an electric motor. They are satisfying to watch in the same way that a well-behaved compost heap is satisfying: quietly purposeful, with no unnecessary fuss.
For a domestic garden, though, they are not an automatic step up. A rotary sieve makes sense when you process compost frequently, make a lot of it, or find the repetitive motion of a hand sieve uncomfortable. It can reduce the strain of lifting and shaking. It also gives a more consistent workflow, because the material is continually moved and presented to the mesh rather than being repeatedly tipped about in batches.
There are trade-offs. Rotary equipment is bulkier to store, more involved to clean and less handy for a quick handful of compost for one pot. Fine wet compost can still clog a drum. No clever mechanism can persuade immature, sticky organic matter to behave like dry crumbs. A motor will simply perform the clogging more expensively.
Powered trommels are best thought of as specialist kit for people who regularly handle substantial volumes: keen allotment holders with several bays of compost, gardeners producing large quantities of soil mix, or small-scale growers. In an ordinary back garden, the limiting factor is often not sieving speed but the time taken to move, mature and prepare the compost in the first place.
Manual rotary versus a simple frame
A manual rotary model can be a good middle ground if physical comfort is the deciding factor. You trade the repeated lift-and-shake motion for steady turning. The best use case is mature, crumbly compost that is already close to finished. Use it with material that is too damp or fibrous, and you will spend time clearing the mesh instead of turning the handle. That is gardening in miniature: the shortcut has an opinion.
For fine seed compost, a conventional hand sieve still has a lot to recommend it. You can see exactly what remains on the mesh, use a small quantity without setup, and achieve a controlled finish. The more elaborate the machinery, the less appealing it becomes for a task involving two litres of compost and a few trays of lettuce.
Choose labour-saving honestly
Buy a larger or rotary sieve when it removes a repeated bottleneck in your gardening. Do not buy one because a single tiring afternoon made your compost heap feel like a commercial operation. Most gardens are still best served by a good mesh frame and sensible preparation.
Choosing the Right Type for Your Garden
There is no universally best sieve because "best" depends entirely on what you are trying to put through it. A gardener raising dozens of seedlings in spring needs something different from someone making leaf mould for woodland planting. The useful question is not, "Which is the finest sieve?" It is, "What material will I actually be screening most often?"
The seed starter
Prioritise a 3 mm hand sieve for seed compost and a 6 mm option for general potting. Fine control matters more than bulk capacity.
The compost maker
A 6 mm or 9 mm hand sieve suits modest quantities. Choose a larger barrow-rest frame when you routinely work through full heaps.
The leaf-mould keeper
A 9 mm or 12 mm mesh lets usable material through without demanding that every leaf has fully disappeared.
The raised-bed builder
A larger frame and coarser mesh help remove stones, roots and major lumps from modest batches of soil before mixing.
Frame material affects durability and comfort. Galvanised metal frames and mesh cope well with routine gardening use if cleaned and stored dry. Powder-coated steel may feel smooth in the hand, but any chips in the finish deserve attention before rust gets established. Plastic frames are light and do not corrode, which can be helpful for occasional use, although they need enough rigidity that the rim does not flex as you shake.
Mesh attachment is worth a close look. The mesh should sit taut inside the frame, with secure joins around the perimeter. Loose mesh moves under load and quickly becomes frustrating. A slight give is normal; a visibly sagging centre is not. If the mesh is replaceable, that can be useful for a tool you expect to keep for years, particularly if you want to move between a general 6 mm grade and a finer propagation mesh.
Think about storage before choosing a large format. A hand sieve can hang on a shed wall or slide beside the potting bench. A large barrow frame needs a proper place. Leaving any sieve permanently outdoors is false economy, even if it has a weather-resistant finish. Winter rain finds every weak point, and wet compost caught in mesh is an uninviting little rust nursery.
A quick buying checklist
- Choose the mesh for the finest job you do regularly, not the occasional one.
- Check that the mesh is taut and securely fixed around the frame.
- Prefer a rigid frame if you will sieve damp compost or garden soil.
- Consider how you will collect the screened material: barrow, trug, tub or potting bench.
- Make sure you can store the tool dry and clean it without a wrestling match.
- Buy a large frame only if you will genuinely process material in quantity.
Sieving for Seed Compost: The Fine-Mesh Technique That Transforms Germination
Even good bagged compost can benefit from sieving for seed sowing. Multipurpose mixes often contain bark pieces, compressed fibres, perlite clusters or occasional lumps that are perfectly harmless for a mature plant but awkward in a seed tray. Seed compost sold as such can also settle in storage and develop a few clumps. A fine pass through 3 mm mesh gives you a more dependable texture, especially for small seed and shallow cells.
The goal is not to produce powder. Powdered compost can settle too tightly and lose the open structure that young roots need. You want a fine, airy crumble: particles small enough to make an even surface, but still porous enough to hold moisture and allow air into the root zone. If your compost turns to dust under a sieve, it may be too dry. Lightly moisten it, mix thoroughly and let it sit briefly before trying again.
The two-layer method
One of the most useful ways to avoid wasting time is to sieve in two grades. Use compost passed through a 6 mm mesh for the lower 60–70% of a seed tray or pot. It provides drainage and a little more structural openness. Then use a 3 mm sieve for the upper 10–15 mm, where the seeds will actually sit. This creates the smooth, close contact that small seeds need without requiring you to process the entire tray's worth of compost through the finest mesh.
The method is recommended in seed-sowing practice by the RHS and National Vegetable Society, and it makes straightforward sense when you try it. The lower layer is not on display and does not need to be immaculate. The top layer is where germination happens, where watering lands and where the seed first makes contact with the growing medium. That is where your effort pays back.
- Moisten compost lightly if it is dry enough to create dust, then break up obvious lumps.
- Sieve enough 6 mm compost to fill the lower portion of your trays.
- Fill loosely and level gently. Do not ram it down as if you are repairing a road.
- Sieve a smaller amount through 3 mm mesh for the upper layer.
- Level the fine compost with a straight edge or the back of your hand.
- Sow seed at the appropriate depth, then cover with fine compost only where the seed requires covering.
- Water gently, ideally from below or with a very fine rose, so the surface remains even.
For very fine seed, the final covering can be barely more than a dusting. In some cases, seed should be left on the surface because it needs light to germinate. The sieve is still useful here because it gives you a level, even bed. It is not a substitute for checking the sowing instructions. Seeds have their own ideas, and they are not shy about them.
Come next spring, if you are preparing a lot of trays, make a small work station rather than repeatedly carrying compost around the garden. Put the sieve over a clean trug, keep a tub for oversize fragments and have trays, labels and a dibber close by. This reduces mess, speeds the job and stops you discovering halfway through that every label has vanished into the compost. It is a garden law that labels can become invisible only when needed.
Compost and Leaf Mould: How Fine Is Fine Enough?
Homemade compost and leaf mould are often treated as if they should emerge from the bin in a perfect, ready-to-use condition. They rarely do, and that is absolutely normal. Compost is a living process, not a factory product. Different ingredients break down at different speeds. A twig, avocado stone or thick cabbage stem may still be recognisable long after softer material has become dark and crumbly.
Sieving helps you make the most of what is ready without waiting for every last fragment to disappear. Put the coarse fraction back into the compost heap. It already contains useful microbes and partially decomposed organic matter, so it is not starting from scratch. Add a layer of fresh material if you have it, keep the heap suitably moist, and it will continue its work.
Using screened compost
Compost passed through 6 mm or 9 mm mesh is excellent for mixing into potting blends, topping up containers, enriching planting holes and improving the surface of vegetable beds. It can be used as a mulch around established plants, although you do not need it to be fine for that purpose. A coarser grade still adds organic matter and helps protect the soil surface over winter.
At this point in the gardening year, screened compost is particularly useful for empty patches in vegetable beds, around fruit bushes and over the surface of containers that are being overwintered. Apply it around plants rather than heaping it against stems. The aim is to feed and protect the soil, not create a damp collar around the plant's neck.
Using screened leaf mould
Leaf mould is different from compost. It is usually lower in nutrients but superb for structure and moisture management. Well-rotted leaf mould can be used as a mulch, mixed into potting blends, incorporated into woodland-style borders or spread over soil where you want to improve texture gradually. A 9 mm or 12 mm mesh is often enough to make it attractive and easy to spread.
If the material is still visibly leafy after screening, do not assume it has failed. A coarse fraction can go back into the leaf cage, while the fine material is already useful. Leaf mould rarely needs to be immaculate unless you are using it for propagation mixes or a particularly refined potting job. In a border, the worms will not complain about a few leaf fragments. They have seen worse.
Do not force unfinished organic matter through
If the material resists the mesh, it is usually telling you something. Return it to the compost heap or leaf store rather than grinding, stamping or aggressively rubbing it through. You will protect the sieve, save effort and end up with a better finished material later.
Soil is the exception that needs a little caution. Sieving a small amount of garden soil can be useful for a specific project, but repeatedly screening soil removes structure and can leave it prone to compaction. If you are preparing soil for sowing, break clods when conditions are dry enough, remove obvious stones and roots, then rake to a fine tilth. Use a sieve for small quantities or specialised mixes, not as a substitute for sound soil preparation across an entire plot.
Cleaning, Storage and the Habits That Make a Sieve Last
A sieve has a simple job, but it works in one of the least forgiving environments in the garden: wet organic matter, abrasive grit, repeated flexing and occasional optimistic overloading. A little care makes a considerable difference to how long it remains pleasant to use.
The best time to clean it is immediately after use. Brush the top and underside of the mesh with a stiff hand brush. Tap the frame gently to dislodge trapped crumbs. If the material is wet and sticky, rinse it with water and let it dry thoroughly before storing. Do not leave compost plastered across the mesh until next weekend. By then it will have set with the determination of old mortar.
Check the mesh periodically. Look for loose edges, broken wires and places where the mesh has begun to sag. Small problems are easier to address before they become a full tear. Also check where mesh meets frame; this is where strain tends to concentrate, especially if the sieve has been used for stony soil or overloaded with wet compost.
Store hand sieves hanging vertically if possible. This keeps them dry, prevents other tools being piled on top and makes them easy to grab when you need one. Large barrow frames can be stood upright against a wall, but secure them so they cannot fall. A tool that has survived years of compost does not deserve to be bent by a rogue gust of wind and a poorly stacked rake.
| Problem | Likely cause | What to do instead |
|---|---|---|
| Nothing will pass through | Compost is too wet, immature or the sieve is overfilled | Use smaller loads, allow material to become crumbly, or select a coarser mesh |
| Mesh clogs repeatedly | Fine aperture combined with fibrous material | Use 3 mm only for mature compost and fine work; brush the mesh regularly |
| Frame feels unstable | Uneven support or too much pressure on one area | Set the sieve on level ground and spread material evenly |
| Finished compost looks too rough | Mesh aperture is too large for the intended task | Reserve it for mulch or general conditioning, or pass a small batch through finer mesh |
| Sieving is painfully slow | Using fine mesh for a job that does not need it | Move up to 6 mm, 9 mm or 12 mm where the end use allows |
Common Questions About Garden Sieves and Riddles
Not for most planting jobs. Bought compost is generally fine for filling pots, planting containers and improving beds straight from the bag. Sieving becomes worthwhile when sowing small seed, using shallow trays or creating a very even surface. It is a refinement, not a compulsory ritual.
A 6 mm mesh is the broadest all-round choice for general potting, modest seed sowing, compost grading and top dressing. Choose 3 mm if propagation is your main interest; choose 9 mm or 12 mm if you mainly process compost or leaf mould in volume.
You can, but it is usually slow and frustrating. Compost should be moist enough to hold together lightly, yet crumbly enough to break apart in your fingers. Very wet material smears across the mesh instead of falling through it. Let it dry slightly under cover, turning it once or twice if needed.
For compost and leaf mould, return it to the relevant heap or bin. It contains partly broken-down material that will continue to rot. For soil, remove persistent roots and stones, then decide whether the remaining soil can be used elsewhere in the garden.
Well-rotted, finely screened leaf mould can be a useful part of a homemade seed or potting mix, but it is not usually used alone. It has excellent moisture-holding qualities but may not provide the balanced structure needed for every seedling. Blend it with suitable compost and use a fine mesh for the upper layer.
Yes, for relatively small quantities and manageable soil. A coarser 9 mm or 12 mm mesh is more sensible for this than a fine propagation sieve. Avoid forcing heavy, wet, stony soil through delicate mesh; it is hard work and hard on the tool.
A Practical Autumn Plan for Fine Compost and Leaf Mould
Right now, in late October, you can make a good start without turning this into a major project. Choose a dry-ish day, gather the leaf mould or mature compost you can access easily, and work in small batches. Keep the fine fraction for jobs that benefit from it. Return the coarse fraction to its heap. Spread the rougher usable material where it will protect bare soil through winter.
If you are collecting fallen leaves, start a separate leaf-mould store now. A wire cage, ventilated bin or simple contained heap is enough. Keep leaves damp rather than waterlogged, and avoid compacting them into an airless block. The finished material will take time, which is precisely why it is worth starting before you feel you need it. Gardening rewards the person who prepares early, then pretends it was all very casual.
Use this autumn to clean and store your sieve properly after the final big jobs. Then, when seed-sowing begins next spring, you will have dry, screened material ready for the first trays rather than trying to work frozen compost through a mesh in February. There are more cheerful ways to begin the growing season.
The GardenScout verdict
A garden sieve is one of the least flashy tools you can own, which is probably why it is so often bought as an afterthought. Choose the mesh carefully and it becomes far more than a frame with wire in it. A 3 mm sieve earns its place for seed compost; 6 mm is the practical all-rounder; 9 mm and 12 mm make homemade compost and leaf mould easier to use without chasing unnecessary perfection. Start with the jobs you actually do, keep the mesh clean, and let unfinished material return to the heap. Your seedlings, pots and soil will be better for it.