How to Make Leaf Mould From Autumn Leaves
Turn that annual carpet of fallen leaves into crumbly, dark, free soil conditioner — using nothing more than a bin, a bag, and a generous helping of patience.
Every autumn, the same thing happens in gardens up and down the country. The trees do their gorgeous, golden striptease, and within a fortnight there's a soggy brown blanket smothering the lawn, blocking the gutters, and clogging the patio drains. And every autumn, millions of bags of this stuff get hauled off to the tip or stuffed into the green bin — which, frankly, is a bit like throwing away free money.
Because here's the thing I wish someone had told me a decade ago: those fallen leaves are, with almost no effort on your part, the raw material for one of the finest soil conditioners money can't buy. It's called leaf mould, and gardeners have been quietly making it for centuries. It's not compost — it works completely differently — and it's arguably even more useful for the jobs compost can't do.
In this guide I'm going to walk you through absolutely everything: how leaf mould actually forms, the bins and bags worth using (and the ones that are a waste of cash), the all-important matter of timing, which leaves rot well and which are a nightmare, and how to speed the whole sleepy process along. I've made the stuff in wire cages, in bin bags shoved behind the shed, and in a fancy timber composter, so I'll be honest about what's worth the bother.
What Leaf Mould Actually Is (And Why It's Not Compost)
This is the bit most people get wrong, so let's clear it up first. Garden compost is made by bacteria. Those bacteria are busy little things — they generate heat, they want nitrogen-rich "green" material like grass clippings and veg peelings, and they can turn a heap into usable compost in a matter of months if you keep them fed and turned.
Leaf mould is completely different. It's made almost entirely by fungi, which break down the tough, fibrous, carbon-heavy material in leaves through a slow, cold process. There's no real heat involved, no turning required, and crucially, no rush. The fungi just quietly get on with it over the course of a year or two, reducing a great mountain of crisp leaves into a dark, sweet-smelling, crumbly material that looks and feels remarkably like rich woodland soil.
The practical upshot of all this is that leaf mould is gloriously low-maintenance. Whilst your compost heap needs feeding, balancing and the occasional sweaty turning session, a pile of leaves needs almost nothing from you except to be kept damp and left alone. The trade-off is that wonderful word again: time. You cannot hurry fungi the way you can hurry bacteria. Mature leaf mould takes roughly twelve to eighteen months for a usable result, and a full two years for the really fine, dark, crumbly stuff.
Leaf mould is low in nutrients compared to compost — it's not really a feed. Its genius lies in soil structure: improving moisture retention, lightening heavy clay, and adding body to thin sandy soils. Think of it as a conditioner rather than a fertiliser.
What You Can Use Leaf Mould For
Before we get into the making of it, it's worth understanding why you'd bother — because the uses are genuinely brilliant and most gardeners massively underestimate them.
Seed and potting compost
Well-rotted, two-year-old leaf mould that's been sieved makes a superb, low-nutrient base for seed sowing. Because it holds moisture beautifully but drains freely, delicate seedlings love it. Mix it with sharp sand and a little loam for an old-fashioned, peat-free seed mix.
Soil conditioner and mulch
This is the headline act. Dig partly-rotted leaf mould into clay to open it up and improve drainage, or fork it into sandy soil to help it hold onto water. Spread it as a mulch around shrubs and over borders in autumn and the worms will pull it down for you.
Woodland and ericaceous planting
Leaf mould mimics the natural leaf litter of a forest floor, making it ideal around woodland-edge plants, ferns, hostas and acid-lovers. It's exactly the environment many of these plants evolved in.
Lawn top-dressing
Sieved, fine leaf mould brushed into a lawn in autumn helps improve the soil beneath without smothering the grass — a quietly effective trick for tired turf.
The Three Ways to Make It: Bags, Wire Bins and Timber Composters
There are essentially three approaches, and which one suits you comes down to how much space you have, how many leaves you're dealing with, and how much you fancy spending. Let's go through each honestly.
1. The Bin Bag Method (Free and Foolproof)

This is where almost everyone should start, and for many small gardens it's all you'll ever need. The method couldn't be simpler. You gather your leaves, stuff them into ordinary black bin bags, and — and this is the bit people skip — you moisten them if they're dry, pierce a few holes in the bag for a bit of air exchange, tie the top loosely rather than airtight, and then shove the lot somewhere out of the way for up to two years.
Behind a shed, down the side of the house, tucked into a forgotten corner — leaf mould doesn't care where it lives, because there's no smell and no mess. You genuinely just forget about it. The black plastic helps retain a little warmth and moisture, and the holes let just enough air in to keep the fungi happy without drying everything out.
Pro Tip
Damp leaves rot far faster than dry ones. If you're bagging up crisp, bone-dry leaves on a sunny October afternoon, tip a watering can over them first. The single most common reason a bag of leaves is still recognisable two years later is simply that it dried out and the fungi went dormant.
2. The Wire Mesh Leaf Bin (The Traditional Workhorse)
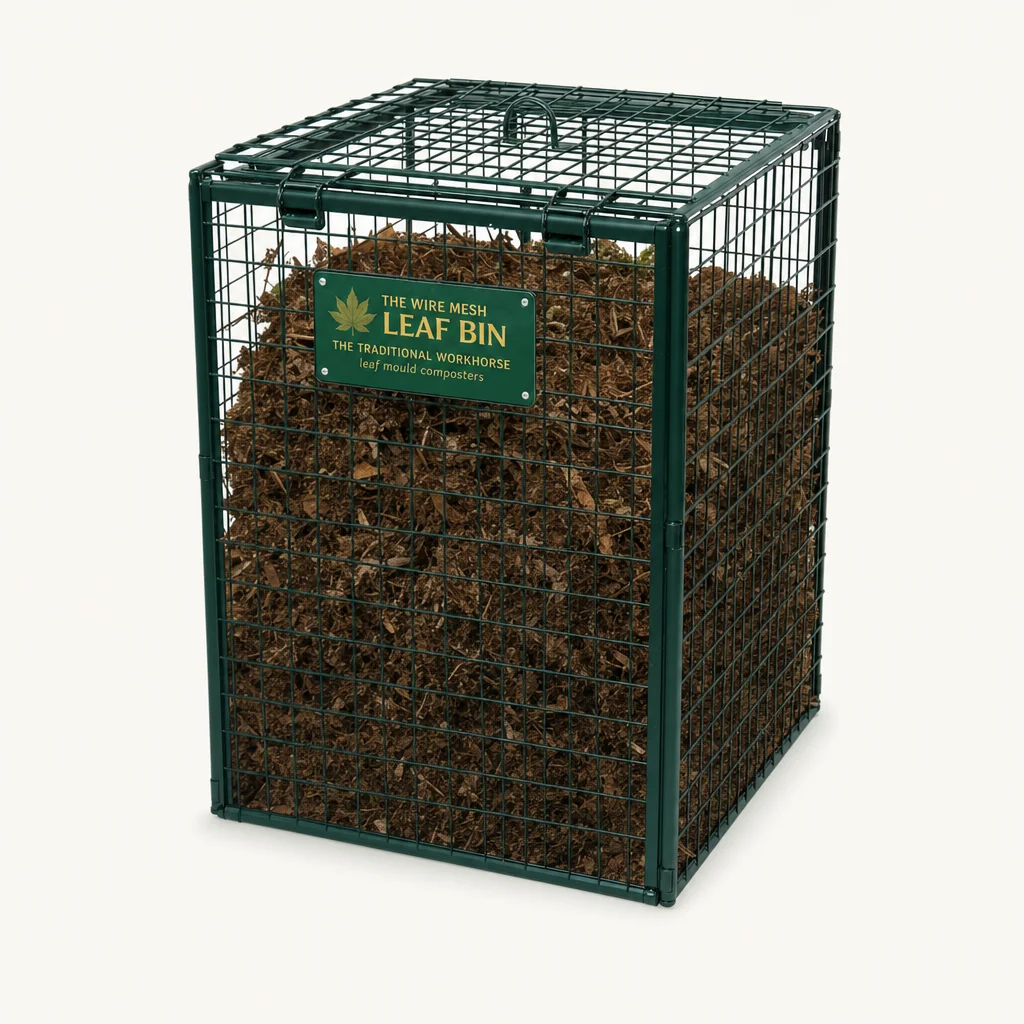
If you've got a decent-sized garden and a proper volume of leaves — think mature trees, a long boundary, or you're collecting from the neighbours too — a dedicated wire leaf bin is the classic answer. The traditional dimensions are a square cage at least one metre by one metre, which gives you enough mass for the leaves to stay damp in the middle whilst still getting air through the sides.
The whole design philosophy here is open and airy. Wire mesh keeps the leaves contained and tidy whilst letting rain soak through and air circulate. A purpose-made bin uses galvanised wire so it doesn't rust away in a season — the better commercial ones, such as those from long-established UK maker Archwood Greenhouses, use a fairly fine 15mm × 25mm galvanised mesh that stops leaves from blowing out or clumping awkwardly against the frame.
You can, of course, knock one of these together yourself with four stakes and a roll of chicken wire for next to nothing — and honestly, that's what I'd suggest for most people. The shop-bought versions are beautifully made and will last decades, but they're a considered purchase rather than an impulse buy.
3. The Timber Leaf Mould Composter (The Premium Option)

At the top end sit handsome slatted timber bins, the sort that look like a smart compost bay and would happily live in full view in an ornamental garden. Original Organics, a UK manufacturer, make their Blackdown range from pressure-treated FSC timber lined with a PVC mesh, and back the timber with a generous 15-year warranty — which tells you something about how long these are built to last.
These come in a sensible spread of sizes depending on your leaf habit. The smallest single-bay unit holds 383 litres in a footprint of 840mm square and 760mm tall, scaling right up to a triple-bay monster holding 1,900 litres across nearly three metres of width. For most domestic gardens the single or double bays are plenty.
Are they necessary? Not even slightly — fungi don't care whether their home cost two hundred quid or nothing at all. But if you want something that looks the part, lasts a couple of decades, and gives you separate bays so you can have one batch maturing whilst you fill the next, they're a genuinely lovely thing to own. The PVC mesh lining is the smart detail, holding the finer crumbled material in whilst still letting the pile breathe.
Comparing Your Options Side by Side
Here's how the three main approaches stack up against each other when you weigh them all together. There's no single "best" — it genuinely depends on your garden and your budget.
| Feature | Bin Bag Method | Wire Mesh Bin | Timber Composter |
|---|---|---|---|
| Upfront cost | Free / negligible | DIY cheap; bought is pricier | Significant investment |
| Best for | Small gardens, few trees | Medium–large gardens | Large gardens, ornamental display |
| Capacity | Per-bag, easily scaled | From 1m × 1m upward | 383L to 1,900L |
| Appearance | Hidden away out of sight | Functional and tidy | Attractive, display-worthy |
| Longevity | Single-use, replaced each year | Decades if galvanised | Up to 15-year timber warranty |
| Effort to make | Minimal | Low (some DIY) | Flat-pack assembly |
| Time to mature | 1–2 years | 1–2 years | 1–2 years |
Notice that bottom row — the maturation time is identical across all three. That's the great equaliser. No bin, however expensive, can make fungi work faster. What you're really buying with the pricier options is capacity, longevity and good looks, not speed.
If you only have a small garden with one or two trees, save your money. A handful of bin bags tucked behind the shed will give you exactly the same quality of leaf mould as a £200 timber bay. Spend on the bin only when volume genuinely demands it.
Which Leaves Rot Well — And Which Are a Nightmare
Not all leaves are created equal, and this is the bit that separates a smooth batch from a frustrating one. Broadly, the thinner and softer the leaf, the faster it breaks down. The thicker, waxier or more leathery it is, the longer it'll take and the more it'll test your patience.
The good ones (fast rotters)
Oak, beech, hornbeam, alder, birch and the leaves of most deciduous trees break down beautifully. These are your bread and butter — thin, plentiful, and reliably converted into lovely mould within the standard timeframe. Beech and oak in particular make some of the very finest, most prized leaf mould.
The slow ones (be patient)
Thick, leathery leaves like sycamore, horse chestnut, walnut and sweet chestnut take noticeably longer. They'll still rot down, but you'll want to shred them first (more on that shortly) and accept that they may need an extra year. Don't let them dominate a pile or they'll hold the whole batch back.
The troublemakers
Evergreen leaves — holly, laurel, conifer needles and the like — are best kept out altogether. They're tough, waxy and slow, and conifer needles in particular are very resinous and acidic. A few stray pine needles won't ruin anything, but don't go collecting them on purpose. They belong in a separate, slow heap of their own if you bother at all.
Leaves That Behave
- Oak — superb, fine-textured result
- Beech — a gardener's favourite
- Hornbeam, alder and birch
- Most thin deciduous leaves
- Hawthorn and field maple
Leaves to Avoid or Shred
- Sycamore — leathery and slow
- Horse chestnut — thick, needs shredding
- Walnut — slow, and contains growth inhibitors
- Holly and laurel — far too tough
- Conifer needles — resinous and acidic
Speeding Things Up: Shredding, Moisture and Mowing
Whilst you can't change the fundamental fungal timescale, there are a few legitimate ways to nudge things along and get a usable result closer to the twelve-month end of the range rather than two years.
Shred the leaves first
The single most effective trick. Smaller pieces have far more surface area for the fungi to colonise, so they break down dramatically faster. The easiest way to do this is to run your lawnmower over a pile on the grass — the mower chops the leaves and, bonus, mixes in a few grass clippings which gently introduce nitrogen and accelerate the early stages.
Keep it damp, never soggy
Fungi need moisture to work. A pile that dries out simply stops decomposing until the next decent rain. Check your bags or bin every few months and water if the contents feel crisp. The target is "wrung-out sponge" damp, not waterlogged.
Allow a little air
This is why we pierce bin bags and use mesh bins. Total airlessness slows things and can turn the pile sour and slimy. A gentle air exchange keeps the process sweet — you should never get a foul smell from leaf mould.
Compress and consolidate
Once collected, treading the leaves down helps them stay damp in the middle and keeps the pile from blowing about. A firmed pile holds moisture far better than a loose, fluffy one.
I genuinely cannot overstate the mower trick. The first year I bothered to shred my leaves before bagging them, I had usable, crumbly mould at fourteen months instead of the two years a previous, un-shredded batch had taken. Same leaves, same corner of the garden, same bags — just chopped up first.
Indicative timeframes based on typical garden conditions. Your results will vary with leaf type, climate and how damp you keep things.
The All-Important Matter of Timing
Leaf mould is a beautifully seasonal craft, and getting the timing right makes everything easier. Here's the annual rhythm of it.
Late autumn: the gathering
The obvious window. Most leaves fall between October and early December, and the sweet spot is collecting them after a good rainfall when they're already damp, or on a still, dry day before they've all blown into the road. Rake or mow them up, and get them into your chosen container while they're fresh. This is your one big push of the year — an hour or two of raking buys you a whole batch of mould.
The long wait: months 1 to 12

Now you do almost nothing, which is the joy of it. Over the first winter and spring, the pile will sink dramatically — don't be alarmed when your bulging metre-high cage collapses to half its size by March. That's just the leaves losing their air and beginning to break down. A quick check on moisture in spring and again in late summer is all that's required.
Months 12 to 24: maturing
By the second autumn you'll have what's often called "young" or partly-rotted leaf mould — still slightly recognisable as leaves but dark and friable. This is perfectly usable as a mulch or soil conditioner right now. If you want the fine, sievable stuff for seed compost, leave it for the full second year until it's a uniform dark crumb.
The Two-Bin Strategy
The clever long-term move is to run two piles or sets of bags on a rolling cycle. Each autumn you fill a fresh one, whilst the previous year's batch carries on maturing. After the first couple of years you'll always have one batch ready to use and another on the way — a perpetual, self-renewing supply of free soil conditioner. This is exactly why the multi-bay timber composters exist.
How to Tell When It's Ready (And How to Use It)
Knowing when leaf mould is "done" isn't an exact science, partly because there are two perfectly valid stages of doneness depending on what you want it for.
Young leaf mould (around one year) is dark and crumbly but you can still make out the shapes of individual leaves if you look. It smells earthy and pleasant. This is ideal for digging into beds, mulching around established plants, and improving soil structure — anywhere the slight coarseness doesn't matter.
Mature leaf mould (around two years) is a uniform, dark brown, fine crumb with no recognisable leaves left. It looks like rich, soft woodland soil and feels gorgeous in the hand. This is the grade you sieve for seed-sowing mixes and fine top-dressing.
To use the fine stuff for seeds, simply pass it through a garden riddle or an old sieve to remove any twigs and stubborn bits, then blend it with sharp sand and a little loam or quality compost. The exact ratios are a matter of taste, but a rough split of equal parts leaf mould, sand and loam makes a lovely traditional, peat-free seed mix.
Remember leaf mould is low in nutrients. If you're using it as the bulk of a potting mix for hungry plants, you'll need to add a feed or mix in some richer compost. For seed-sowing it's perfect as is, because young seedlings don't want a rich diet anyway.
Honest Pros and Cons of Making Your Own
Having made leaf mould every year for over a decade now, I think it's only fair to give you the genuine upsides and the realistic drawbacks before you commit a corner of your garden to it.
The Upsides
- Effectively free — uses waste you already have
- Almost no ongoing effort; no turning required
- Brilliant soil conditioner for clay and sandy soils
- Makes a superb peat-free seed compost base
- No smell, no mess, can be hidden anywhere
- Keeps leaves out of the bin and off the lawn
- Endlessly renewable, year after year
The Drawbacks
- Slow — 1 to 2 years before it's usable
- Low in nutrients; not a plant feed
- Needs space dedicated for a long stretch
- Thick and evergreen leaves are awkward
- Requires the discipline to keep it damp
- Annual raking is a proper job in big gardens
For me the maths is overwhelmingly in favour. The "cost" is some space and a couple of hours of raking once a year, and the reward is an annual supply of premium soil conditioner I'd otherwise have to buy. The only real catch is patience — but since the leaves are doing all the work whilst you get on with your life, even that barely counts as a downside.
How I'd Rate the Practice Overall
If I'm scoring leaf-mould-making as a garden activity — weighing up ease, cost, results and how much I actually enjoy doing it — here's where it lands.
The only category dragging the score down is speed, and that's a deliberate, almost philosophical part of the process — you simply cannot rush fungi. Once you've made peace with the timescale and got your rolling two-batch system going, that drawback quietly vanishes, because there's always a finished batch waiting whilst the next one cooks.
Who Should Bother With Leaf Mould?
Anyone With Deciduous Trees
If you've got even one mature tree dropping a carpet of leaves each autumn, you've got the raw material for free. This is a no-brainer.
Seed Sowers
If you raise plants from seed and want a peat-free, moisture-retentive base, mature sieved leaf mould is hard to beat — and far cheaper than bagged seed compost.
Clay & Sandy Soil Gardeners
If you battle heavy clay or thin, free-draining sand, leaf mould is one of the best structural improvers you can add — and you can never have too much of it.
The Eco-Minded
If you'd rather not cart leaves to the tip and want to garden more sustainably with no peat and no plastic-bagged products, this closes the loop beautifully.
The only people who can reasonably skip it are those with no trees nearby at all and no space to spare — and even they can often scrounge a few bags of leaves from a neighbour, since most people are only too happy to have them taken away.
Frequently Asked Questions
The Verdict
Making leaf mould is one of those rare gardening jobs where doing almost nothing produces something genuinely valuable. You take a free, abundant waste material that would otherwise be a chore to dispose of, you give it a corner of the garden and a year or two of patience, and you get back a premium soil conditioner and seed compost base that would cost real money to buy.
For most people, the honest recommendation is to start with the bin bag method this very autumn — it costs nothing and proves the concept. If you've got a bigger garden and a serious leaf problem, a simple metre-square wire cage is the traditional sweet spot, and you can build one for next to nothing. The handsome timber composters from makers like Original Organics, with their FSC timber and 15-year warranty, are a lovely long-term investment if you want something that looks the part and lasts decades — but they don't make better mould, just a tidier home for it.
Shred your leaves with the mower, keep them damp, get a rolling two-batch system going, and you'll never look at a pile of autumn leaves as rubbish again. It's free, it's easy, it's good for your soil and good for the planet. I can't think of a single reason not to give it a go.