
Making a No-Dig Bed: What to Buy and How to Start This Autumn
A practical, unfussy way to turn lawn, weeds or an underused corner into a productive growing bed without spending the weekend wrestling a fork.
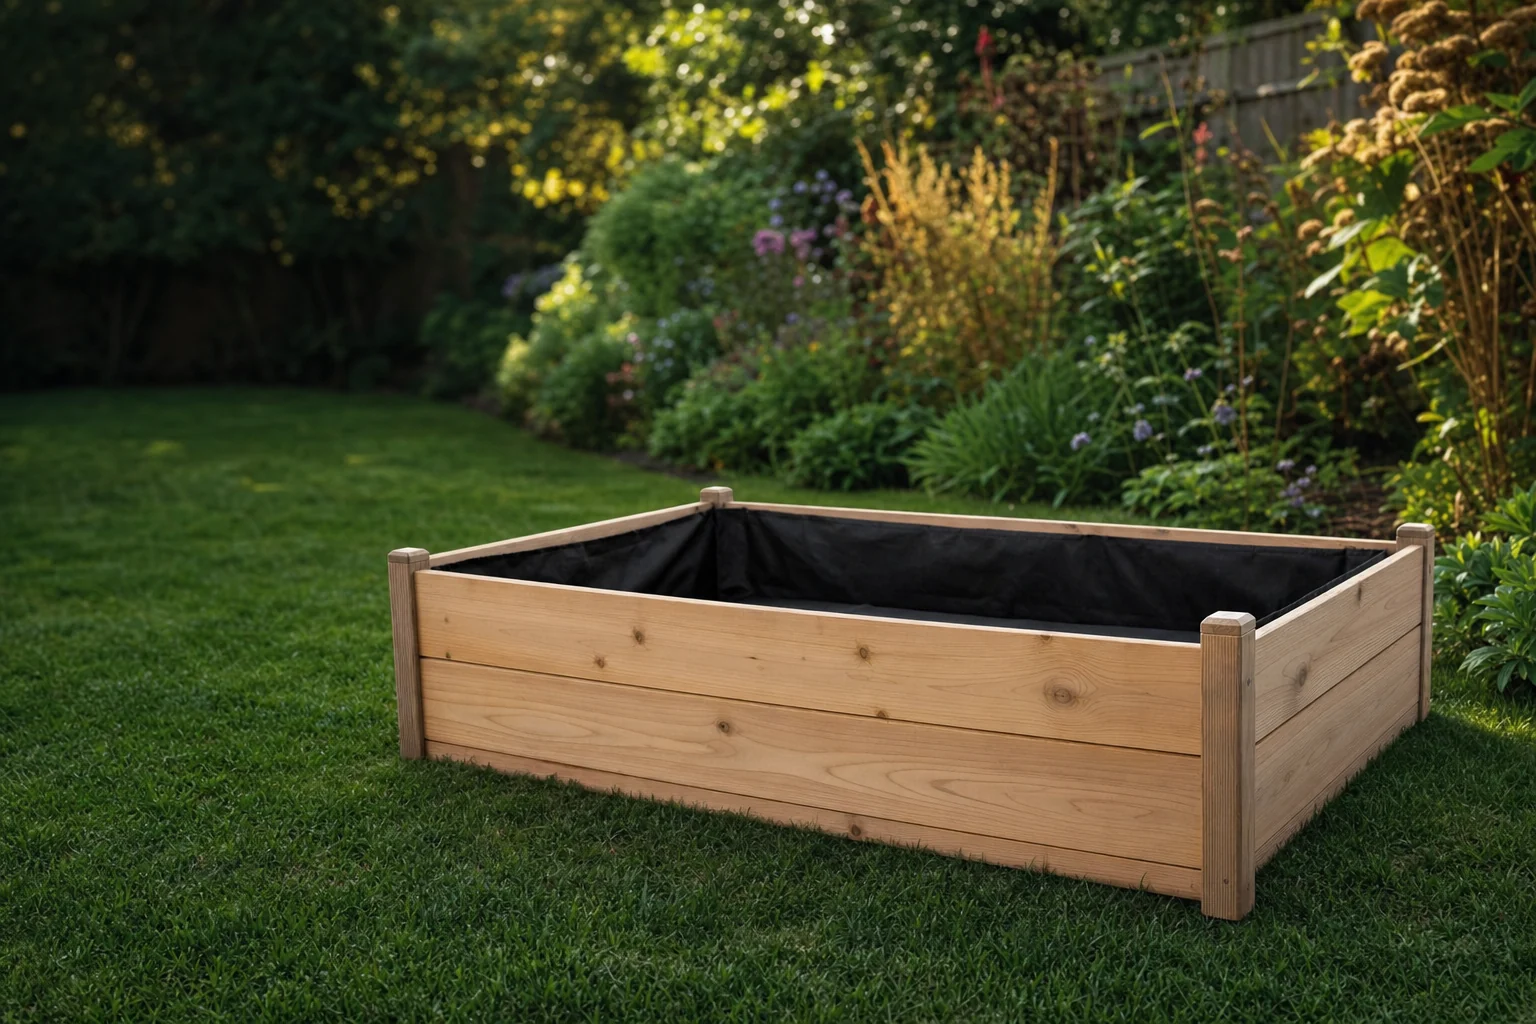
What Is No-Dig Gardening and Why Start This Autumn?
Late September is one of the quietly useful moments in the gardening year. The urgent business of sowing and planting has eased a little, the lawn is no longer growing with the confidence of a teenager, and there are suddenly corners of the garden you can see properly again. That patch beside the fence which was "definitely going to be vegetables this year" is now visible. So is the tired strip of grass beyond the patio. No judgement. Gardens are very good at giving us another chance.
No-dig gardening is a method of making and maintaining growing beds without turning over the soil. Instead of stripping away vegetation, digging down, breaking clods and trying to remove every root, you cover the existing surface with a light-blocking layer of cardboard and place compost on top. The vegetation below is deprived of light, then gradually breaks down. The compost becomes the new, immediately usable growing layer.
That is the central idea. It is beautifully simple, although not quite magical. The cardboard does not remove the need to think about perennial weeds, drainage or future watering. Compost does not make a shady site sunny. And if you lay a bed straight over something deeply compacted or permanently waterlogged, it will still be deeply compacted or permanently waterlogged underneath. But for ordinary grass, annual weeds and an area of ground you want to bring into cultivation with less disruption, it is a wonderfully practical approach.
The modern no-dig approach is widely associated with Charles Dowding, whose pared-back method centres on two materials: cardboard and compost. There is a certain relief in that. Garden projects have a habit of acquiring a cast list: membrane, gravel, edging, timber, bark, fertiliser, specialist tools, an alarming number of bags and a receipt long enough to knit with. A basic no-dig bed asks you to begin with only what the ground genuinely needs.
The autumn advantage
Starting now lets the cardboard become wet and settle beneath the compost over winter. Rain helps knit the layers together, whilst the bed is not yet under pressure to produce a crop next week. Come spring, you have a defined, workable surface rather than a plan scribbled on the back of an envelope.
Autumn also makes the practical work less tiresome. Existing growth is usually less vigorous than it was in high summer, so there is less foliage to flatten. Compost is less likely to bake dry before you have finished spreading it. You can build the bed in stages if that suits your energy and time. A little preparation one weekend, a compost delivery or collection the next, then planting when the new season begins. It is gardening at a sensible pace, which is underrated.
No-dig does not mean no work. It means choosing work that supports the soil rather than repeatedly disturbing it. You still need to plan, source compost, water new plants and keep an eye on persistent weeds. The difference is that you are not beginning by exhausting yourself with unnecessary excavation.
The Science Behind the Cardboard and Compost Stack
A no-dig bed works because plants need light. Cardboard laid over grass or weeds forms an opaque barrier that blocks that light, preventing the foliage beneath from continuing its usual business. Annual weeds are particularly vulnerable to this. Grass is also smothered when it is completely covered. Over time, the old vegetation softens and decomposes, contributing organic matter beneath the new bed.
The word "barrier" can make cardboard sound permanent, like some sort of subterranean patio. It is not. Plain corrugated cardboard is temporary. It gets wet, begins to lose its stiffness and is gradually worked on by the life in and around the soil. That is why preparation matters so much: cardboard should be free from tape, staples and plastic labels. Those bits do not politely vanish just because the rest of the box has become a useful garden layer.
Above it sits the compost. This is much more than a decorative topping. It gives roots somewhere loose and nutrient-rich to establish, reduces the drying effect of sun and wind on the surface, and keeps the cardboard in place. A dry sheet of cardboard on an exposed plot is basically a kite with ambitions. Compost weighs it down, insulates it and turns the whole arrangement into a bed that can be planted rather than merely admired.
Cardboard excludes light
Overlap the sheets generously so light cannot find a route through gaps. A single uncovered seam can become a surprisingly efficient green corridor for grass and weeds.
Moisture settles the layers
Water, whether from a hose or autumn rain, helps the cardboard mould itself to the ground. The better the contact with the surface below, the more effective the smothering layer will be.
Compost becomes the root zone
In the first season, plants are principally growing in the compost layer you have added. This is why a generous initial depth matters more than trying to make an immaculate finish.
There is an important distinction here between annual weeds and determined perennial ones. Small annual weeds and grass are well suited to being covered. Established perennial weeds may send up shoots at edges, gaps or weak points, especially where their roots extend beyond the bed. That does not mean the method has failed. It means a living plant has behaved like a living plant and looked for daylight.
When that happens, do not launch into a full archaeological dig. Pull or cut off new growth as it appears, then improve the coverage where necessary. A second patch of cardboard with more compost over it is often the calmest answer. No-dig gardening rewards the gardener who notices a problem early and responds simply, rather than the gardener who assumes every green shoot requires a major civil engineering scheme.
Think in layers, not trenches
The aim is not to bury the old ground as deeply as possible. It is to create continuous contact: soil or vegetation at the bottom, damp cardboard in the middle, compost above. If those layers meet properly, they can begin doing their jobs without you turning a single spadeful.
As the cardboard breaks down, the divide between "old soil" and "new bed" becomes less distinct. Roots, moisture and soil organisms move through the changing layers. You may still find fragments of cardboard when planting during the first year; simply push through a softened section or make a small opening where you need it. There is no prize for removing every last trace. The bed is not supposed to remain a cross-section from a gardening textbook. It is supposed to become soil.
Choosing Your Spot Before You Spend a Penny
The cheapest no-dig bed is the one you do not build in the wrong place. Cardboard is often free, compost can be sourced locally, and the job itself is manageable, but you still want to put those materials where they will earn their keep. Take a few minutes now to assess the site properly. It is far easier to move a hose than to move a newly made bed full of compost.
For most vegetables, look for a position receiving at least six hours of direct sun. That is especially important for crops grown for fruit or pods, which need a bright, open site to perform well. A warm wall can help, though it may also create a dry rain shadow. Observe rather than guess. Stand in the proposed spot at different points in the day if you can. Shade shifts more than people expect, particularly once low autumn sun begins throwing long shadows from sheds, fences and neighbouring trees.
Partial shade is not automatically a reason to abandon the idea. A less sunny bed can be excellent for leafy salads and herbs, particularly in the brighter part of the year when some leaves appreciate a little shelter from hard sun. What matters is matching future crops to the site rather than building a bed for tomatoes in the one part of the garden where tomatoes will spend all day looking faintly disappointed.
Drainage is the other essential check. Visit the area after rain. Does water sit in a hollow? Does the soil remain slick and squelchy long after the rest of the garden has drained? A no-dig bed adds a raised layer of compost, which can improve the immediate planting surface, but it cannot make standing water disappear. In a persistently wet spot, cardboard may break down before it has done its intended work and the compost above may stay too wet for many crops.
Access deserves equal attention. You should be able to reach the middle of the bed from either side without stepping on it. A maximum width of 1.2 metres is a useful rule because it keeps weeding, sowing, picking and topping up within arm's reach. This is not mere tidiness. Avoiding foot traffic is fundamental to preserving the open structure you are trying to create. If you walk across the bed every time you harvest lettuce, you will eventually make your own small problem.
Consider the route from compost pile to bed as well. A bed at the far end of the garden may be perfectly possible, but every bucket, barrow or bag has to travel there. Check gates, steps and narrow side passages. Think about where a delivery could be placed without blocking access or covering a drain. These are boring questions right up until you are manoeuvring compost through a gap barely wide enough for a wheelbarrow. Then they become thrillingly relevant.
Do a wet-weather reconnaissance. Before committing to the site, look at it after proper rain. A patch that seems fine during a dry spell may reveal a puddling problem once autumn weather gets involved.
Sizing Up: Bed Dimensions and Your Compost Calculation
For a first no-dig bed, modest is sensible. You are learning how your site behaves, what compost is like to handle, how much you realistically want to grow and whether your carefully drawn crop plan survives contact with spring. A starter bed measuring roughly 0.9 metres by 2.7 metres is a manageable size. It is large enough to grow a satisfying selection of crops, yet not so large that the compost pile becomes an event requiring refreshments and a rota.
The key number is the initial compost depth. A 15 centimetre layer is the recommended starting point for a first-year no-dig bed. This provides enough material to create a proper growing surface above the cardboard, rather than a thin scattering that dries rapidly and exposes every unevenness below. It also gives young roots room to establish before they meet the original ground.
For a bed around 0.9 metres by 2.7 metres, a 15 centimetre compost layer requires approximately 0.38 cubic metres of compost. If cubic metres feel abstract, picture the bed itself as a shallow box and calculate length multiplied by width multiplied by depth. It is worth doing this before ordering or collecting anything. Compost nearly always looks like less when it is piled up and more when it is spread out. This is one of its most reliable talents.
| Bed plan | Useful for | Compost calculation | Practical note |
|---|---|---|---|
| 0.9 m × 2.7 m starter bed | A first vegetable or salad bed | Approximately 0.38 m³ at 15 cm deep | A manageable first project with room for several crops. |
| 1 m wide bed, extended by 1 m | Scaling up a long border-style bed | Approximately 0.1 m³ for each extra metre at 15 cm deep | Keep the width reachable; extend length rather than making the bed broader. |
| Bed wider than 1.2 m | Usually best avoided | Depends on final size and depth | It becomes tempting to step onto the compost, which defeats much of the point. |
The scaling rule is refreshingly straightforward: for every extra metre of length on a bed that is 1 metre wide, allow about 0.1 cubic metres of compost for a 15 centimetre layer. That makes it easier to plan a longer run without reaching for complicated sums. If you are building two beds, calculate each separately and then add the totals. It is much easier to slightly overestimate the quantity than to discover you are short when the cardboard is already in place and rain is gathering.
Build paths into the plan
Do not use every available centimetre for bed space. Leave a clear path around it, especially beside fences and walls. You need somewhere to stand whilst tending the edge, and a path is far preferable to balancing on the compost like a gardener in a low-budget circus act.
Shape is flexible. Rectangles are easy to mark out, cover and crop, so they are a fine default. Curved edges can suit an ornamental part of the garden, although they take more care when laying overlapping cardboard. Whatever shape you choose, keep it simple enough that you can reach all parts of it and lay the cardboard without creating awkward gaps.
You do not need timber sides for a no-dig bed. The compost can be mounded directly on the ground, particularly when starting with a modest area. Edging is optional: useful where you want a crisp boundary, need to contain a particularly loose material or prefer a more formal look, but not a requirement for the method to work. If you do add edging, install it before the cardboard and compost. It is much easier to work around a fixed edge than to disturb a finished layer afterwards.
What to Buy: A Sensible No-Dig Shopping List
The good news is that this is not a project requiring an alarming collection of specialist equipment. Most gardeners already own the few tools that make the job easier. The main materials are cardboard and compost. Everything else is either useful preparation or a choice about how neat you want the finished bed to look.
Core shopping and sourcing list
- Plain corrugated cardboard: enough to cover the entire bed with overlapping sheets.
- Compost: enough to create a 15 centimetre layer across the planned area.
- A measuring tape: for marking the bed and calculating compost volume.
- String, canes or a hose: to outline the shape before you commit.
- A watering can or hose: to dampen cardboard and settle the finished layers.
- Secateurs or shears: useful if existing vegetation is tall and floppy.
- Optional edging: only if you want a defined boundary or need it for the site.
For cardboard, ask locally before buying anything. Supermarkets, removal companies and electrical retailers often have large boxes that would otherwise be recycled. Brown corrugated cardboard is ideal. It is sturdy enough to lay flat, it overlaps well, and it is usually available in useful-sized sheets. Appliance boxes can be especially helpful for a larger bed, provided you have somewhere to flatten and store them briefly.
Be selective. Avoid glossy, heavily coloured, waxed or laminated cardboard. Remove parcel tape, reinforced tape, staples, plastic windows and adhesive labels. It is a slightly fiddly job, but it is one worth doing at the kitchen table with a mug of tea rather than crouched over the bed in drizzle. The garden does not need a collection of tiny plastic labels gradually emerging from the soil for the next decade.
Compost deserves the larger share of your attention. Well-rotted horse or cow manure compost is an excellent option where you can obtain it. It brings organic matter and a useful texture to a new bed. Municipal green waste compost can be a practical alternative, particularly for filling a larger area. Bagged multi-purpose compost is convenient for containers and small gaps, but using it to build a whole bed is usually a last resort simply because a full bed takes a substantial volume.
Well-rotted manure compost
A strong choice for a first layer where it is properly composted and pleasant, crumbly material rather than fresh manure. Ask local farms or suppliers what has been composted and how it has been stored.
Green waste compost
Often widely available and useful at scale. Check the texture before committing if possible: you want compost rather than a load dominated by large woody pieces.
Bagged compost
Handy for topping up, filling a very small bed or working where bulk access is impossible. For a larger first bed, it can mean many bags and rather a lot of plastic to deal with.
When planning the quantity, remember that compost settles. The original 15 centimetre depth compacts to roughly half its starting depth after the first season. That is normal, not evidence that your bed has vanished overnight. Organic material settles as air spaces close and as the ingredients continue their journey towards soil. It does mean that you should expect to top up in later seasons rather than assuming the first delivery is a permanent installation.
Finally, choose a date that suits the materials. Cardboard is easier to handle before it has been soaked by a week of rain; compost is easier to spread when it is not frozen solid. A dry, calm autumn day is ideal, but do not wait endlessly for perfection. In a British autumn, that can become a long-term strategy.
Cardboard: How to Source, Prepare and Lay It Right
Cardboard is the bit of a no-dig bed that can look almost too humble to matter. It has been used to transport cereal, a kettle or somebody else's online shopping, and now it is being asked to help make a vegetable bed. Yet it is one of the crucial layers. Poor coverage gives weeds a route through; good coverage lets the compost layer above do its work with far less competition.
Start by collecting more than you think you need. Once boxes are opened and flattened, their usable area can be smaller than expected, and overlap uses material quickly. You want enough cardboard to cover the entire marked bed without stretching sheets taut or leaving little uncovered diamonds between awkwardly shaped pieces.
Brown or plain cardboard is the easy choice. Printed brown cardboard with ordinary water-based or soy-based ink is generally suitable, but surfaces that are heavily printed, glossy, waxed or laminated are better kept out of the bed. If a box has a shiny coating that makes it look as though it might survive a small flood, it is not the material you want beneath your compost.
Remove the non-cardboard bits. Tape, staples, plastic labels and delivery pouches should all come off before the sheets go down. They will not decompose with the cardboard, and removing them later is nobody's idea of a rewarding spring activity.
If the grass or weeds are tall, cut or flatten them first. You do not have to strip the area bare, and you do not need to dig out turf. The objective is simply to make a reasonably level surface so the cardboard sits close to the ground. Long stems can make it spring up, create air pockets and leave awkward ridges. A mow, strim or session with shears is often enough.
Lay the cardboard so each sheet overlaps the next generously. Imagine rain running down through the joints, and imagine a weed shoot looking for the nearest crack. Both should meet a layer of cardboard rather than an open route to the surface. Pay particular attention to the bed's outer edges, where grass tends to creep in from the surrounding area. Tuck cardboard well beyond the intended growing surface if you can, then cover it fully with compost.
Dampen the cardboard as you work. It does not need to be drenched into pulp, but it should be wet enough to soften and settle. This is especially useful on a breezy day, when dry cardboard has the handling characteristics of an indignant sail. A watering can is often easier than trying to manage a lively hose over loose sheets.
Do not skimp at the edges
Most no-dig beds look excellent in the middle and develop their first weed issues around the perimeter. Extend the cardboard coverage to the very edge, overlap well, and keep paths clear enough that you can spot any encroaching grass early.
Do not worry if the surface is not perfectly smooth once the cardboard is down. The compost will soften the visual effect, and perfection is not the aim. What you are looking for is continuous coverage and sensible contact with the ground. A wrinkled but fully covered bed is better than a photographically neat arrangement with gaps every few centimetres.
Compost Deep-Dive: Quantities, Quality and First-Year Reality
Compost is where a no-dig bed becomes a growing bed. In the first year, it is the principal medium into which you will sow and plant. That makes depth and quality important, though there is no need to become paralysed by the pursuit of a mythical perfect blend. Good compost, available locally and in enough quantity, is generally more useful than a supposedly flawless product you cannot obtain in the volume required.
The starting depth is 15 centimetres. Spread it as evenly as practical across the cardboard, making sure every edge is covered. You can level it with the back of a rake, a board or gloved hands. The aim is not a formal lawn-like finish; slight undulations will settle. Concentrate instead on avoiding thin areas where cardboard might show through or where roots will have very little compost to explore.
Well-rotted farmyard manure is a favourite material for many gardeners because it contributes organic matter and often has a pleasing, crumbly consistency. "Well-rotted" is doing important work in that phrase. You want composted material, not fresh manure that is still heating, strongly pungent or recognisably straw-heavy. When in doubt, inspect a sample. It should resemble compost and smell earthy rather than like a very recent farmyard conversation.
Council green waste compost can make sense for a bigger bed. It recycles material collected locally and is often available in bulk. Its texture can vary, so look at it if possible. A few woody pieces are not a disaster; gardens are not laboratories. But a load dominated by large chips may be awkward for direct sowing and less pleasant when you are trying to plant small seedlings.
Bagged compost has its place. If your proposed bed is tiny, access is difficult, or you are simply topping up later, bags are straightforward to carry and use. For a full first bed, however, the number required can become impractical. If you are tempted to make do with a very thin layer because you have only a few bags, it is usually wiser to reduce the bed's footprint and build a smaller one properly.
Settling deserves an honest mention because it catches people out. A fresh 15 centimetre layer can look wonderfully deep in autumn. By the following spring and first growing season, it may settle to around 7 to 8 centimetres. That is expected. It is not compost disappearing through a sinkhole. As the material consolidates, water moves through it, and the old vegetation beneath begins to break down, the whole profile becomes more compact.
Plan for that from the start. Your bed will benefit from future additions of compost on the surface. This is the maintenance rhythm of no-dig: feed from above rather than repeatedly turning the soil below. A top-up helps replace settled material, supports the growing surface and keeps the bed looking cared for. It is much less dramatic than rebuilding the bed, but it is not optional forever.
Do not mix the compost into the soil beneath. That can feel counterintuitive if you were taught that improvement always means digging organic matter in. Here, the compost is deliberately left on top. Roots and soil life will make use of the layered arrangement in their own time, whilst you preserve the structure below rather than breaking it apart just because you have a fork handy.
It is also fine if your compost contains the occasional twig, stone or uncomposted-looking shred. Remove the large, awkward pieces if they bother you at planting time, but do not turn a useful load into a forensic investigation. The criteria that matter most are enough volume, a broadly composted texture, and material you are happy to grow food in.
Step-by-Step: Laying Your First No-Dig Bed This Autumn
Set aside an unhurried session. For a small starter bed, the work is straightforward, but it goes more smoothly if you have all the cardboard prepared, compost accessible and tools nearby before you begin. There is no need to dig, but there is a satisfying amount of arranging, carrying and spreading. Wear gloves if you prefer, particularly when handling cardboard staples or rough compost.
1. Mark the shape
Use string lines, canes or a hose to define the bed. Check that it is no wider than you can comfortably reach across from either side. Stand on the future path, not the future bed.
2. Flatten very tall growth
If grass or weeds are tall, mow, cut or flatten them. There is no need to remove turf or excavate roots; you are simply making the surface easier to cover.
3. Fit optional edging
If you are using timber, metal or stone edging, place it before the cardboard. This gives you a clear boundary and avoids disturbing a completed bed later.
4. Lay damp cardboard
Cover the area completely, overlapping sheets and removing all tape, staples and plastic. Wet it as you go so it settles against the vegetation.
5. Add compost to 15 cm deep
Spread the compost evenly across the cardboard. Cover every edge and aim for a continuous layer rather than piles and hollows.
6. Water and leave it to settle
Water the finished bed if conditions are dry. Autumn rain is helpful afterwards; it settles the materials and begins the quiet work of turning layers into a growing space.
Begin by marking out the area. This is the stage to correct an over-ambitious width, move a corner away from an awkward gate or decide that the bed should be 30 centimetres shorter because that makes the path much more comfortable. Once compost is spread, alterations are still possible, but they involve more lifting and more opportunities to spill soil into your shoes.
If vegetation is taller than about 30 centimetres, cut it down or flatten it. Tall growth can stop cardboard settling closely to the ground. You are not trying to make the ground bare. You are merely removing the springiness. A rough cut is fine. The old foliage remains part of the material that will break down beneath the bed.
Next, place your cardboard. Work from one end to the other, with each piece overlapping the previous one. Dampen it as you lay it. If the wind is troublesome, use a little compost at the corners to hold sheets down as you work, then return to spread the full layer once coverage is complete.
Add compost in manageable loads. If you are using a wheelbarrow, tip small heaps across the bed and spread them out rather than placing one large mountain in the middle. Dragging a huge pile across cardboard can create gaps or pull sheets out of position. Use a rake gently; you are levelling compost, not scarifying a rugby pitch.
Once the compost is spread, water it if it is dry. Do not compress it by treading it down. You want it to settle naturally with weather and watering, not be stamped into a dense surface before roots have had a chance to explore it. Then leave it. This is an important part of the process. A newly laid no-dig bed may look as though it needs something else immediately, but autumn and winter are quite capable of doing useful work without further interference.
Your first-year planting expectation
By spring, the bed should be ready to plant into from the top. Avoid the urge to dig through the cardboard "just to check". Plant or sow into the compost layer, disturb only the area needed for each plant, and let the layers continue settling beneath.
Pros, Cons and Honest First-Year Caveats
No-dig gardening is often presented as a clean sweep of advantages: fewer weeds, no digging, better soil, easier growing. Much of that is genuinely appealing. But a good method should be allowed to have limits. The best results come from understanding what no-dig can do well and what it still asks of you.
What it does well
- Avoids the heavy physical work of digging and turf removal.
- Suppresses annual weeds effectively when cardboard coverage is complete.
- Creates a defined growing layer quickly, without waiting for a dug plot to settle.
- Keeps the bed surface easy to top up with compost in future years.
- Works well for converting lawn or weedy ground into a usable bed.
What still needs attention
- Persistent perennial weeds can reappear at weak points and edges.
- The initial compost requirement is substantial for anything beyond a tiny bed.
- Compost settles, so the bed needs future top-ups.
- Poor drainage beneath the bed remains a problem.
- You still need paths, watering and routine observation.
The accessibility benefit is real. Digging compacted ground is hard work, particularly for gardeners with limited mobility, recurring back trouble or simply no desire to spend a Saturday fighting clay. No-dig does not remove carrying and spreading, but those tasks can be broken into smaller sessions, shared with somebody else or managed with a wheelbarrow and buckets. There is no requirement to repeatedly lever a fork into the ground.
Weed suppression can be very satisfying from day one, especially where the starting point is grass or annual weeds. The bed goes from green and unruly to covered and purposeful remarkably quickly. However, do not interpret a weed-free surface as a guarantee that nothing will emerge. Perennials are persistent by nature. If shoots appear, deal with them promptly rather than letting them establish above the compost.
First-year crops should be chosen with the young bed in mind. The compost layer is new and settling, so avoid treating it as though it were a deeply established vegetable plot with years of cultivation behind it. Leaf crops, herbs and plants that are happy in compost-rich ground are sensible starting points. As the bed develops, you will learn what thrives in your particular location.
Watch, do not fuss. A no-dig bed benefits from observation: look for weed shoots at edges, check moisture in dry spells, and notice how quickly the surface settles. It does not benefit from regular digging "to improve it". The restraint is part of the method.
There can also be a visual adjustment. A fresh compost bed without wooden sides may look informal at first, particularly beside a very neat lawn. That is not a flaw, but it is worth knowing your own preferences. A clean path, crisp edge and a few carefully placed plants often make the whole thing look intentional very quickly.
How No-Dig Compares With Digging and Raised Bed Kits
There is more than one way to make a vegetable bed, and no-dig is not a moral test. Traditional digging, no-dig layers and framed raised beds can all have a place. The useful question is which approach fits your ground, your body, your budget for materials and your appetite for weekend labour.
| Approach | Starting method | Main strength | Main compromise |
|---|---|---|---|
| Traditional digging | Remove weeds or turf, then turn and work the soil. | Uses existing soil and can suit a plot that is already open and manageable. | Physically demanding and disruptive to soil structure; difficult where turf or tough weeds dominate. |
| Cardboard-and-compost no-dig bed | Cover vegetation with cardboard, then add a 15 cm compost layer. | Creates a growing surface without excavation and suppresses covered vegetation. | Needs a worthwhile volume of compost and careful edge coverage. |
| Framed raised bed | Build timber or metal sides, then fill with growing material. | Neat, clearly defined and useful where extra height is wanted. | The frame does not remove the need for compost, cardboard or good site choice underneath. |
Traditional digging can make sense on ground that is already cultivated and relatively weed-free. If you have inherited a vegetable patch that has been worked for years, you may not need to create a new bed over grass. But where the starting point is lawn, brambles of annual weeds or a neglected patch of compacted-looking ground, digging can become a punishing first step. It also tends to expose buried weed seeds and requires a fair amount of stamina.
A no-dig bed is often the more welcoming route for a new gardener because it gives a clear sequence. Mark, cover, compost, plant. It does not ask you to diagnose every soil layer before you are allowed to grow a lettuce. The existing soil remains beneath, the bed is made above it, and you can learn as you go.
Raised bed kits are a style and access choice rather than an alternative soil method. A frame can make the bed look tidy and can help contain compost, but it still needs filling. If it is placed over grass or weeds, the same cardboard layer is useful beneath the compost. In other words, a raised frame and no-dig can work together perfectly well. The frame is the architecture; the cardboard and compost are the growing method.
For most first-timers, I would favour the simplest possible version: a modest unframed or lightly edged bed, cardboard, compost and a clear path around it. Learn how that behaves over a year. You can always build more formal beds later if you enjoy the process. It is much harder to un-buy a stack of elaborate materials because a weekend project got slightly carried away.
Frequently Asked Questions From First-Time No-Dig Gardeners
Yes, newspaper can be used as a light-blocking layer, but it needs several layers to do the job effectively. Use around 8 to 10 sheets together and avoid glossy supplements. Cardboard is often easier to handle because it is sturdier, simpler to overlap and less likely to tear when you spread compost over it.
No. Grass can remain beneath the cardboard. If it is tall, mow or flatten it so the cardboard sits well against the surface, then cover it completely. The lack of light stops the grass growing normally, and the old vegetation gradually breaks down beneath the bed.
That is generally helpful. Rain moistens and settles the cardboard, consolidates the compost layer and supports the start of decomposition. Check that compost has not washed away from exposed edges, but otherwise let the weather do some useful work for you.
No. Keep the compost on top. The point of this approach is to create and maintain a layered surface without disturbing the soil underneath. Plant into the compost layer and allow roots and soil organisms to connect the layers gradually.
You can make the bed in autumn and leave it to settle for spring, which is often the easiest route. If you do plant, remember that the compost is the immediate growing medium and avoid digging down through the cardboard. For many gardeners, the real reward is having a ready bed when the spring sowing itch arrives.
Act early. Pull small shoots, cut back stronger perennial growth, and add another patch of cardboard and compost where you find a weak point. Pay close attention to edges and seams. A shoot is information, not a reason to abandon the bed and take up competitive stamp collecting instead.
The new vegetable gardener
A clear, manageable way to make a first productive bed without learning to dig a whole plot first.
The lawn converter
Particularly useful when an underused strip of grass is ready to become a salad or herb bed.
The less-digging gardener
A sensible option if heavy soil work is difficult, unappealing or simply not how you want to spend autumn.
The biggest mistake with a first no-dig bed is often trying to make it too large, too ornate or too perfect. Start with an area you can reach, source enough compost to give it a proper 15 centimetre layer, overlap your cardboard carefully and let winter settle the rest. You will learn more from one well-made small bed than from an ambitious project that runs out of compost three-quarters of the way along.
GardenScout verdict
A no-dig bed is one of autumn's most rewarding garden jobs because it is practical now and useful later. Cover the existing ground with clean, overlapping cardboard, add a 15 centimetre layer of compost, keep the bed no wider than you can comfortably reach, and allow rain and time to settle it. Do not expect perfection in year one. Expect a workable, promising growing space that gets better as you observe it, top it up and resist the temptation to dig it all over again.