
How to Get a Stripy Lawn Like a Groundsman
Rollers, mower choice and mowing patterns explained — because the closest thing to a professional pitch may be sitting just beyond your patio doors.
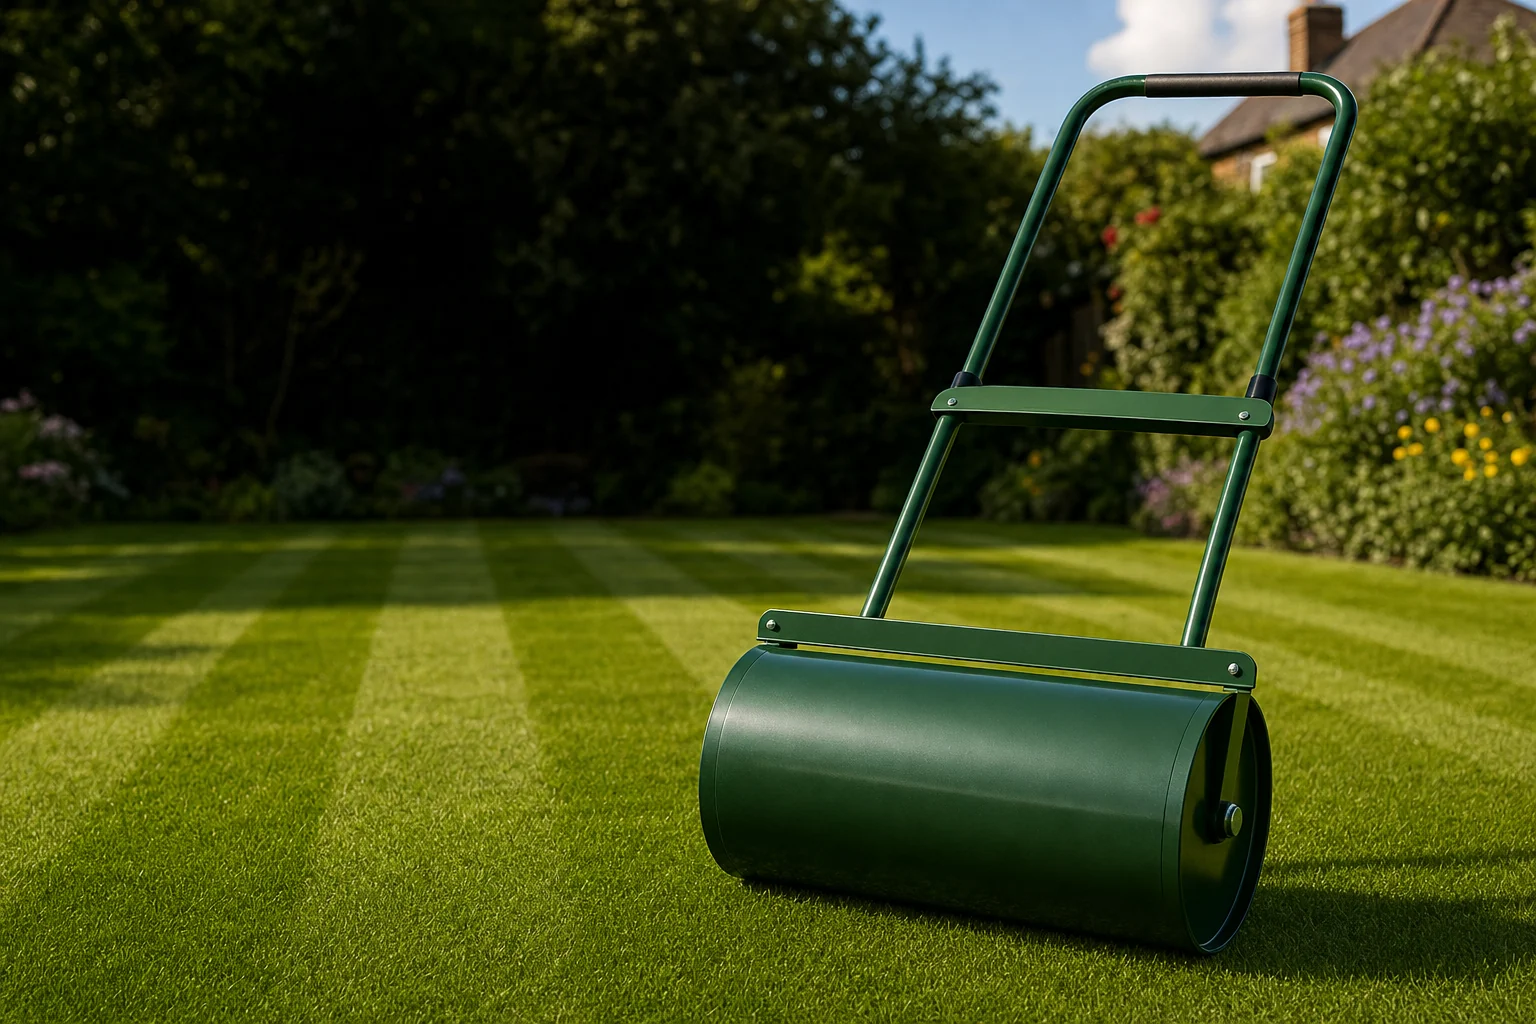
What Makes a Lawn Look Like It Belongs to a Premier League Ground?
A properly striped lawn has a slightly ridiculous effect on people. It makes an ordinary patch of grass look planned, cared for and somehow more expensive than it did ten minutes earlier. The garden may still have a wheelie bin by the gate and a child's abandoned football under the hedge, but those alternating bands lend it a whisper of Wembley. Or Lord's. Or the orderly green geometry of Wimbledon during a quiet morning before the crowds arrive.
That is the appeal. A striped lawn is not simply shorter grass. It is a surface with direction, light and a sense of occasion. It turns mowing from one of those weekend chores you put off until the grass begins looking personally affronted into a small piece of garden design.
The pleasing news is that the groundsman look is not reserved for stadium machinery, acres of immaculate turf or a team of people in matching waterproofs. A domestic lawn can produce crisp, convincing stripes with healthy grass, a mower or attachment that bends the blades after cutting, and a mowing pattern that begins with one very straight line. That last bit matters rather more than most people expect.
The effect is optical rather than botanical. The dark and light bands are not different grasses, different fertilisers, dyed sections or alternating mowing heights. They are the same grass blades viewed from opposite directions. When blades are bent towards you, more light is reflected back to your eye and the stripe looks lighter. When they are bent away, the stripe appears darker. Walk to the other end of the garden and the pattern seems to swap over. Magic, if you are feeling generous. Basic light reflection, if you are the sort who reads appliance manuals for pleasure.
The key idea
Cutting the grass makes it neat. Rolling it in a consistent direction makes it striped. The cutting deck and the roller are doing related jobs, but they are not the same job.
This distinction is useful when choosing equipment. A mower can give a beautifully even cut and still leave very little visible pattern behind. Equally, a modest rotary mower fitted with a well-matched striping attachment can improve the look of an established lawn dramatically. The lawn does not know whether its roller arrived attached to a premium mower or in a box on a Tuesday afternoon. It responds to consistent pressure and direction.
Before getting carried away, it is worth setting expectations. A stripe is most obvious in a reasonably open lawn, with grass that is neither scalp-short nor exhausted, viewed in decent natural light. A tiny, lumpy lawn bordered by three trampolines and a washing line will not become Centre Court. It can, however, look much sharper. That is a perfectly worthwhile ambition.
The Science of the Stripe: Why Your Grass Bends — and Stays Bent
Imagine every blade in your lawn as a narrow green ribbon. When a roller passes over it, the blade is pressed over in the direction of travel. It is still alive, still attached and still green; it is simply leaning. Thousands of blades leaning one way form a band that catches the light differently from the next band, where thousands of blades lean the other way.
Stand at one end of a striped lawn and you will usually see a light stripe followed by a dark stripe. Move around to the opposite side and the apparent lightness reverses. This is why the pattern can look surprisingly dramatic from an upstairs window, a patio, or the end of a garden path. It is also why a stripe that seems faint from one viewing angle may suddenly look much stronger from another. The lawn has not changed. You have.
Grass is more accommodating than it looks. Cool-season grass blades can bend up to around 45 degrees before their cell structure is compromised. That gives a roller enough working range to create the visible contrast we are after, whilst allowing the lawn to recover and stand up again over time. The stripe is meant to be temporary. A lawn that stayed flattened forever would be less groundsman chic and more "someone parked a caravan there in 1987".
Light-facing blades look brighter
Grass bent towards the viewer reflects light differently, producing the pale band that makes a stripe pattern readable at a glance.
Blades bent away look darker
The neighbouring pass lays grass in the opposite direction. Less reflected light reaches you, so the same turf appears deeper green.
Alternating direction creates contrast
The dramatic bit comes from switching direction at each turn. Parallel passes all laid one way may look tidy, but they will not produce the familiar alternating effect.
For UK lawns, perennial ryegrass is a particularly useful grass for the job. It is common in lawns and has excellent blade flexibility, which makes it responsive to rolling. If your lawn contains a good amount of perennial ryegrass, you have a cooperative partner before you have even started thinking about machinery.
Creeping red fescue is another helpful player. Its fine leaves can hold a bend well, contributing to a softer but still defined striped effect. Browntop bent is well known in close, carefully managed turf such as bowling greens and is capable of superb stripe retention. Most home lawns are mixtures rather than single-species carpets, of course, and that is absolutely fine. You are not required to identify each blade with a magnifying glass and a clipboard. A healthy mixed lawn can stripe well.
Height is part of the picture
For cool-season turf, a mowing height of 2.5 to 3.5 inches provides enough leaf length for the roller to bend visibly. Cut too close and there is much less blade available to catch the light.
That does not mean taller is always better. Overgrown grass can flop irregularly, hide wheel marks and make a pattern look woolly rather than crisp. The sweet spot is maintained turf with enough length to flex. Think neat jumper rather than shaggy rug.
Rear-Roller Mowers vs Rotary Mowers With a Striping Kit
There are two sensible routes to a striped lawn. The first is to buy a mower with a rear roller built into its design. The second is to use a rotary mower and add a striping kit, roller attachment or trailing roller behind it. Neither route is automatically correct. The best choice depends on your lawn, your existing mower and how often you want that crisp finish.
A dedicated rear-roller mower is the straightforward, all-in-one solution. Its roller sits behind the cutting deck, so the grass is cut and laid over in a single pass. The roller should make full-width contact behind the deck, which is important: if grass is cut but not rolled across the complete path, the edge of each stripe loses definition. A proper rear-roller machine is designed around this relationship from the outset.
In the UK market, Hayter, Mountfield, Honda and STIGA are familiar names for gardeners looking at rear-roller mowing. Hayter's Harrier range is often part of the conversation for people who want the classic striped-lawn experience. Mountfield's RM range, Honda's HRD and HRX ranges with rear-roller options, and STIGA's Collector models with roller variants all sit within the wider rear-roller landscape. The exact machine matters, naturally, but the useful buying principle is simpler: look for a roller that genuinely covers the path left by the cutting deck.
A rotary mower with an add-on striping system takes a different approach. It still cuts grass with a rotary blade, but a flap or roller at the back follows behind and bends the grass. This can be an excellent route if your current mower already cuts well, starts reliably and is otherwise suited to your garden. Replacing a good mower just to gain stripes is not always the most sensible use of garden money. There are enough things trying to separate us from our money already. Slugs, for one.
| Approach | Dedicated rear-roller mower | Rotary mower + striping kit | Standalone lawn roller |
|---|---|---|---|
| How it works | Cuts and rolls in the same pass. | An attachment follows the rotary deck and bends the grass after cutting. | Rolls the lawn separately from mowing. |
| Best fit | Regular striping on a lawn where presentation is a priority. | Gardeners who already own a capable rotary mower. | Those happy to make an additional pass for a pattern. |
| Pattern consistency | Very convenient because cutting and rolling stay aligned. | Depends on attachment fit and whether it covers the full cut width. | Can be effective, but requires careful alignment after mowing. |
| Routine | One mowing operation creates the finish. | One mowing operation once the attachment is properly fitted. | Mow first, then roll as a separate task. |
The rear-roller route has a practical appeal that is difficult to argue with. You mow, you turn, the stripe appears. It is orderly. There is less opportunity for you to cut in one direction and then roll slightly adrift in another, creating a pattern that looks as though it has had a mild disagreement with itself.
But dedicated rear rollers are not automatically superior in every garden. If your lawn is heavily undulating, very small, obstructed by trees or punctuated by beds with curving edges, a broad stripe can be harder to establish and maintain. A smaller mower and an attachment may be easier to manoeuvre around the bits that make your garden yours. Perfect stripes are not the only measure of a good mowing experience.
Rear-roller strengths
- The roller is integrated into every mowing pass.
- Cutting and bending happen in the same direction.
- A consistent routine is easier to repeat from week to week.
- Well suited to gardeners who enjoy a formal lawn finish.
Things to consider
- The machine must suit the shape and scale of your lawn.
- A roller cannot hide bumps, bare patches or poor turf health.
- Very intricate gardens can make straight passes awkward.
- Results still depend on mowing direction and preparation.
For cordless mower owners, EGO offers a branded striping kit for compatible mowers in its 56V cordless range. This is the kind of accessory worth considering if you already use that platform and want a more deliberate finish without changing mower family. The important question remains the same as with any attachment: does the roller sit correctly behind the deck and cover the path you are cutting?
The Roller Explained: Why Width and Pressure Matter So Much
A roller can seem almost insultingly simple. It is a cylinder. It turns. It presses grass down. Yet the difference between a roller that matches a mower properly and one that does not can be the difference between clean bands and a vaguely stripy lawn that looks as though it has been viewed through steamed-up glasses.
Width comes first. The roller needs to match or exceed the cutting width of the mower deck. If it is narrower, it cannot bend every blade that has just been cut. You are left with strips of unrolled grass at the sides of each pass, which soften the line between one band and the next. The effect may still be visible from a distance, but it will lack the satisfying sharpness that makes people pause at the gate.
Take the simple example of a 40cm roller used behind a 46cm deck. There are 6cm of cut grass beyond the roller's coverage. Spread evenly, that is 3cm on each side that is not fully laid in the same direction. The grass will eventually be disturbed by neighbouring passes, but the stripe edge begins compromised. That is why a full-width rear roller is so useful: it is designed to cover the mowing path rather than merely follow somewhere near it.
Pressure is the second big variable. A heavier roller generally creates a more pronounced bend, and that means a stripe that appears crisper and lasts longer before the grass naturally lifts again. For a standalone garden roller, an approximate minimum effective weight is around 20–25kg. Below that, you may still be moving blades, but the result is less likely to have the clear contrast that makes the work worthwhile.
Integrated mower rollers work differently. You do not judge them simply as a separate lump of metal with a stated weight because the machine's own weight transfers through the roller as it travels. The practical result is what matters: steady contact, even pressure and a roller that stays engaged across the mower's path.
A heavier roller is not a licence to flatten everything in sight. The aim is to bend grass blades consistently, not to treat your lawn like a freshly laid gravel drive. Use a roller as part of normal mowing, not as a cure for uneven ground.
There is also a small but important matter of surface conditions. Grass that is stressed, sparse or suffering through a dry spell will not necessarily give you a satisfying stripe, no matter how determinedly you march up and down it. Likewise, a lawn that is excessively wet can make mowing and turning messier than it needs to be. The best results come when the turf is actively growing and generally happy. Lawns are not demanding in the way roses can be, but they do enjoy a little basic consideration.
Keep an eye on the roller or attachment itself, too. It should turn freely and sit evenly. If one side is dragging, clogged or not contacting the lawn properly, it can leave an uneven band that becomes obvious once the sun catches it. Striping is gloriously simple, but it is also unforgiving of wonky lines.
Step-by-Step: The Groundsman's Mowing Pattern From First Pass to Final Edge
This is the section that makes the biggest difference. You can own a perfectly respectable rear-roller mower, or fit an excellent striping attachment, and still end up with a pattern that looks a bit uncertain if you rush the route. Groundsmen are not merely mowing parallel lines. They are building a layout from the outside in.
Step 1: Prepare the lawn for the job
Start with a lawn that is reasonably clear. Pick up sticks, toys, stones, lengths of hose and any other objects that have mysteriously migrated into the grass. A roller needs consistent contact. It cannot do that if it is hopping over a tennis ball every third metre.
Set your cutting height sensibly. For cool-season turf, 2.5 to 3.5 inches provides useful blade length for striping. If the lawn is much longer than that, resist the temptation to remove everything in a single dramatic session. A gradual approach keeps the lawn looking more composed and gives the roller a better surface to work with.
Step 2: Create a perimeter headland
Before mowing long stripes, mow around the outside of the lawn first. Make this perimeter area two passes wide. This is your headland: a turning zone that gives you room to change direction at the end of each stripe without chewing up the lawn edge or making awkward three-point turns like you are reversing a van outside a village pub.
The headland is one of the most useful tricks to borrow from professional groundskeeping. It frames the lawn, gives the pattern a clean boundary and means that every long pass can begin and finish with enough room to turn smoothly. Do not skip it because it seems like extra work. It makes the rest of the job much easier.
Two-pass perimeter
Mow around the lawn twice before beginning the main stripes. This creates a practical turning strip and a smart visual border.
One straight reference line
The first pass sets the direction for every pass that follows. Give it the attention you would normally reserve for hanging a picture frame.
Turn only on the headland
Finish a stripe, enter the perimeter zone, turn smoothly, then begin the next stripe in the opposite direction.
Step 3: Find the straightest possible first line
Your first stripe is the anchor for the whole lawn. If it bends, every following pass tends to inherit that bend. You might correct it later, but you will spend the rest of the mow quietly irritated by it. Better to take a minute at the beginning.
Use a garden line or string guide if you have one. If not, choose a dependable fixed reference: a fence, a straight path, a wall, or the edge of a border. Look ahead at the far end of the lawn rather than staring at the mower's front wheels. That is a simple driving habit with a surprisingly large payoff. Your hands naturally steer towards where your eyes are focused.
Step 4: Mow the first long stripe
Travel steadily from one end of the lawn to the other. Let the roller do the bending as you go. Do not veer towards a flower bed to avoid a twig at the last second unless you enjoy creating a stripe with the charisma of a banana. Stop, remove the obstacle, and carry on.
When you reach the headland at the far side, make a gentle turn. Come back alongside the first line, travelling in the opposite direction. The adjacent strip now bends the other way, producing the alternating light and dark effect. Keep each pass close enough to avoid an uncut seam, but do not overlap wildly. The aim is neat coverage, not a lawn that has been repeatedly rethought.
Step 5: Repeat, keeping the mower aligned
Continue across the lawn with parallel runs. The easiest visual guide is usually the line made by the previous pass. Keep the mower moving at a consistent pace, particularly if your lawn is broad enough for the pattern to be visible from a distance. Sudden stops or hurried corrections can leave marks that stand out when the light hits them.
If you reach an awkward curve, do not force a perfect rectangle into it. Let the formal long stripes occupy the largest clear section, then mow smaller, irregular areas in a way that looks intentional. A lawn with a clean central pattern and neatly managed edges is far better than a whole garden full of compromised lines.
Step 6: Finish the edges and admire it from the right place
Once the main area is complete, tidy any remaining perimeter sections. Then step back. Better still, look at the lawn from the patio, a garden chair or an upstairs window. Stripes are made for viewing at a slight distance. At ground level, you may see more individual blades than pattern. From further away, the geometry suddenly comes together.
Change the direction next time
Do not mow the same stripe direction forever. Alternate your main pattern between mowing sessions: lengthways one time, crossways the next, or diagonally when you fancy a change. It refreshes the look and avoids making one visual route the lawn's permanent habit.
Rear-Roller Mowers: What Matters Most for Stripe Quality
Comparing rear-roller mowers purely by badge can lead you down a rather unhelpful path. The useful question is not "which brand makes stripes?" All of the recognised rear-roller names are aiming at the same visual principle. The better question is "which kind of rear-roller mower suits the lawn I actually have, and will I use it consistently?"
Hayter's Harrier range is strongly associated with the traditional striped-lawn look and is a natural starting point for gardeners who see mowing as part maintenance, part presentation. For a more formal lawn where regular striping is the plan, that style of machine makes sense because the rear roller is central to the design rather than an afterthought.
Mountfield's RM range is another route into rear-roller mowing. Honda's HRD and HRX lines include rear-roller options, while STIGA offers Collector models with roller variants. These names are worth having on your shortlist because they give UK buyers several familiar places to begin comparing mower format, handling and suitability for their own patch.
Rather than pretending there is a universally correct choice, I would narrow it down by lawn behaviour. Does your garden have a wide, open rectangular area? A full rear-roller mower is likely to be especially satisfying. Does it have winding borders, narrow gateways and several obstacles? You may still want a roller mower, but manoeuvrability should sit alongside stripe quality on your list. A perfect roller is of limited comfort if using the mower feels like trying to park a sofa in a phone box.
| Rear-roller category | Examples to explore | Why it suits striping | Best garden character |
|---|---|---|---|
| Traditional rear-roller format | Hayter Harrier range | Built around the familiar cut-and-roll mowing routine. | Lawns where a formal, repeated stripe pattern is a priority. |
| Rear-roller alternative | Mountfield RM range | Offers another dedicated route to a rolled finish. | Gardeners seeking a rear-roller approach in a familiar UK brand family. |
| Rear-roller options within wider ranges | Honda HRD and HRX options | The rear roller is the feature to seek where stripe quality matters. | Those comparing mower formats as well as lawn presentation. |
| Collector mower variants with roller | STIGA Collector roller models | A roller variant brings the grass-bending element to the mowing pass. | Gardens where collection and finish are considered together. |
One detail deserves repeating because it is so central: check that the roller makes full-width contact behind the deck. That is the bit doing the visual work. A mower can have a rear roller in the broadest sense, but if its coverage does not correspond properly to the cutting path, the stripe will never be as crisp as it ought to be.
When comparing machines, think in terms of the finished pass. You want grass cut evenly, then bent evenly over that same width. That is the whole groundsman formula in one sentence.
It is also sensible to remember that a striped finish cannot compensate for a lawn with substantial bare areas, poor growth or wildly uneven levels. The roller will show the lawn's shape more clearly, for better and for worse. A good mowing pattern flatters healthy turf. It does not perform miracles, although gardeners have every right to keep hoping.
Striping Kits and Add-On Rollers: A Sensible Route If You Already Own a Rotary Mower
If your current rotary mower is dependable, cuts cleanly and suits the size of your lawn, adding a striping attachment can be the most logical move. You are not trying to turn it into a stadium machine. You are adding the one missing action: bending the grass behind the deck.
The simplest type is a flap-style striping attachment. This uses a flexible trailing strip that drags lightly over the grass after cutting. It can encourage a visible pattern, especially on responsive grass, and its simplicity is part of the appeal. There is very little to understand: it follows the mower and lays the blades as you travel.
Roller-style attachments use a small roller on a bracket behind the mower. These are generally the more purposeful option for gardeners who want clearer, longer-lasting stripes because the roller applies more deliberate pressure than a flexible flap. Fit and coverage remain crucial. A small attachment that does not suit the mower's path will not create the sharp, full-band effect you are after.
EGO's striping kit is relevant here because it is designed for compatible mowers in the brand's 56V cordless mower range. For an EGO owner, the appeal is obvious: you can remain within the mower system you already know whilst adding a dedicated rear attachment intended to improve lawn presentation. It is a neat example of why accessories deserve a second look before you decide a whole mower needs replacing.
Flap-style attachments
A simple trailing strip that drags over the grass. Best viewed as an accessible way to introduce the principle of laying blades after cutting.
Roller-style attachments
A small roller mounted behind the mower. More purposeful pressure can help create a clearer stripe where mower compatibility and width are right.
Compatible cordless systems
EGO offers a branded striping kit for compatible mowers in its 56V cordless range, giving existing owners a direct accessory route.
There are a few things I would check before committing to any add-on. First, make sure it is intended for your mower or genuinely compatible with its rear arrangement. Second, look at the cutting width and compare it with the attachment's effective rolling width. Third, consider the shape of your lawn. An attachment can make sense on a straightforward lawn, but it should not become another awkward object to wrestle around narrow curves and tight corners.
Standalone push or tow-behind rollers are a different proposition again. They can create stripes, but they separate rolling from mowing. That means you must first cut the lawn, then repeat the same route with the roller, keeping every pass aligned. There is nothing inherently wrong with that — some gardeners enjoy the ritual — but it adds time and doubles the opportunity for a line to wander.
Add-on route makes sense if…
- Your existing rotary mower already gives a clean cut.
- You want to experiment with stripes before changing mower type.
- Your lawn is a practical size and shape for repeated straight runs.
- You can match the attachment's working width to the mower deck.
Think twice if…
- The attachment will leave unrolled grass beyond its coverage.
- Your mower's rear design does not offer a secure fitting point.
- The lawn is highly irregular and hard to mow in straight runs.
- You expect an accessory alone to solve underlying lawn problems.
There is a particular satisfaction in improving the mower you already own. It is less dramatic than arriving home with a new machine, admittedly, but often more sensible. If your rotary mower performs every other job well, a striping kit can be the one upgrade that changes how the lawn looks without changing your entire mowing routine.
Small Details That Separate Crisp Stripes From Faint Ones
Once you understand the basic technique, the remaining improvements are mostly about consistency. None is especially glamorous. Together, though, they are what turn "yes, I can see some stripes" into "that looks properly smart".
Start with lawn health. Grass needs enough leaf to bend, enough vigour to recover, and enough even growth to make each pass read as a continuous band. Thin or patchy sections interrupt the optical effect because there are fewer blades reflecting light in the same direction. If your lawn is recovering from a hard season, give it time. The stripes will look better when the turf is ready rather than when you are merely impatient.
Then consider timing. Mow often enough that you are maintaining the surface rather than rescuing it from a jungle situation. A regular light trim gives the roller a clean, manageable canopy of grass to work on. Infrequent heavy mowing creates a much rougher finish and makes it harder for the lawn to look composed.
Finally, vary your pattern over the season. Straight stripes are the easiest place to start, but once you are comfortable, you can mow lengthways one session and crossways at the next. Diagonal lines can make a modest lawn feel wider. Chequerboard effects are made by mowing a striped lawn again at right angles, though they require patience and a willingness to explain to family members why nobody should walk across it "just for a second".
The proud patio viewer
Choose straightforward parallel stripes and orient them so they look their best from the house or main seating area.
The practical upgrader
If a rotary mower already works well, investigate a correctly fitting striping kit before replacing it.
The lawn perfectionist
A dedicated rear-roller mower offers the most direct routine for regular, formal striping.
Common Questions About Stripy Lawns
No. The visible contrast comes from grass blades bent in opposite directions. Blades leaning towards you reflect light differently from blades leaning away, making alternating bands appear light and dark.
Yes, if it has a suitable striping attachment or roller behind the deck. The attachment needs to bend the grass after cutting, ideally across the full width of the mower's cutting path.
The common causes are grass cut too short, a roller that is too light or too narrow, inconsistent passes, and turf that is sparse or stressed. Cool-season turf mown at 2.5 to 3.5 inches has enough blade length to create a stronger visual effect.
It does. Every stripe follows the visual direction established by the first pass. Use a garden line, fence, path or border as a reference and focus on a fixed point at the far end of the lawn.
Striping works by bending blades within their natural flexibility, rather than permanently flattening the lawn. The goal is controlled contact that lays the grass over, not excessive compaction or aggressive rolling.
GardenScout Verdict
A stripy lawn is one of the most achievable "professional garden" effects because the transformation comes from technique rather than theatrical intervention. Get the grass healthy, keep enough blade length for it to flex, use a roller that covers the mower's full cutting path, and take care over that first straight pass.
If you want the simplest repeatable routine, a dedicated rear-roller mower is the natural choice. If you already own a capable rotary mower, a compatible striping kit can be a thoroughly sensible alternative. Either way, mow a two-pass perimeter headland, alternate direction on each run, and give the lawn a moment in the sun afterwards. It has earned it.