
How to Get Rid of Bindweed and Ground Elder for Good
A realistic, patient plan for tackling the two perennial weeds that have reduced perfectly cheerful gardeners to muttering at borders.

Use it to loosen soil and lift out bindweed and ground elder roots with less risk of chopping them into smaller pieces. It is particularly useful when clearing an overgrown patch or working through heavier ground.
Check price on Amazon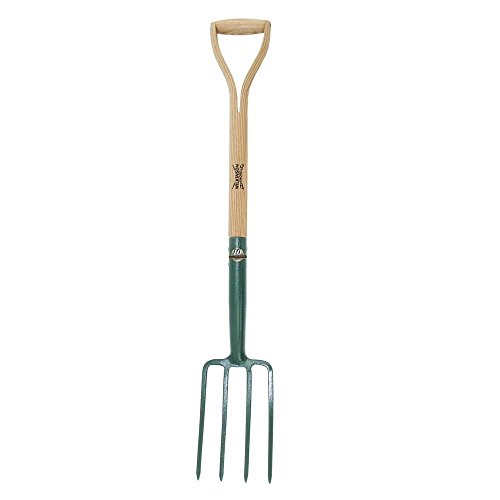
Its smaller head is easier to work between established plants when tracing and removing weed roots from a mature border. It gives you more control than a full-sized fork in tight spaces.
Check price on AmazonWe link to the exact model on Amazon UK. Prices change often, so check the live price before you buy. As an Amazon Associate we earn from qualifying purchases.
Kit that makes this easier
A few tools that help with the jobs above. We link to the exact model on Amazon UK.
Wilkinson Sword Stainless Steel Digging Fork
Use it to loosen soil and lift out bindweed and ground elder roots with less risk of chopping them into smaller pieces. It is particularly useful when clearing an overgrown patch or working through heavier ground.

Check today's price: Wilkinson Sword Stainless Steel Digging Fork on Amazon UK
Wilkinson Sword Stainless Steel Border Fork
Its smaller head is easier to work between established plants when tracing and removing weed roots from a mature border. It gives you more control than a full-sized fork in tight spaces.

Check today's price: Wilkinson Sword Stainless Steel Border Fork on Amazon UK
The Two Weeds That Break Gardeners' Hearts (And How to Finally Win)
There are weeds you notice, pull out and forget by tea time. Then there are bindweed and ground elder. These are the ones that make an otherwise sensible person stand in the garden holding a handful of leaves, wondering whether moving house might be simpler.
They regularly appear near the top of gardeners' least-favourite weeds in RHS discussions, gardening forums and conversations over the allotment gate. Not because they are ugly, exactly. Bindweed's flowers can be rather lovely if you meet them on a country walk. Ground elder has handsome foliage and a froth of white flowers. The trouble is that neither has the good manners to stay where it is put.
Both are perennial weeds. Both spread through underground root systems. And both can make casual surface weeding feel rather like trimming the fringe on a rug that is quietly trying to take over the room. Snap off the visible growth, and the root system simply sends up another shoot. Sometimes several. Gardening teaches patience in many ways; these two offer an advanced course.
Bindweed is the climber. You may know it as bellbind or, rather less affectionately, devil's guts. The common hedge bindweed is Calystegia sepium, whilst field bindweed is Convolvulus arvensis. Both scramble through shrubs, roses, hedges, beans and anything else with a stem. Left alone, bindweed winds itself around plants until the whole border looks as though someone has thrown fishing line across it.
Ground elder, Aegopodium podagraria, is the spreading carpet. It is also called bishop's weed and goutweed. It advances through beds by creeping underground stems, popping up between perennials and around established roots where it is hardest to dig. There is a variegated form grown as an ornamental plant, which is a decision some gardeners later reflect on with the expression of somebody who has invited a goat into the kitchen.
The important distinction
Getting rid of the leaves is not the objective. Exhausting or removing the underground root system is. Every useful method in this guide does one of those two things: it either lifts roots out, carries treatment down into them, or deprives them of light until they run out of stored energy.
The encouraging bit is that you do not need a single dramatic blitz to make progress. In fact, the dramatic approach is often what causes trouble. A calm, repeated plan works better. Start by identifying what you have, choose a method suited to the place it is growing, then keep at it before the weed gets enough leaf to recharge itself. That is the whole game.
Know Your Enemy: Identifying Bindweed and Ground Elder Before You Act
Before reaching for a fork, a bag or anything in a bottle, make sure the culprit is really the culprit. This matters particularly in a mixed border, where a young perennial can look surprisingly suspicious in spring and an enthusiastic self-seeder may be entirely welcome. Pulling up a plant you meant to keep is annoying. Carefully treating it as a weed is a more elaborate version of the same mistake.
How to recognise bindweed
Bindweed announces itself first through its leaves and its behaviour. The leaves are arrow-shaped, technically described as hastate, with pointed tips and small backward-facing lobes at the base. The stems are slender and twining. They wind clockwise around canes, stems, wire supports and neighbouring plants, which is why a small patch can quickly become a tangled nuisance.
During a single season, bindweed stems can grow up to 2 metres. That pace explains why it can seem to appear from nowhere. You went away for a long weekend, the delphiniums looked fine, and now there is a green spiral staircase climbing through them.
Flowers appear from June to September. They are trumpet-shaped, white or pale pink, and can be up to 3 centimetres across. Lovely flowers are not a defence, I am afraid. Japanese knotweed has handsome leaves too. Plants are under no obligation to deserve the trouble they cause.
There are two common bindweeds worth distinguishing. Hedge bindweed, Calystegia sepium, tends to have larger white flowers, around 3–4 centimetres across. It is the big, vigorous one often found climbing hedges, fences and substantial garden plants. Field bindweed, Convolvulus arvensis, has smaller flowers, around 1–2 centimetres across, often white with pink stripes. Field bindweed is generally considered the harder of the two to eradicate, partly because it is so persistent from its underground roots.
How to recognise ground elder
Ground elder does not climb. Instead, it forms a leafy colony that expands outwards through beds, under fences and into the softest, most carefully mulched patch of soil it can find. The leaves are compound and made up of three lobed leaflets. Look for a triangular, hollow stem, particularly as the plant matures.
Its white flowers arrive from May to July in flat-topped umbels, a little like elderflower at a glance. This family resemblance is one reason it sometimes slips past gardeners early on. The foliage is a better clue, but there is another useful test: crush a leaf gently between your fingers and smell it. Ground elder has a strong, unpleasant scent when crushed. It is not subtle. If you have identified it correctly, your nose will generally agree.
Do not identify by flowers alone. Ground elder's umbels resemble those of several other members of the carrot family, whilst bindweed flowers are easy to recognise only once the plant has already climbed somewhere inconvenient. Leaves, stems and growth habit give the safer picture.
Check the area around the weed too. Is it emerging as isolated shoots from a single place, or scattered in a broad patch? Are neighbouring plants entangled? Does the ground elder reappear at the edge of a path, under a fence or from the middle of an established clump of geraniums? This little bit of detective work will tell you whether you are facing a manageable outbreak or a root system that needs a longer campaign.
The Dig-It-Out Method: When Patience and a Fork Are Your Best Tools
Digging is not glamorous. It does not provide the instant satisfaction of spraying something and walking away. It does, however, give you direct control and is often the best option where you are growing food, gardening organically, or working around plants that you cannot risk damaging.
For ground elder in a vegetable bed, I would usually start here. The same applies to bindweed threading through a patch of young vegetables, around shallow-rooted plants, or through soil you are preparing for planting. You are removing physical pieces of the problem rather than hoping a treatment will reach the right leaves without touching the wrong ones.
The crucial rule with bindweed is simple: do not rotovate infested ground. The RHS warns against it, and with good reason. Rotovating chops roots into many small pieces, each with the potential to regenerate. Instead of one weed problem, you have effectively used a machine to distribute starter kits around the bed. It is impressively efficient, in the worst possible way.
Use a fork, not brute force
A flat-tined border fork is kinder than a spade for this job. A spade's sharp edge slices through roots as you dig, leaving pieces behind. A fork lets you lift and tease soil apart with more control. You will still break roots sometimes. That is unavoidable. The aim is to minimise it, not to achieve archaeological perfection on the first afternoon.
Flat-tined border fork
Use it to loosen a section of soil and lift roots with less slicing than a spade. Work steadily around the edges of an infestation rather than charging into the middle.
Soil sieve for suitable ground
In sandy or loamy soil, a sieve can help recover fragments that would otherwise disappear back into the bed. It is slower, but very effective on a small vegetable plot.
Bucket or bag for every root
Collect what you remove as you go. Do not leave pieces on the soil surface, where a damp spell can turn a tidy session into an accidental replanting exercise.
A repeat date in the diary
One dig is the opening move, not the finale. Returning regularly while the weeds are actively growing stops surviving roots from rebuilding their reserves.
Choose a time when the soil is moist but not saturated. Bone-dry ground makes roots snap. Waterlogged soil turns every forkful into a cloddy wrestling match and compacts easily underfoot. Early autumn is often useful for digging because the soil may still be warm and workable, yet the frantic peak of summer growth has passed. Right now, in September, it is a sensible time to clear what you can and make a plan for the spring flush.
Start at the outside edge of the patch. Push the fork in, lever gently, and ease apart the loosened soil with your gloved hands. Follow visible root sections rather than tugging hard. Bindweed roots can be pale, stringy and deceptively long. Ground elder has creeping rhizomes that branch and travel through soil. If you find one disappearing under the crown of a cherished perennial, do not yank. Expose as much as you reasonably can, cut only if you have to, then mark that spot for repeated follow-up.
Make the first dig count
Do not try to clear an entire overrun border in one heroic Saturday if it means rushing. Work in manageable sections, remove every fragment you can see, and return to the same ground as soon as new shoots show. A careful square metre is more useful than a hurried ten.
Never add bindweed roots or ground elder rhizomes to a home compost heap. They can survive and regrow. Put removed material in a bag for disposal instead. It may feel slightly wasteful when you are used to composting every scrap, but this is one of those moments where optimism has consequences.
Digging also makes you a better observer. You soon learn where roots are coming from, whether they are crossing under a boundary, and which plants are offering cover. That knowledge matters. If ground elder is arriving through a neighbour's side of a fence, you may not be able to eliminate every incoming root, but you can create a routine that keeps it from settling in.
The Cane-and-Bag Trick: Targeted Herbicide Without Harming Your Plants
There are places where digging is either impractical or likely to cause more damage than the weed itself. An established ornamental border is the obvious example. If bindweed has threaded itself through roses, climbers, shrubs and herbaceous perennials, excavating every root can mean dismantling the border along with it. Nobody wants to rescue the garden by accidentally evicting half its residents.
This is where the cane-and-bag method earns its reputation as the clever gardener's approach. It is widely recommended by Gardeners' World, the RHS and experienced UK gardeners because it allows a systemic glyphosate-based weedkiller to reach bindweed foliage while containing the treatment away from desirable plants.
The principle is straightforward. Instead of spraying bindweed where it is tangled through your plants, you give it something safe to climb. Once it has obligingly wound itself up a cane, you isolate those leaves in a bag and treat them there. The bindweed remains attached to its root system, which is the important part: systemic treatment needs to move from living foliage down into the roots.
How to do it, step by step
- Find the bindweed stems emerging from the soil. Untangle them slowly from surrounding plants. If a stem snaps, leave the root in place and wait for fresh growth rather than trying to tug the whole thing out through a shrub.
- Insert a bamboo cane nearby. Use one cane or a small group, depending on how many stems you have. Position them so bindweed can reach them without having to cross your prized plants first.
- Allow the weed to climb. Bindweed will usually twine naturally. Leave it for around 1–2 weeks until you have a decent amount of leafy growth on the cane.
- Wait for 30–60 centimetres of stem if possible. More healthy leaf area gives the treatment more surface to be absorbed through. Do not detach it from the roots.
- Ease the coiled stems off the cane. Do this carefully and keep the growth intact. Slide the stems into a clear or black plastic bag while they remain connected to the soil.
- Apply the glyphosate-based weedkiller inside the bag. Spray or paint it directly onto the bindweed leaves only, following the product label exactly.
- Seal the bag loosely and leave it in place for 24–48 hours. This keeps the treatment contained and gives it time to be absorbed. Remove the bag afterwards and dispose of it responsibly.
Use herbicides with care. Glyphosate-based products are non-selective: they can damage any green plant tissue they touch. Always follow the label, avoid windy conditions, keep treatment away from ponds and drains, and do not use more than the directions require. The cane-and-bag method is about precision, not quantity.
The bag matters because spray drift is the great spoiler of border weed control. Even a careful hand sprayer can send fine droplets onto the foliage you were trying to protect. Inside a bag, you can see what you are doing, work slowly and keep the treatment exactly where it needs to be.
Clear plastic makes checking the leaves easier. Black plastic provides shade as well as containment. Either can work provided the foliage is enclosed and you do not crush or sever the stems. I favour a bag large enough that the leaves sit naturally rather than being folded into a sweaty green knot. The goal is absorption, not an unpleasant sauna experience for the weed. Though, to be fair, bindweed has not shown much concern for our comfort over the years.
Do not rush to pull treated bindweed away immediately. A systemic treatment needs time to move through the plant. Leave the treated growth in place after removing the bag, then watch for decline. If fresh shoots appear later, repeat the process with new healthy growth. This is normal. Deep or extensive roots may need more than one carefully timed treatment.
Why healthy leaves matter
Systemic weedkiller works through actively growing foliage. Treating a tiny, damaged or drought-stressed scrap of bindweed is unlikely to give the root system much of a message. Let the weed make enough leaf, then use that growth against it.
This method is mainly for bindweed. Ground elder does not climb, so a cane gives you nothing useful. Ground elder in a mixed border can sometimes be treated by carefully isolating and applying weedkiller to its own foliage, but the margin for error around perennials is smaller. Where possible, lifting roots or smothering a cleared area is the less fiddly route for ground elder.
Smother and Starve: Using Exclusion to Exhaust Underground Root Systems
Smothering is the quiet approach. It does not involve relentless digging or a bag full of carefully corralled bindweed. Instead, it uses a very basic fact of plant life: no light means no photosynthesis, and no photosynthesis means a perennial eventually has to live off its stored reserves.
That makes it an excellent choice for new ground, neglected corners, allotment patches, areas awaiting a redesign, or beds you are happy to take temporarily out of action. It is also a good answer when an infestation is so broad that digging every root fragment would become a hobby with no obvious finishing date.
Bindweed and ground elder are persistent because their underground roots store energy. Cut off the leaves once and that store fuels regrowth. Cover the leaves for long enough and the root system keeps trying to produce shoots but cannot replenish what it spends. Eventually, repeated failed attempts weaken it.
Patience is part of the method. Established perennial weeds can take 1–3 seasons to exhaust under light exclusion, depending on how entrenched they are and how completely the covering blocks light. That is not a failure of the method. It is simply the weed being exactly as irritatingly well-equipped as advertised.
Materials that can do the job
Cardboard
Plain cardboard makes a useful biodegradable base layer. Remove tape, labels and staples, overlap the sheets generously, and wet them as you lay them so they mould to the ground.
Old carpet of natural fibre
Wool or other natural-fibre carpet can exclude light on a rough patch of ground. Avoid foam-backed synthetic carpet, which is difficult to manage and not something you want breaking down into the soil.
Black polythene sheeting
An opaque sheet blocks light effectively where you are preparing ground and do not need it to look decorative. Secure it well so wind cannot turn the project into a neighbourhood event.
Weed-suppressing membrane
A purpose-made membrane is useful beneath a new path or as part of a longer landscaping project, provided the edges and overlaps are properly covered and checked.
Start by cutting or pulling down the top growth. You do not need to dig the whole infestation first; indeed, disturbing every root may defeat the point. Flatten what is left, lay your chosen light-excluding material over the area, then secure every edge. Overlap cardboard sheets and sheeting generously so no bright slivers of daylight reach the weed. A tiny gap can become a very determined green flag.
Cardboard works particularly well as part of a bed renovation. Once it is down, cover it with suitable organic matter and leave the area undisturbed. It will gradually break down, which is useful, but do keep an eye on it. If bindweed finds a seam or emerges at the edge, pull it promptly or extend the cover. The approach is not "lay it down and never look again". It is "lay it down and deny the weed a chance to regroup".
For ground elder, smothering is most effective when you can genuinely deprive it of light across the whole patch. For bindweed, it can work well in open ground but is less convenient in a border full of plants, because bindweed may simply emerge beyond the cover or climb up a neighbouring shrub. In those situations, canes and targeted treatment are usually more precise.
Avoid planting straight through a membrane-covered infestation too soon. Every hole you cut is a potential escape hatch. If you need the area productive quickly, dig-and-sieve may be more appropriate. Smothering rewards people who can give it time. It is the gardening equivalent of winning an argument by calmly refusing to be drawn into one.
Method vs Method: Which Approach Actually Works Best for Your Situation?
There is no single best method for every garden. The right choice depends on four things: what you are growing, how severe the infestation is, whether you want a chemical-free approach, and how much time you can realistically give the job. The last one matters more than people admit. A theoretically perfect plan you will not maintain is less useful than a modest plan you can repeat.
Digging gives immediate physical removal and is the natural fit for vegetable beds. Cane-and-bag treatment is a precision tool for bindweed in established ornamental planting. Smothering is the slower, lower-effort route for areas that can be rested. All three work best when followed by observation and prompt action on regrowth.
| Consideration | Digging and sieving | Cane-and-bag treatment | Smothering |
|---|---|---|---|
| Best setting | Vegetable beds, bare soil and small infestations | Established ornamental borders with bindweed climbing through plants | New ground, neglected plots and areas awaiting redevelopment |
| Visible result | Immediate removal of lifted roots and shoots | Gradual decline after treatment has been absorbed | Slow, as roots are weakened over time without light |
| Effort pattern | Physical, repeated sessions | Careful setup and follow-up on new growth | Lower day-to-day effort, but requires patience and checks |
| Chemical-free option | Yes | No | Yes |
| For bindweed | Useful, especially in open soil | Especially useful in planted borders | Useful on clear, coverable ground |
| For ground elder | Usually the most direct method | Not the natural fit | Useful where the whole patch can be covered |
| Main limitation | Roots can break and regrow | Needs careful handling near desirable plants | Can take 1–3 seasons |
Scenario: a vegetable plot with ground elder
Manual digging wins here. A fork-and-sieve routine allows you to remove rhizomes without applying a non-selective treatment near food crops. Work the bed carefully, collect every root piece you can find, then revisit it every 2–3 weeks from April through October while growth is active. You will not get every fragment first time, but repeated removal prevents the surviving pieces from gaining strength.
Scenario: bindweed through a mature border
Use canes. Trying to dig through the root zones of established shrubs and perennials can cause far more damage than it solves. Guide the bindweed onto canes, wait for enough leaf, then use the bag method to keep treatment off surrounding plants. Meanwhile, gently pull any young shoots you can reach without disturbing the border.
Scenario: an overgrown patch earmarked for next year
Smothering is often the sensible answer. Cut down the visible growth, cover thoroughly, secure the edges and give the patch time. Inspect it occasionally and deal with shoots trying to escape around the perimeter. It is not instant, but it turns a daunting clearing job into a manageable long-term project.
What works in your favour
- Both weeds reveal themselves clearly once you know the leaves and growth habits.
- Repeated removal weakens root reserves even if you cannot lift every piece.
- Targeted methods let you protect vegetables and valued ornamental plants.
- Autumn is a useful moment to clear, cover and plan before spring growth returns.
What makes them difficult
- Surface weeding alone usually leaves the real problem underground.
- Rotovating bindweed-infested soil can spread root fragments.
- One treatment or one digging session rarely finishes an established infestation.
- Weeds crossing from neighbouring land may need ongoing boundary control.
The Seasonal Battle Plan: A Month-by-Month Calendar for Maximum Impact
Timing is the overlooked part of perennial weed control. Do the right thing at the wrong moment and you make life harder for yourself. The plant may not have enough leaf to absorb a systemic treatment, the soil may be too dry to release roots cleanly, or you may be about to let it flower and spread seed just as you lose interest. It happens to the best of us.
As it is now September, begin with an honest assessment. Pull or lift any accessible growth, use canes for bindweed still actively growing in borders, and cover bare infested ground before autumn weather makes the job more miserable. Then use the calendar below to stay one step ahead next year.
March to April: early growth and easier digging
Ground elder commonly emerges 2–3 weeks before bindweed in many UK regions. This is your early warning system. As shoots first appear, the soil is often moist enough for roots to come away more cleanly. Begin manual removal now, particularly in vegetable beds and newly cleared ground.
For both weeds, early season is a good time to dig but not the ideal point for herbicide treatment. Plants have relatively little leaf area, so there is less surface available for uptake. Let bindweed make enough growth if you plan to use the cane-and-bag method later.
May to June: active growth
Both weeds are in full growth. Bindweed begins looking for something to climb, so set up canes now. Ground elder may flower from May to July. Removing flower heads prevents seed spread, although it does little to affect the established root system. Think of it as tidying the loose ends, not defeating the main operation.
Continue digging sessions every 2–3 weeks. This rhythm is important: each fresh shoot is the plant trying to rebuild its underground reserves. Remove it promptly, and you make that attempt expensive for the weed.
July to August: do not let summer momentum slip
Summer can be the point when bindweed looks most triumphant. It is climbing, flowering and generally behaving as though it pays the mortgage. Keep guiding stems onto canes and treat only when the foliage is healthy and conditions are suitable. In dry periods, digging can become frustrating because roots snap more readily, so focus on pulling new growth, maintaining covers and waiting for better soil conditions.
A seasonal rule worth remembering
Never reward a perennial weed with a long uninterrupted spell of leafy growth. Whether you dig, treat or smother, the objective is to stop it rebuilding energy below ground. Consistency matters more than one spectacular weekend of effort.
September to October: useful work for right now
Early autumn is excellent for a reset. Bindweed may still be growing strongly enough for a targeted cane-and-bag treatment, while soil conditions can become friendlier for fork work after rain. Lift what you can from vegetable beds, remove top growth before covering larger patches, and lay cardboard or other exclusion material while you still have the enthusiasm to make neat overlaps.
This is also a good time to make notes. Mark where bindweed emerged from a hedge, where ground elder entered beneath a fence, and which sections of border were impossible to dig without disrupting plants. Your future self will appreciate the map enormously in spring, when every green shoot seems to look vaguely familiar but none of them comes with a label.
November to February: plan, cover and resist unnecessary disturbance
Growth slows, but this is not a time to assume the weeds have surrendered. Check that covers remain secure after wind and rain. Avoid rotovating or indiscriminately turning over known bindweed patches. Use the quieter months to decide which beds need lifting and replanting, which can stay under cover, and where you will position canes once bindweed returns.
Weather changes the job. Dig when soil is workable, not frozen, waterlogged or baked hard. Apply any herbicide only in appropriate conditions and according to its label. Gardening calendars are guides; your own soil and weather get the final vote.
Stopping the Comeback: Follow-Up, Boundaries and Better Habits
The phrase "for good" needs one small dose of honesty. If bindweed or ground elder is established beyond your boundary, or if it has spent years colonising a large garden, permanent eradication may not happen in one season. But you can absolutely get to a point where it is a minor maintenance job rather than the headline act in your gardening life.
The secret is follow-up. After digging, inspect the soil for new shoots and remove them quickly. After targeted treatment, wait for fresh growth rather than assuming every root has died. After smothering, check edges and joins. A plant that makes it through a gap in the covering has not beaten the system; it has simply found a gap. Fix the gap.
Keep borders reasonably open where possible. This does not mean stripping them of character. It means avoiding a situation where every inch of soil is hidden beneath dense growth and bindweed can spend months climbing unseen. A little access around prized plants makes early intervention vastly easier.
Mulch has a role too, though it is not a cure by itself. A good mulch can make young shoots easier to spot and pull, and it helps keep soil conditions more workable. It cannot stop an established bindweed root from sending up a determined shoot, nor will it defeat ground elder simply by being thick and hopeful. Think of mulch as an ally, not a bodyguard.
Finally, deal with the edges. If weeds are advancing from a hedge, fence line or neighbour's side, focus your routine there. You may need to pull emerging shoots regularly along your side of the boundary. It is not glamorous, but boundaries are where infestations often restart.
Common Questions About Bindweed and Ground Elder
It can weaken bindweed substantially if you are consistent. The key is to pull or cut every new shoot before it has time to build a large leaf area and recharge the roots. It is slower than digging or targeted systemic treatment, but it is a useful chemical-free strategy in areas where roots cannot be disturbed.
Do not put the roots or rhizomes on a home compost heap. They can survive and regrow. Collect removed material in a bag for disposal instead. Ordinary leaves without roots are less risky, but when dealing with these weeds it is usually wisest to keep the whole lot out of the compost system.
They are difficult in different ways. Bindweed is the more obvious nuisance in borders because it twines through other plants. Ground elder can be more troublesome in densely planted beds because its creeping roots travel between crowns and reappear in places where digging is awkward. Neither responds well to being ignored.
Yes, if you can do so easily. Removing flower heads prevents seed spread, but it will not remove the established underground root system. Continue with digging, repeated pulling or smothering for meaningful control.
You can, but choose the moment carefully. Freshly planted areas may make later follow-up digging more difficult. If possible, clear and monitor the bed first, or use a temporary crop or planting arrangement that leaves you access to remove returning shoots.
The Bottom Line: Consistency Beats Drama
Bindweed and ground elder are not defeated by one angry afternoon. They are defeated by denying them opportunities. Lift roots where you can. Never rotovate bindweed-infested soil. Use canes to draw bindweed away from valued plants before treating it with care. Cover open ground thoroughly when time is on your side. Then return when the next shoot appears.
If you are beginning this job in September, do not feel you have missed your chance. You have a useful autumn window to dig in workable soil, deal with active bindweed in borders, and smother areas you want to reclaim next year. Come spring, you will be starting from a far stronger position.
GardenScout's practical verdict
For ground elder in beds you can access, use a fork, sieve suitable soil and repeat the job patiently. For bindweed climbing through an established border, the cane-and-bag method offers the most controlled targeted treatment. For a large, empty or neglected patch, smothering is the low-drama long game. None is magic. All can work brilliantly when you keep the pressure on.
- Wilkinson Sword Stainless Steel Digging ForkBest for thorough diggingView on Amazon
- Wilkinson Sword Stainless Steel Border ForkBest for crowded bordersView on Amazon